Shoemaking 3.0 – Lasting

Lasting
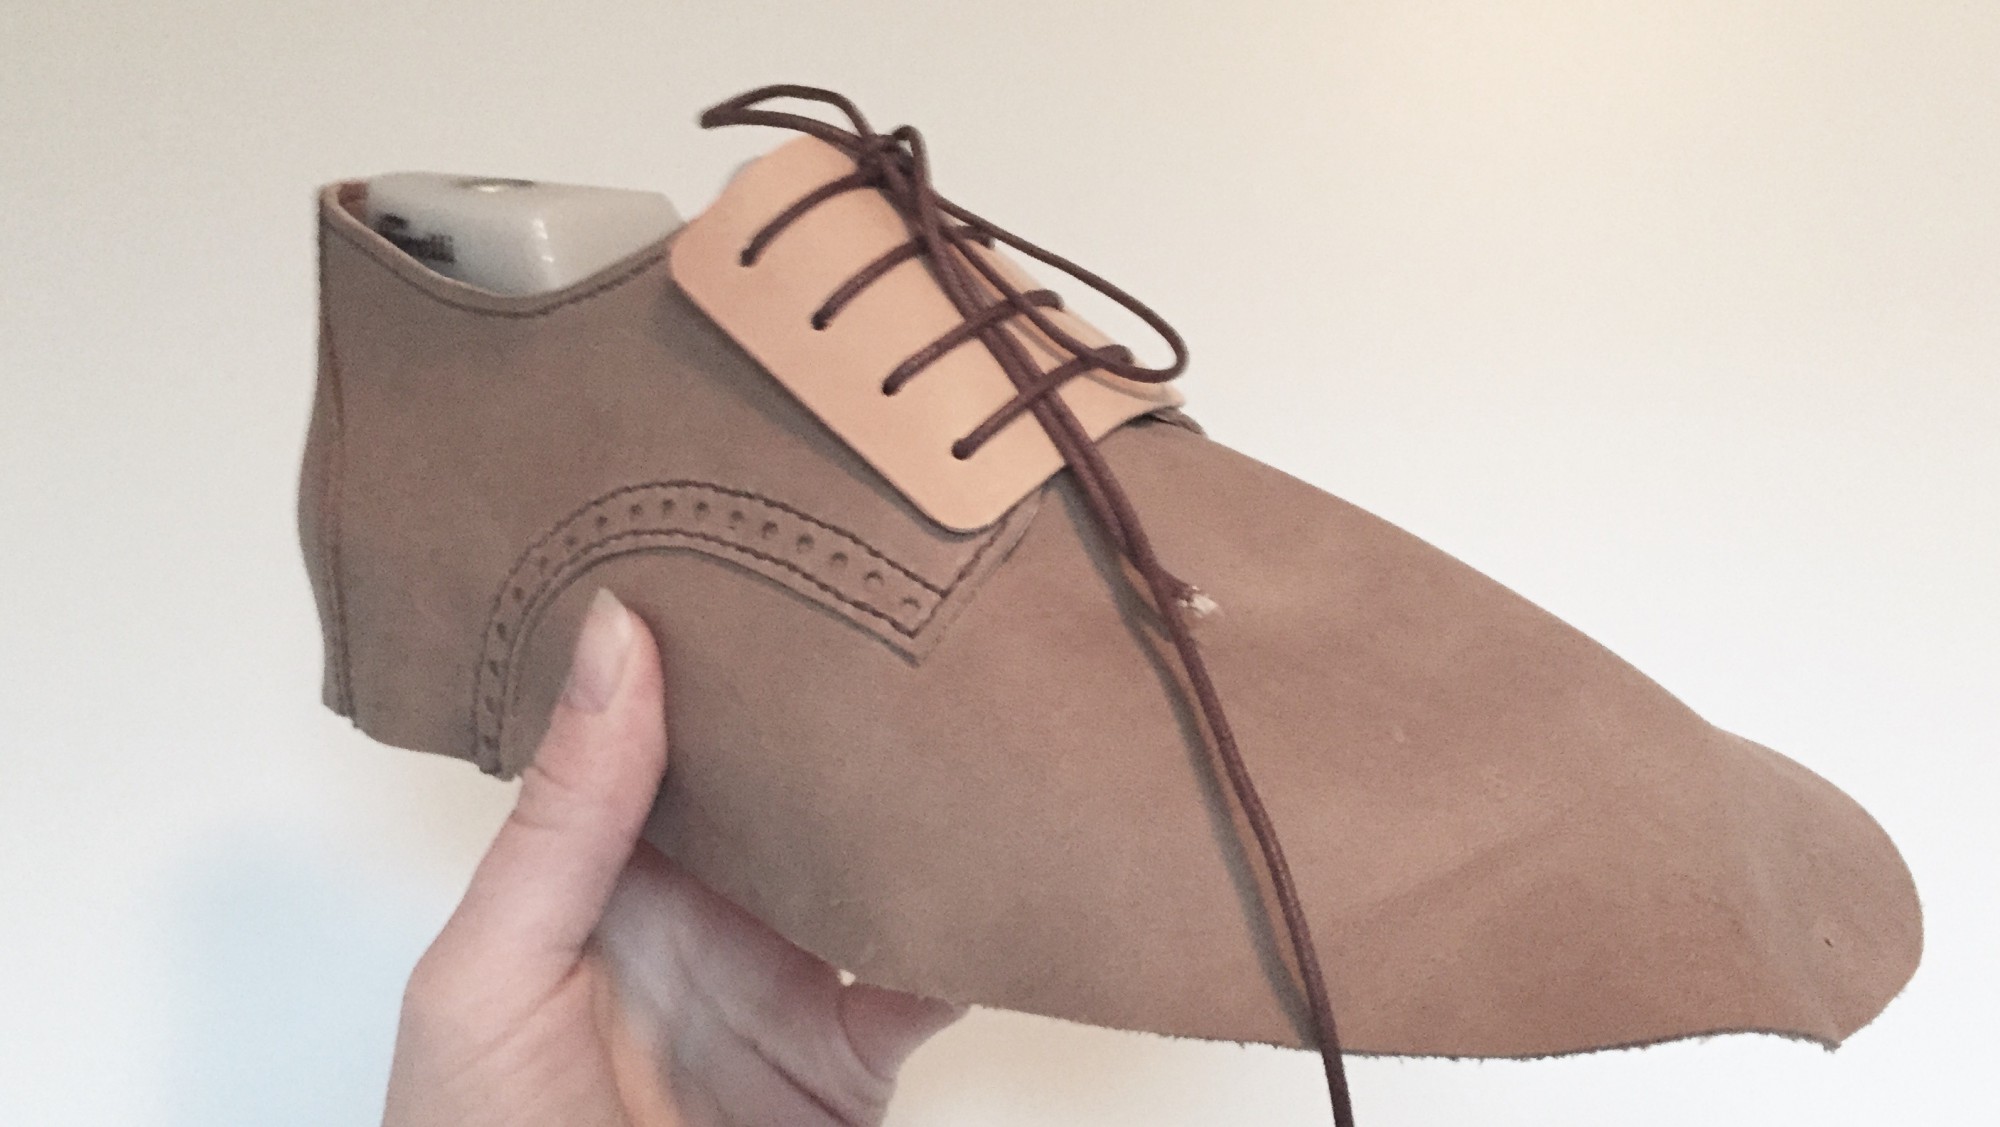
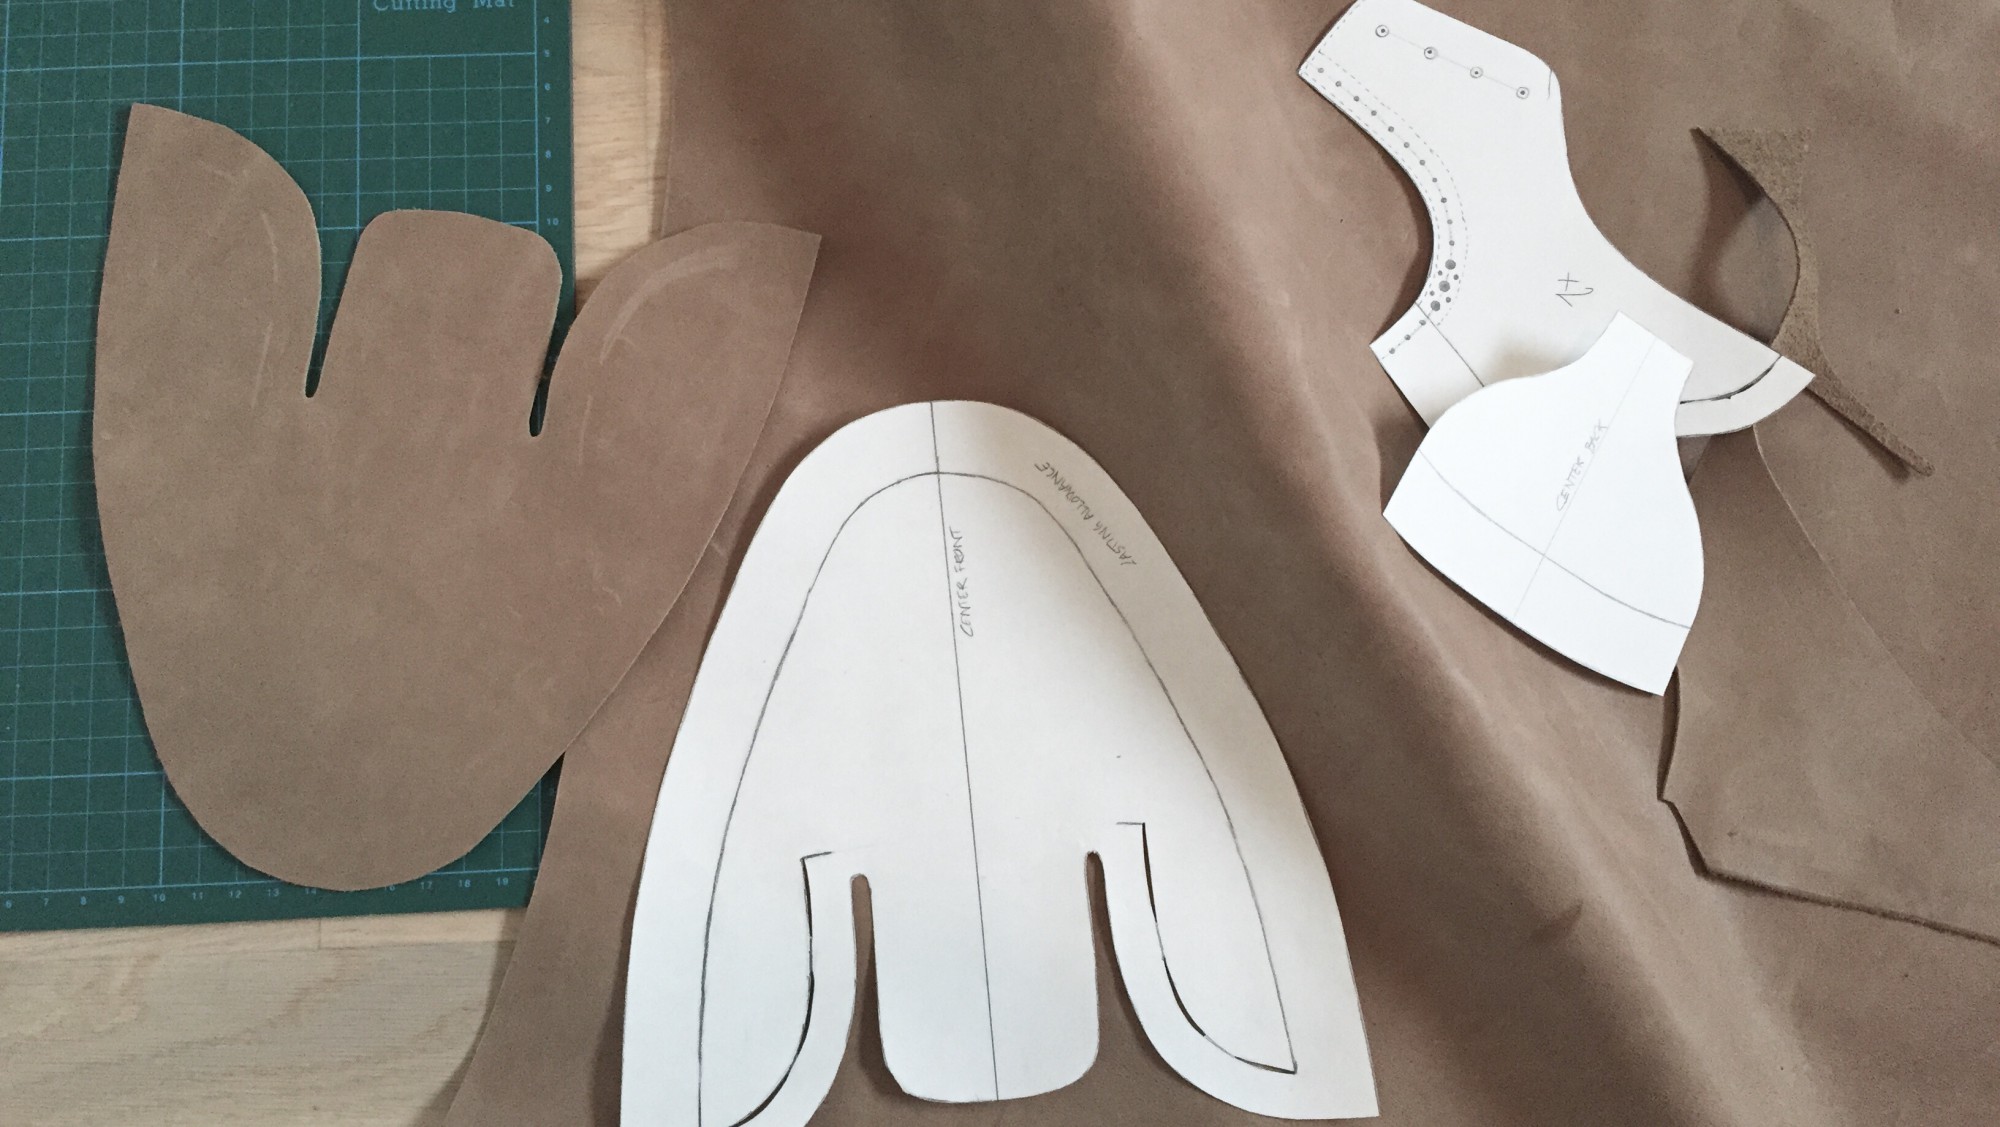
Endelig er jeg nået til den del af projektet jeg har set mest frem til, men samtidig også har været mest spændt på om jeg kunne mestre – læstningen. Det er en møjsommelig proces, som kræver stor tålmodighed. Læderet fugtes med en svamp, hvilket gør det mere elastisk. Yderlæder og foer spændes stramt over læsten med en tang og sømmes fast, begyndende ved tåen. Med skomagerhammeren komprimeres læderets fibre, så det ligger helt glat langs kanten.


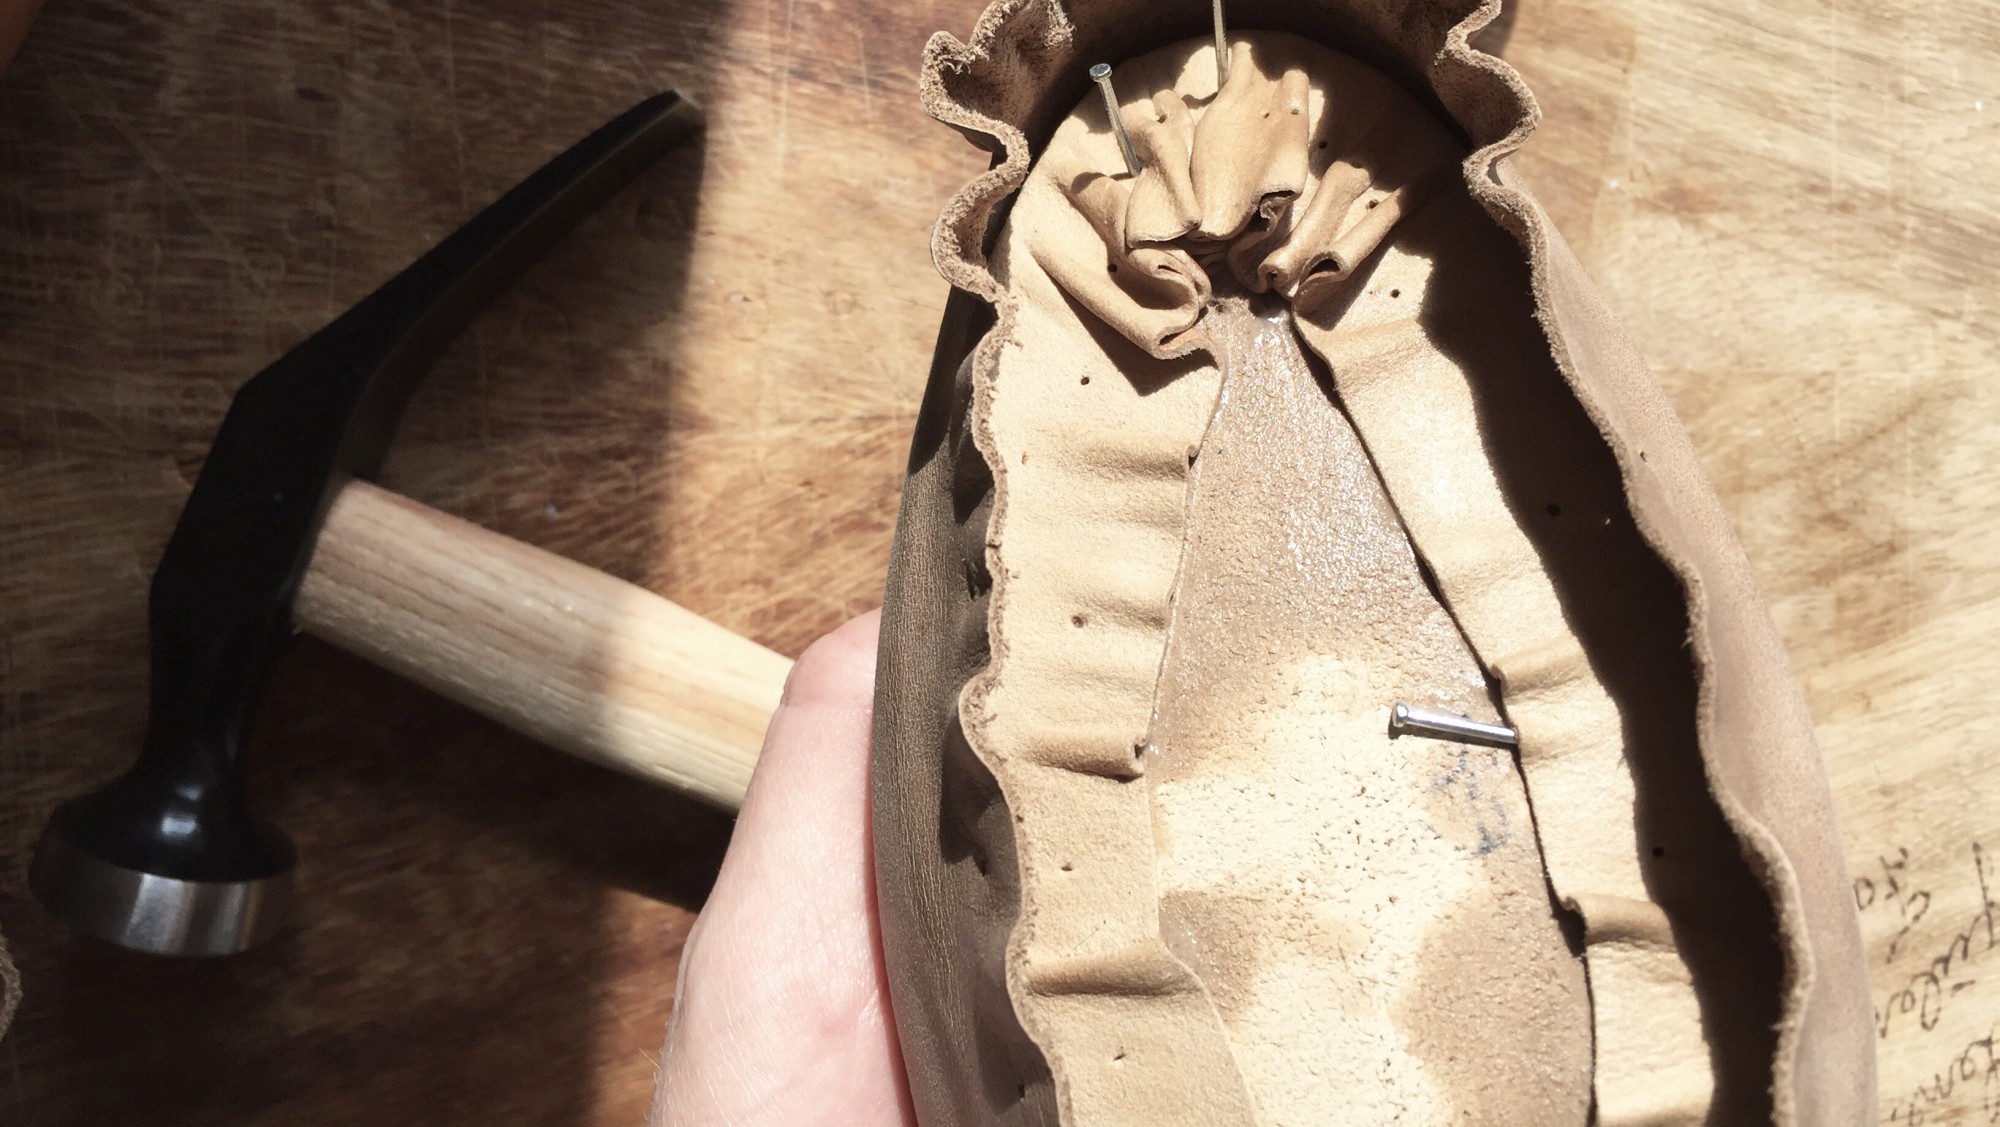
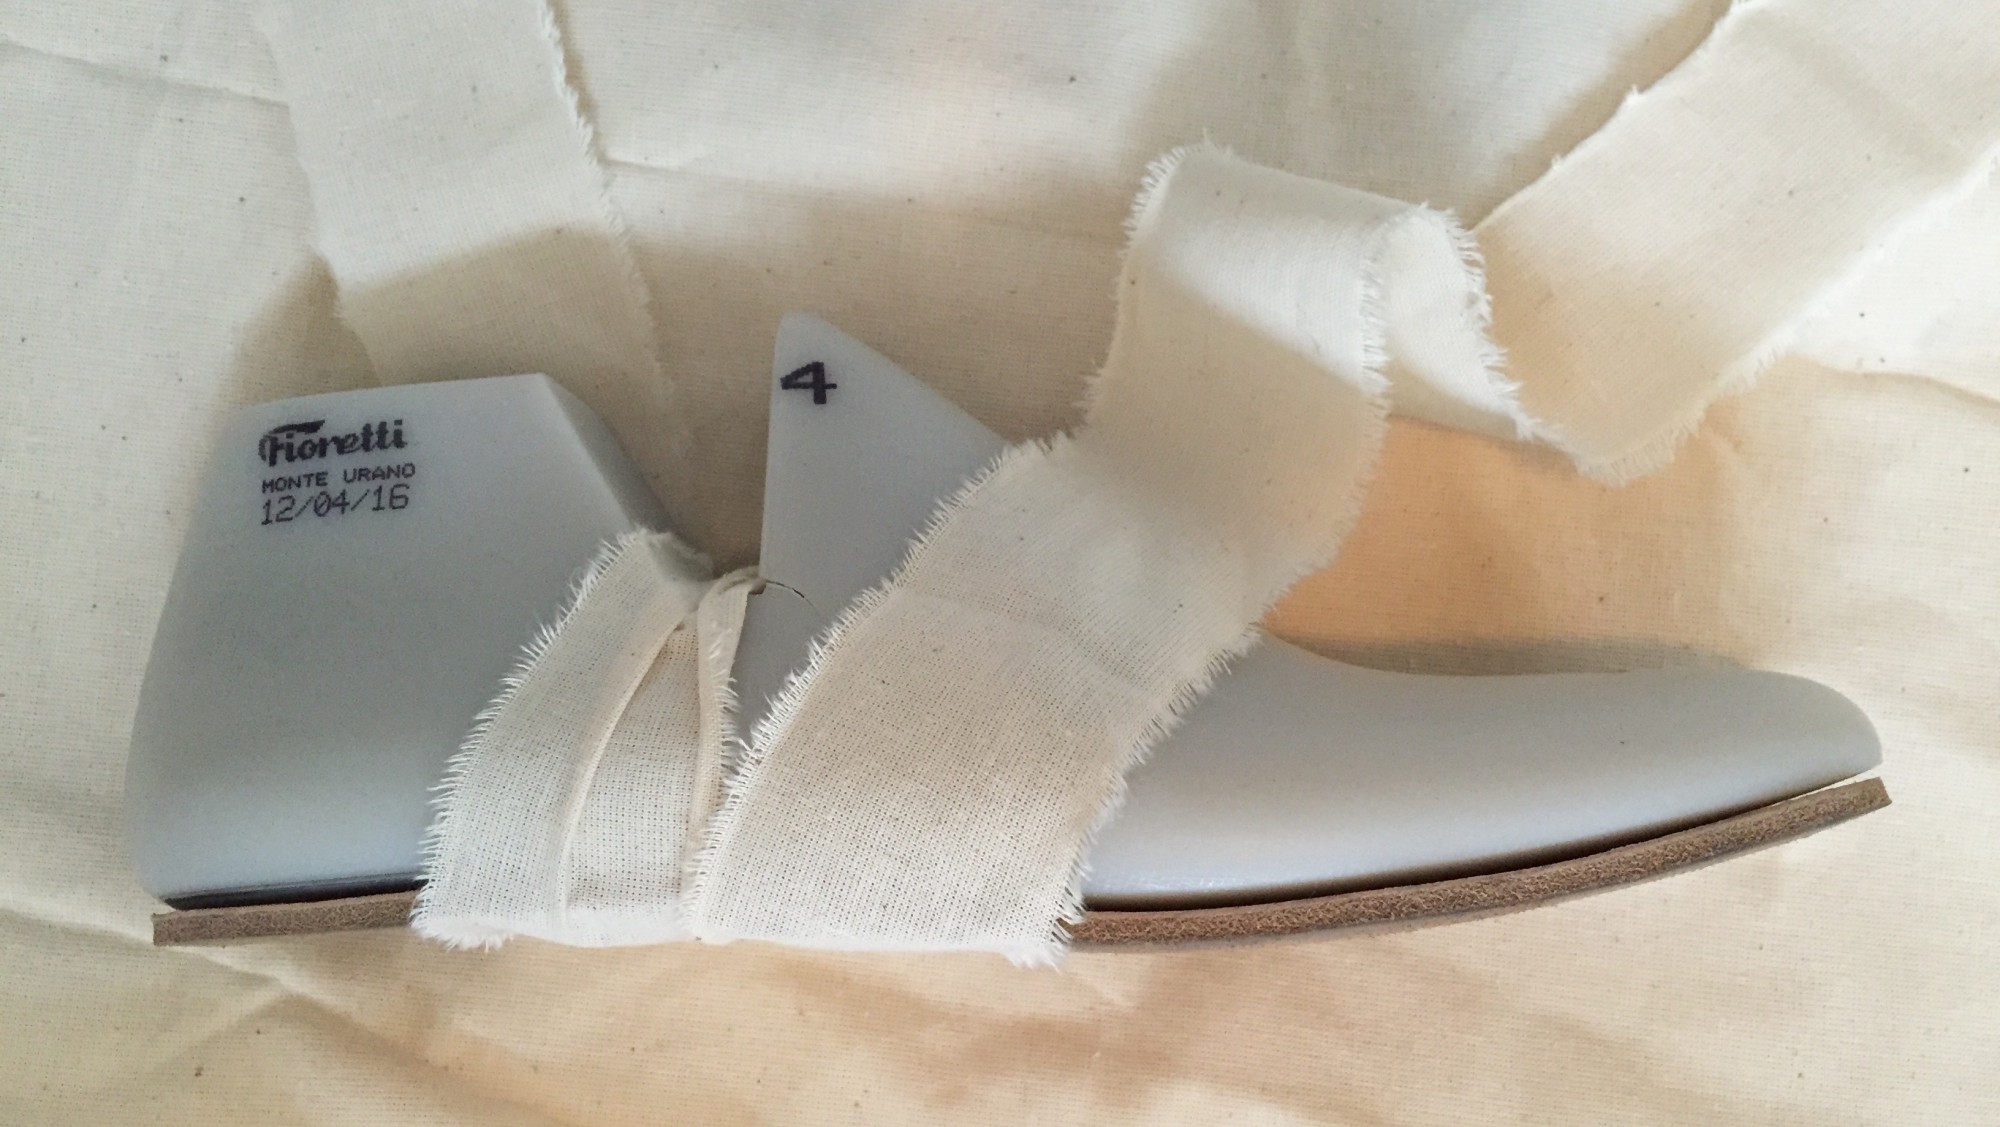
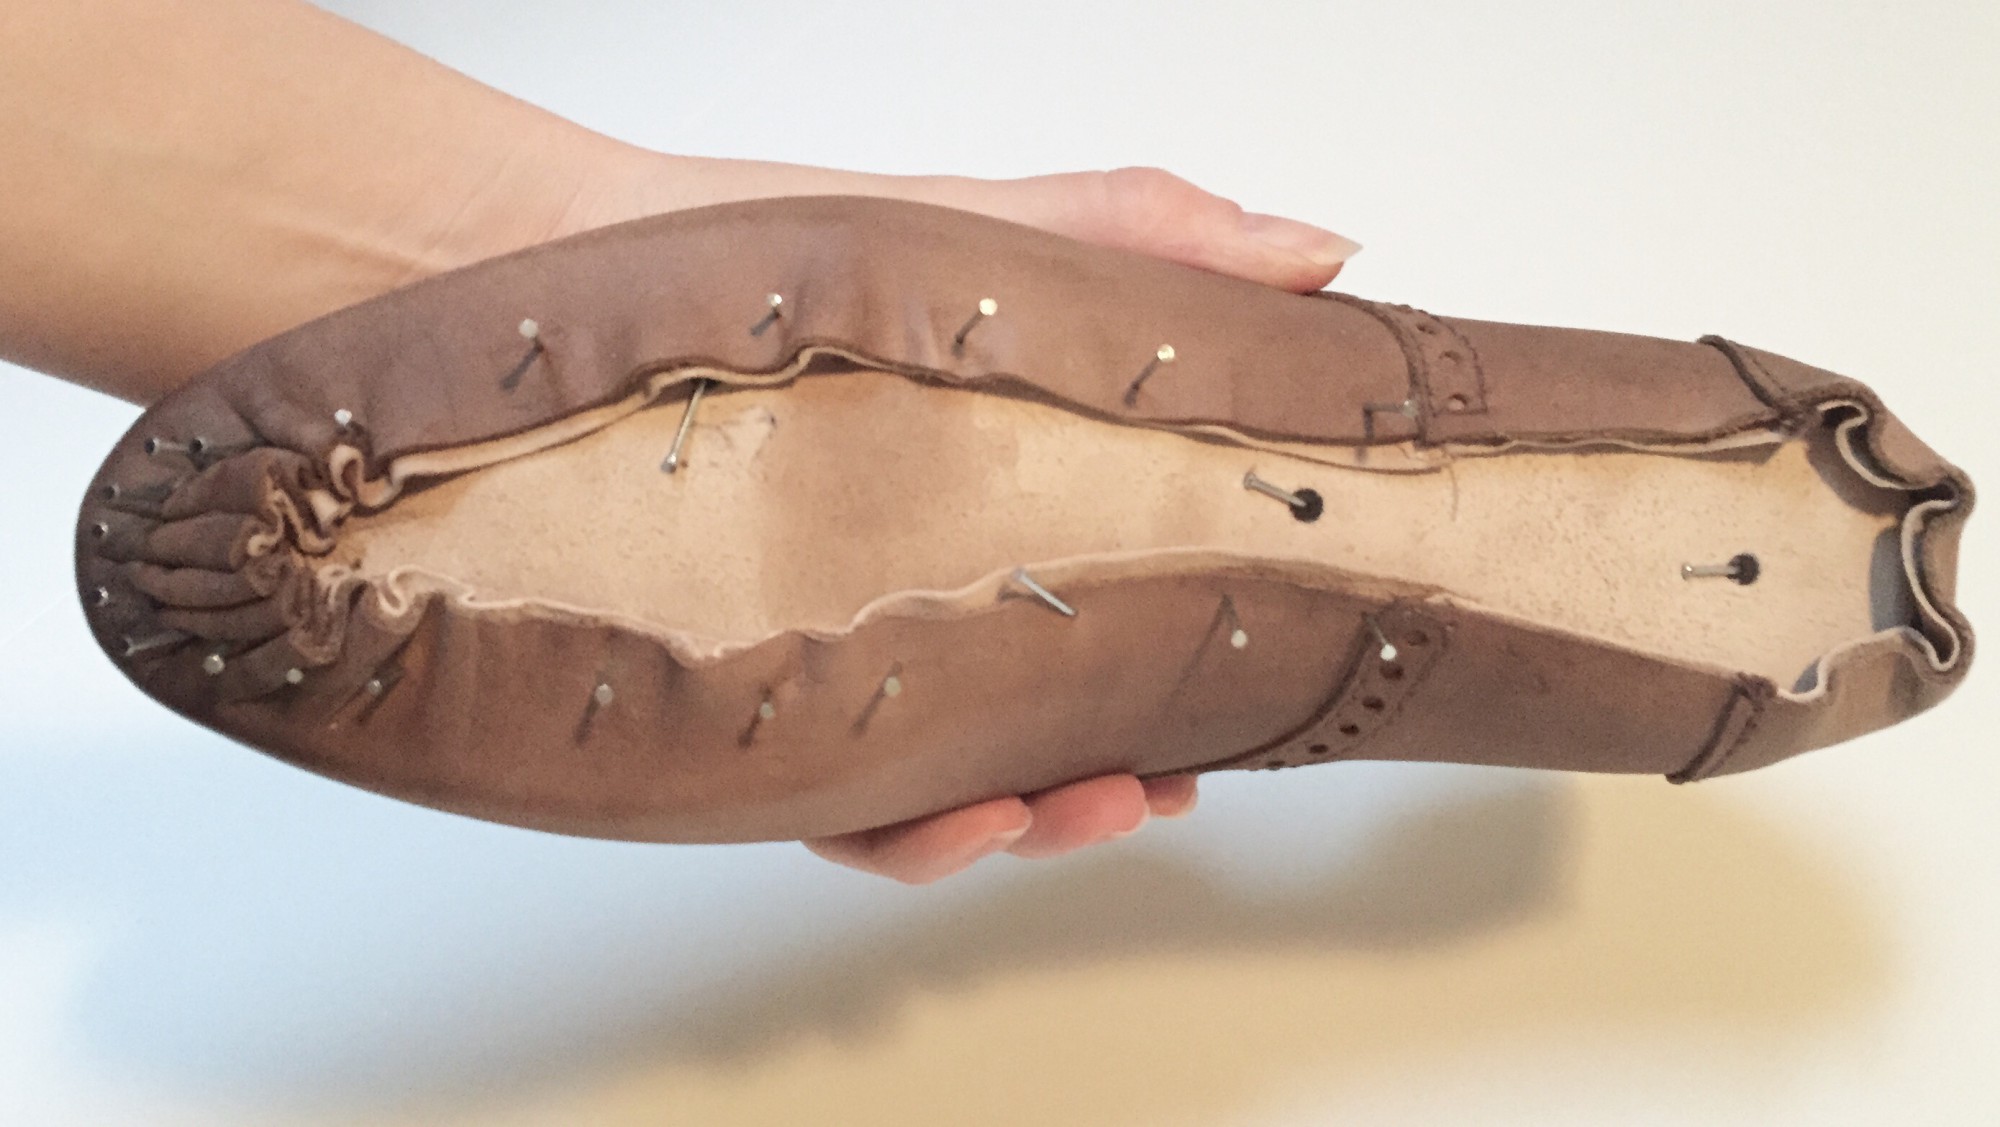
Finally time has come for the part of this project I have been looking forward to the most, at the same time wondering if I would be up for the challenge of lasting. It is a slow process requiring much patience. Moisting the leather with at sponge makes it more elastic. Outer leather and lining are tightened over the last with a pincer. It is secured with nails, beginning at the toe. With the shoemakers hammer, the leather fibres are compressed, creating a smooth feather line.

LastingBegge sko er nu læstet første gang og ligger til tørre.


Both shoes has now had their first lasting and are left to dry.

Lasting
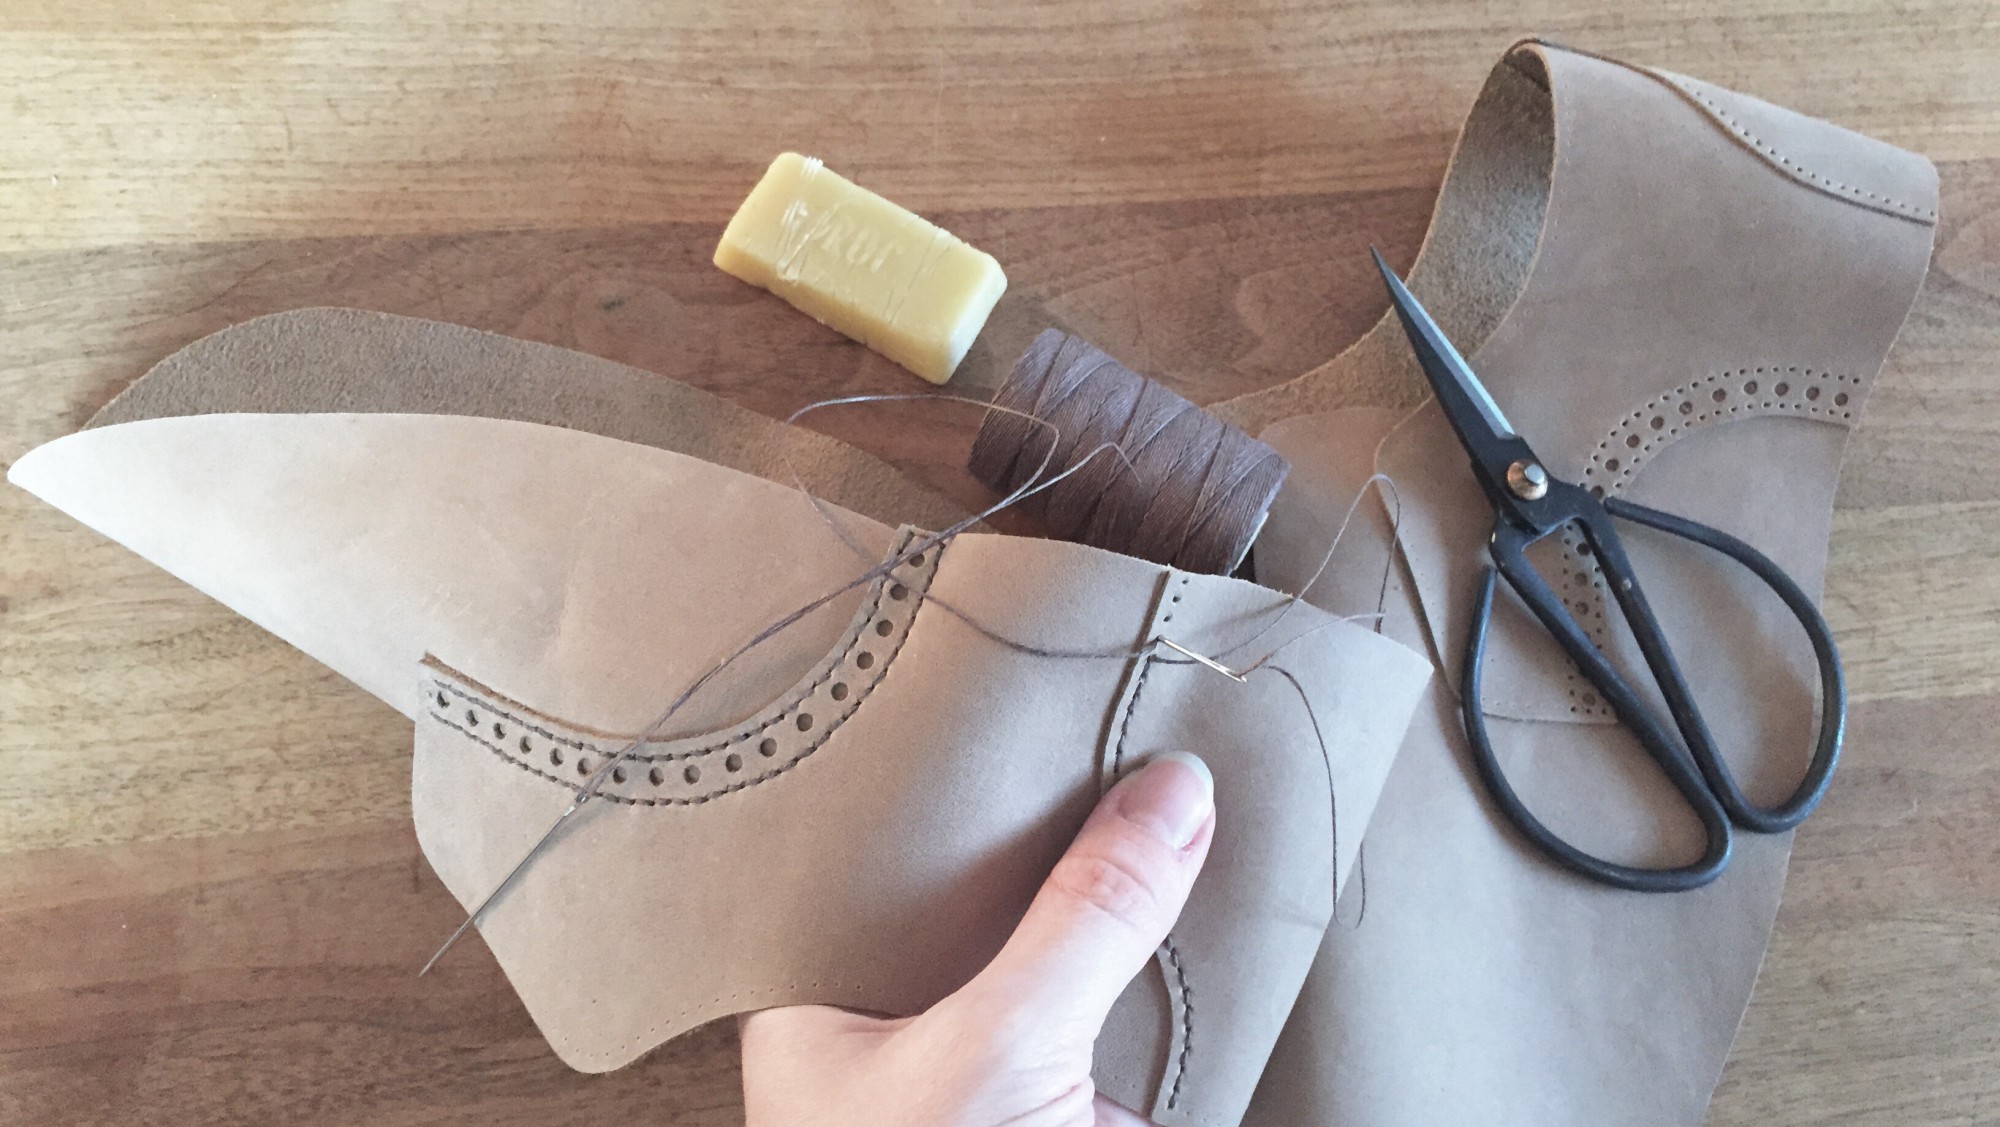
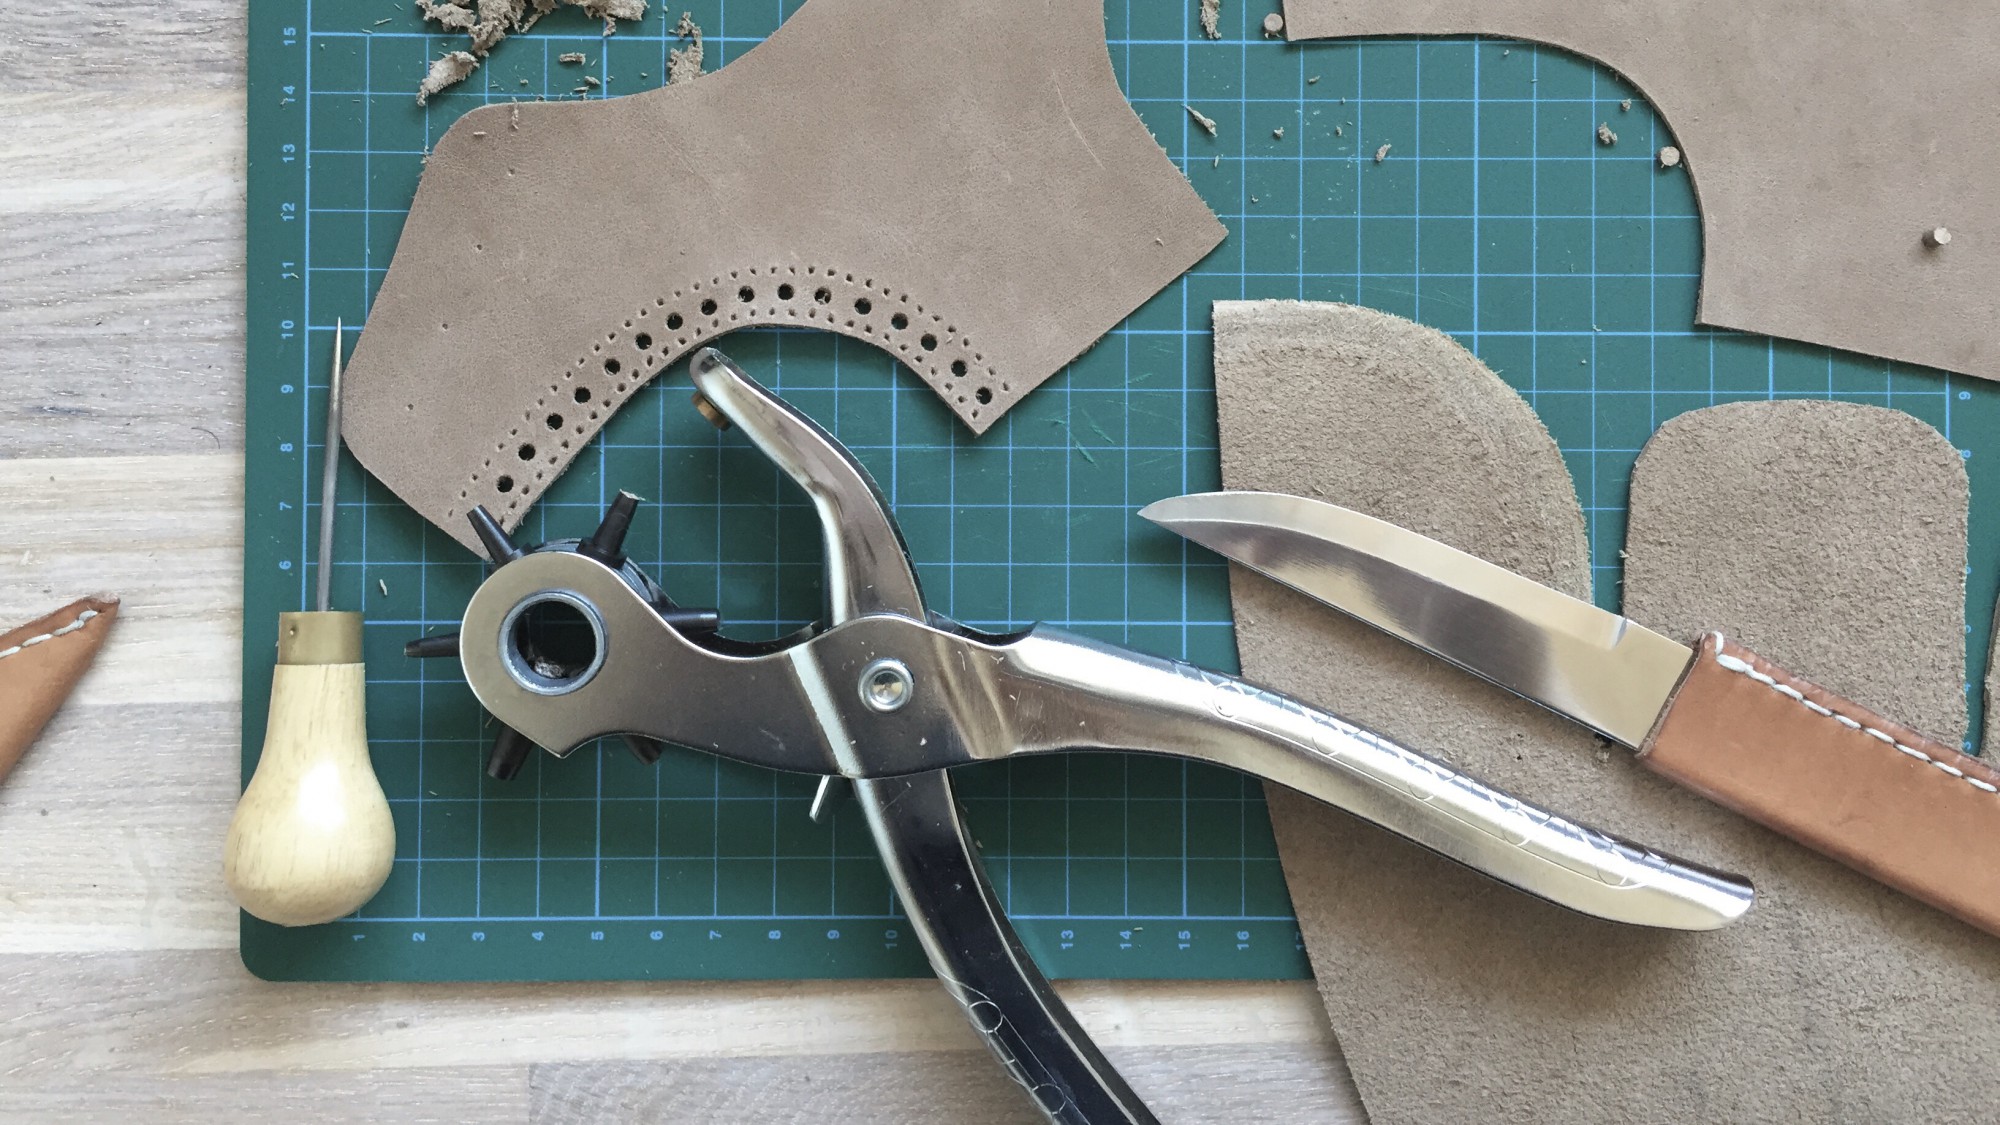
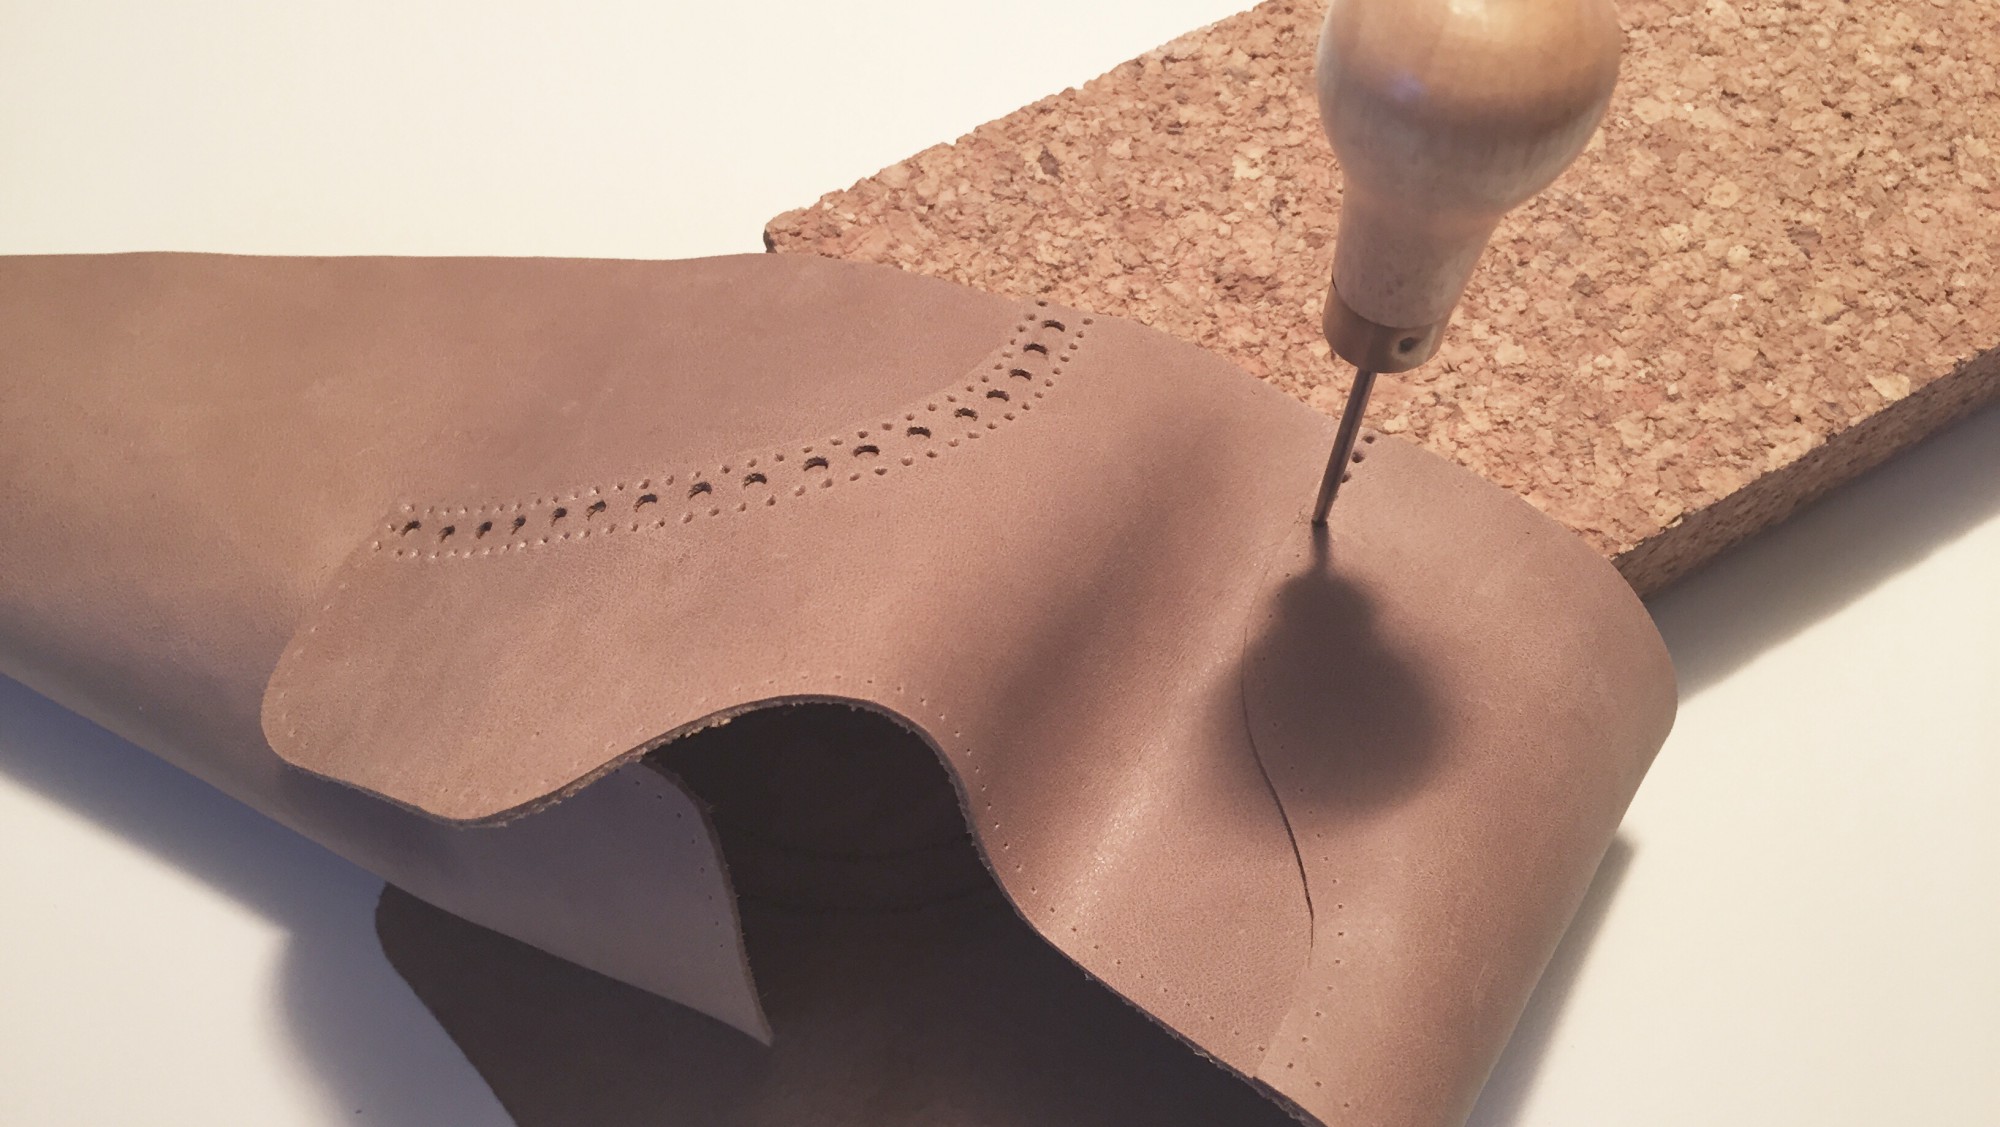
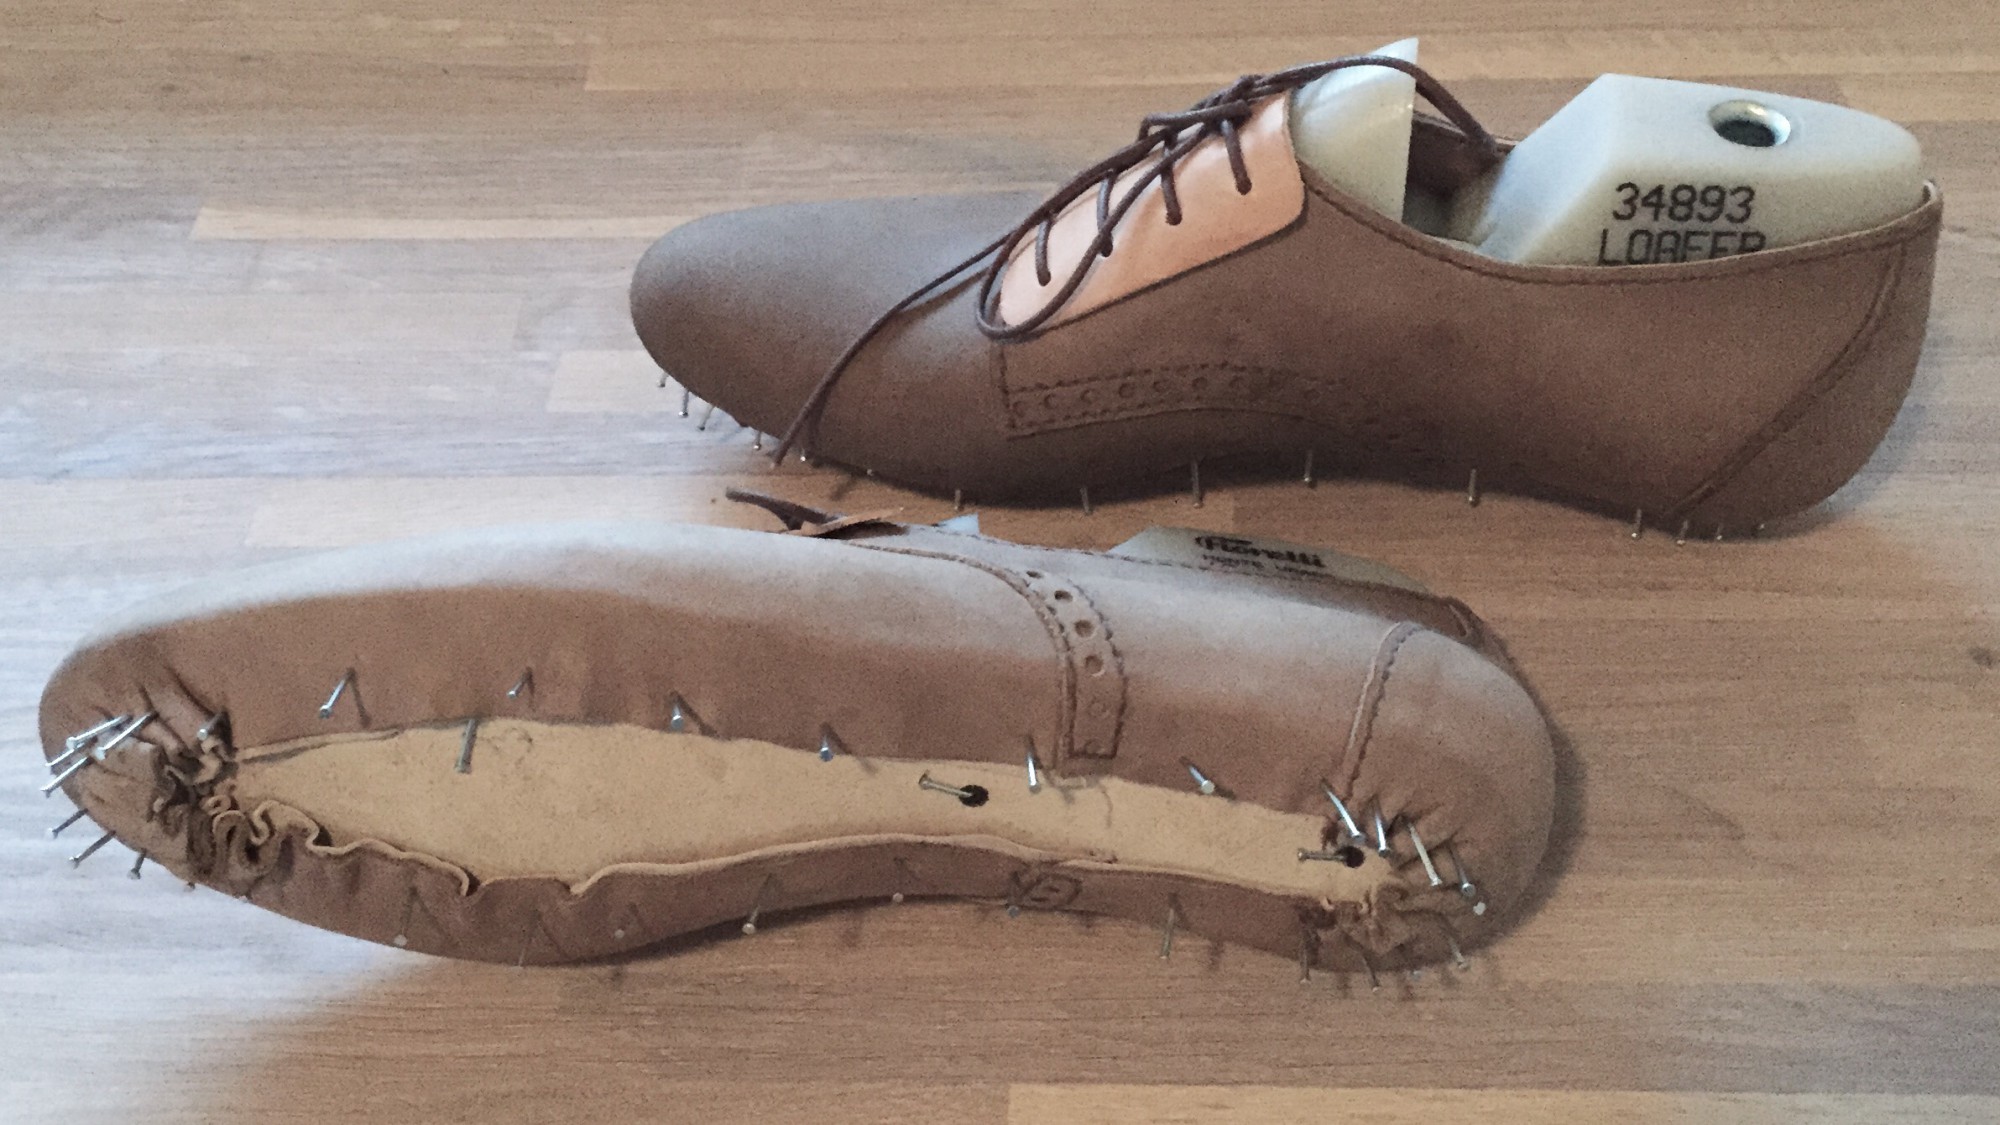
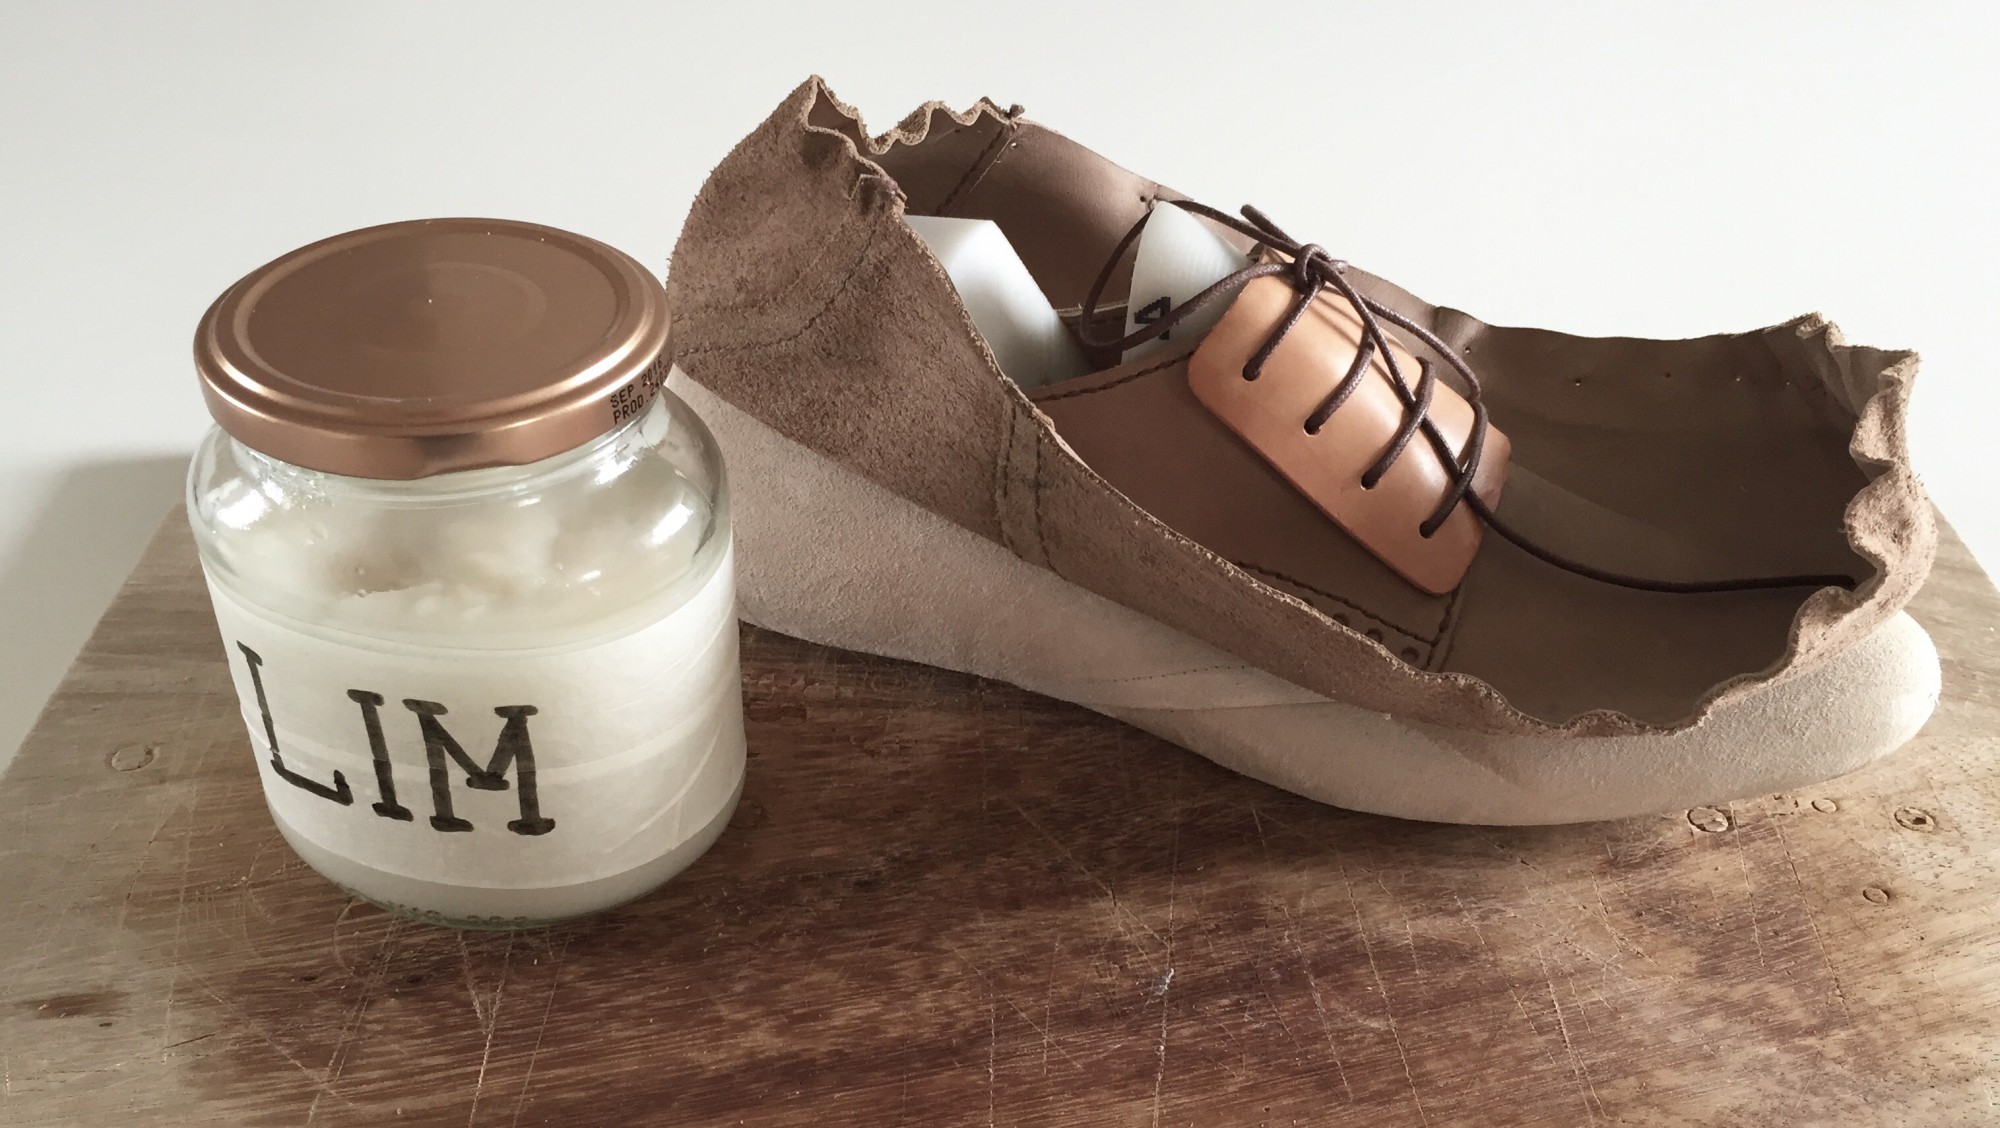
Efter lang tids research, blandt alt fra YouTube til antikke husholdningsbøger, har jeg sammenstykket min egen opskrift på skomagerklister. Den består i al sin enkelhed af mel, vand, sukker salt og eddike. Denne klister skal primært bruges til forstærkninger som jeg vil fortælle meget mere om i mit næste indlæg. Men inden de kan limes på, tages alle sømmene ud og foeret alene læstes og limes fast med melklister under dæksålen.


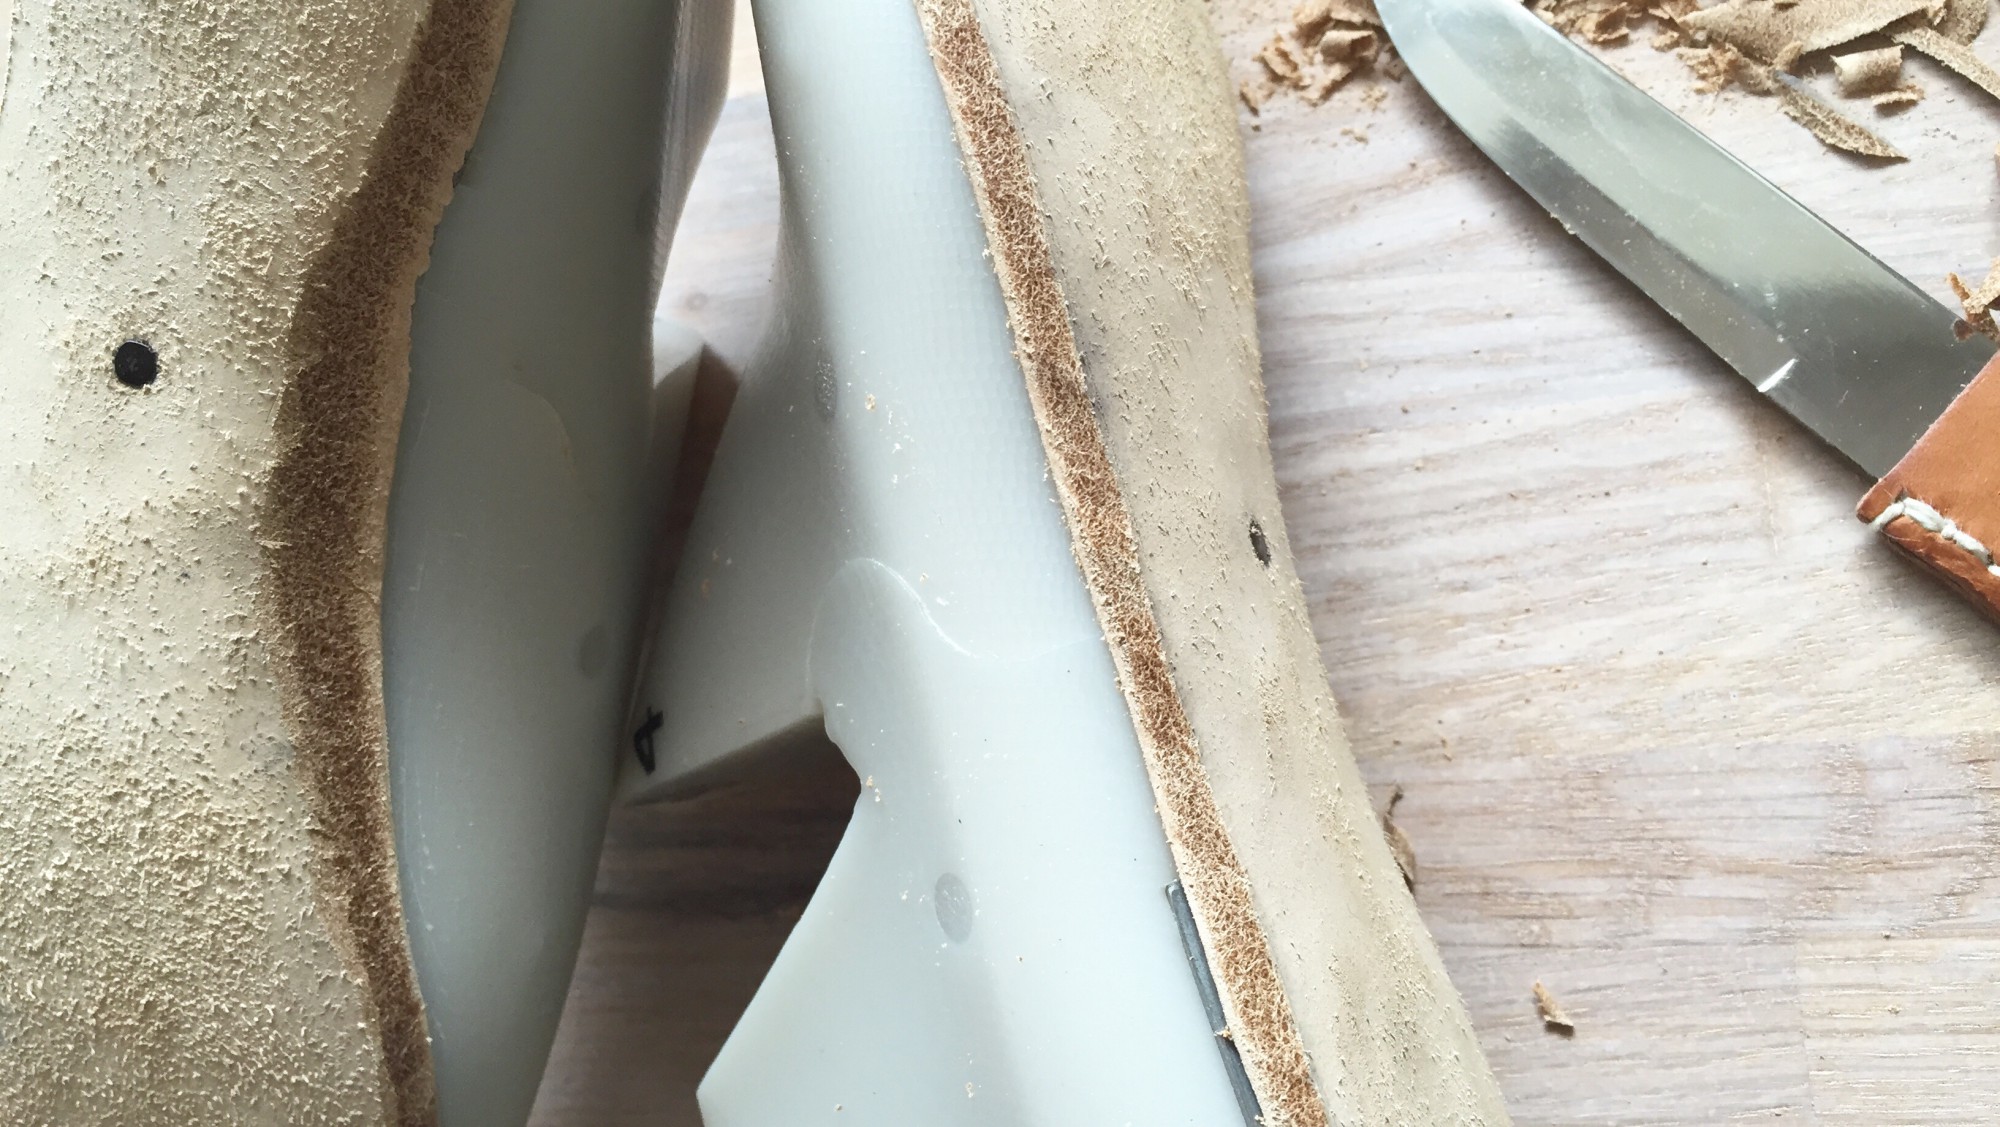
After long time researching, browsing everything from YouTube to antique household books, I put together my own recipe for shoemakers paste. In all simplicity it consists of water, flour, sugar, salt and vinegar. The paste is primarily used for the stiffeners which I will go further into in my next post. But before they can be mounted, all nails are removed and the lining is lasted and glued to the bottom using the paste.

Lasting


Shoemaking 2.2 – Sewing the upper

Sewing upperAlle sømme på overlæderet håndsyes med bomuldstråd, som gives voks for at beskytte fibrene så den ikke tager skade under syarbejdet. Jeg syer med to nåle og hvert sting strammes til ved at trække i begge trådender samtidig.


All seams on the outer leather are hand sewn with cotton thread, waxed to protect the fibres during sewing. I sew with two needles, and every stitch is tightened by pulling both thread ends at once.

Sewing upperFoeret består af to dele, som sammensyes på maskine, da det giver en fladere søm. Sømrummet skærfes og hamres fladt.


The lining consists of two parts, gathered on sewing mashine as it makes a more flat seam. The overlap is skived and hammered flat.

Sewing upperFoerets kanter limes på overlæderet. Der laves huller med syl og syes hele vejen rundt.


The edges of the lining are glued to the outer leather. Awl holes are made and sewn all the way round.

Sewing upperTil sidst laves snørehuller med en hultang og for at beskytte hullerne og sikre den rette afstand laves et ekstra stykke læder med snørehuller. Dette skal forblive under læstningen.


Finally holes are made for the shoelaces and an extra leather piece is added to protect the holes and keep the spacing equal. This will stay during lasting.


Shoemaking 2.1 – Preparing upper shoe

Cutting upper leatherJeg har valgt et smukt sandfarvet kalveskind med et mat udtryk til dette par sko. Mønsterdelene lægges på, markeres og skæres ud.


I have chosen to do this pair of shoes in beautiful sand coloured calf leather which has a matte look. The pieces of the pattern are laid out, marked and cut.

Brogue detailsHullerne til brogue-detaljen punsles ud med en hultang. Det underliggende stykke ved alle sammenføjninger skærfes. Dette betyder at læderet skæres helt tyndt ud mod kanten for at undgå at overlappet ses igennem. En disciplin der kræver en del øvelse og tålmodighed, men vigtigt for den sidste finish.


The brogue holes are punched out. The underlaying piece of seams are skived. This means that the leather is cut to nothing at the edges to avoid a visible overlap. A disciplin that demands a great deal of practice and patience, but very important for the final detail.

Awl holesAlle delene limes sammen efter markeringerne. Med et markeringshjul mærkes alle stinghullerne op og hullerne laves herefter med en syl. Så er det snart tid til at sy…


All parts are glued together according to the guide marks. The stitch holes are marked with a wheel tool and the holes are made using an awl. Soon it is time for sewing…

Shoemaking 2.0 – Insole

Cutting InsoleTil dæksålen har jeg brugt kraftigt sålelæder, som skæres ud i facon som læstens bund, hellere lidt for stor end for lille da den senere tilpasses yderligere.

Sålerne lagde jeg i blød i et par timer, hvorefter jeg pakkede dem ind i avispapir, hvor de kunne ligge og trække endnu et par timer.


I used heavy sole leather for the insole and cut it into the shape of the bottom of the last. At this point it is better to cut it a bit too big as it will be fitted further later on.

I soaked the soles in water for a few hours, then wrapped them up in newspaper and left them for yet a few hours.

De gennemfugtede såler er nu klar til at blive sømmet fast til læstens bund. På videoen ses, hvordan de efterfølgende formes efter læstens krumninger med en skomagerhammer. Herved komprimeres fibrene i læderet.


The thoroughly moisted soles are now ready to be nailed to the bottom of the last. This video shows how they are then shaped as the curves of the last with a shoemakers hammer. This compresses the leather fibres.

InsoleDæksålen efter komprimering.


The insole after compression.

Wrapping InsoleLæst og dæksål pakkes stramt ind i lærredsstrimler for at holde faconen mens læderet tørrer.


Last and insole is then wrapped up tightly in canvas strips, keeping the shape while the leather is left to dry.

Trimming insoleTil sidst skæres kanterne til hele vejen rundt, så læstens krumning fortsætter jævnt ned over dæksålen.


Finally the edges are cut all the way around, continuing the curve of the last smoothly through the insole.


Shoemaking 1.2 – Pattern

Peeling off patternDa jeg var tilfreds med mit design, skar jeg langs stregerne på de enkelte mønsterdele, hvorefter de forsigtigt kunne pilles af læsten.


Once satisfied with my design, I cut along the lines of the individual parts of the pattern, allowing them to be carefully peeled off the last.

Flattening patternTape-mønsteret glattes ud mens det klæbes fast på karton.


The tape-pattern is smoothed out while tranferred onto cardboard.

PatternTil sidst rentegnes alle mønsterdele og der tilføjes sømrum og læstetillæg.


Finally all pattern parts are finished off, adding seam- and lasting allowance.