Long Cardigan

Long Cardigan
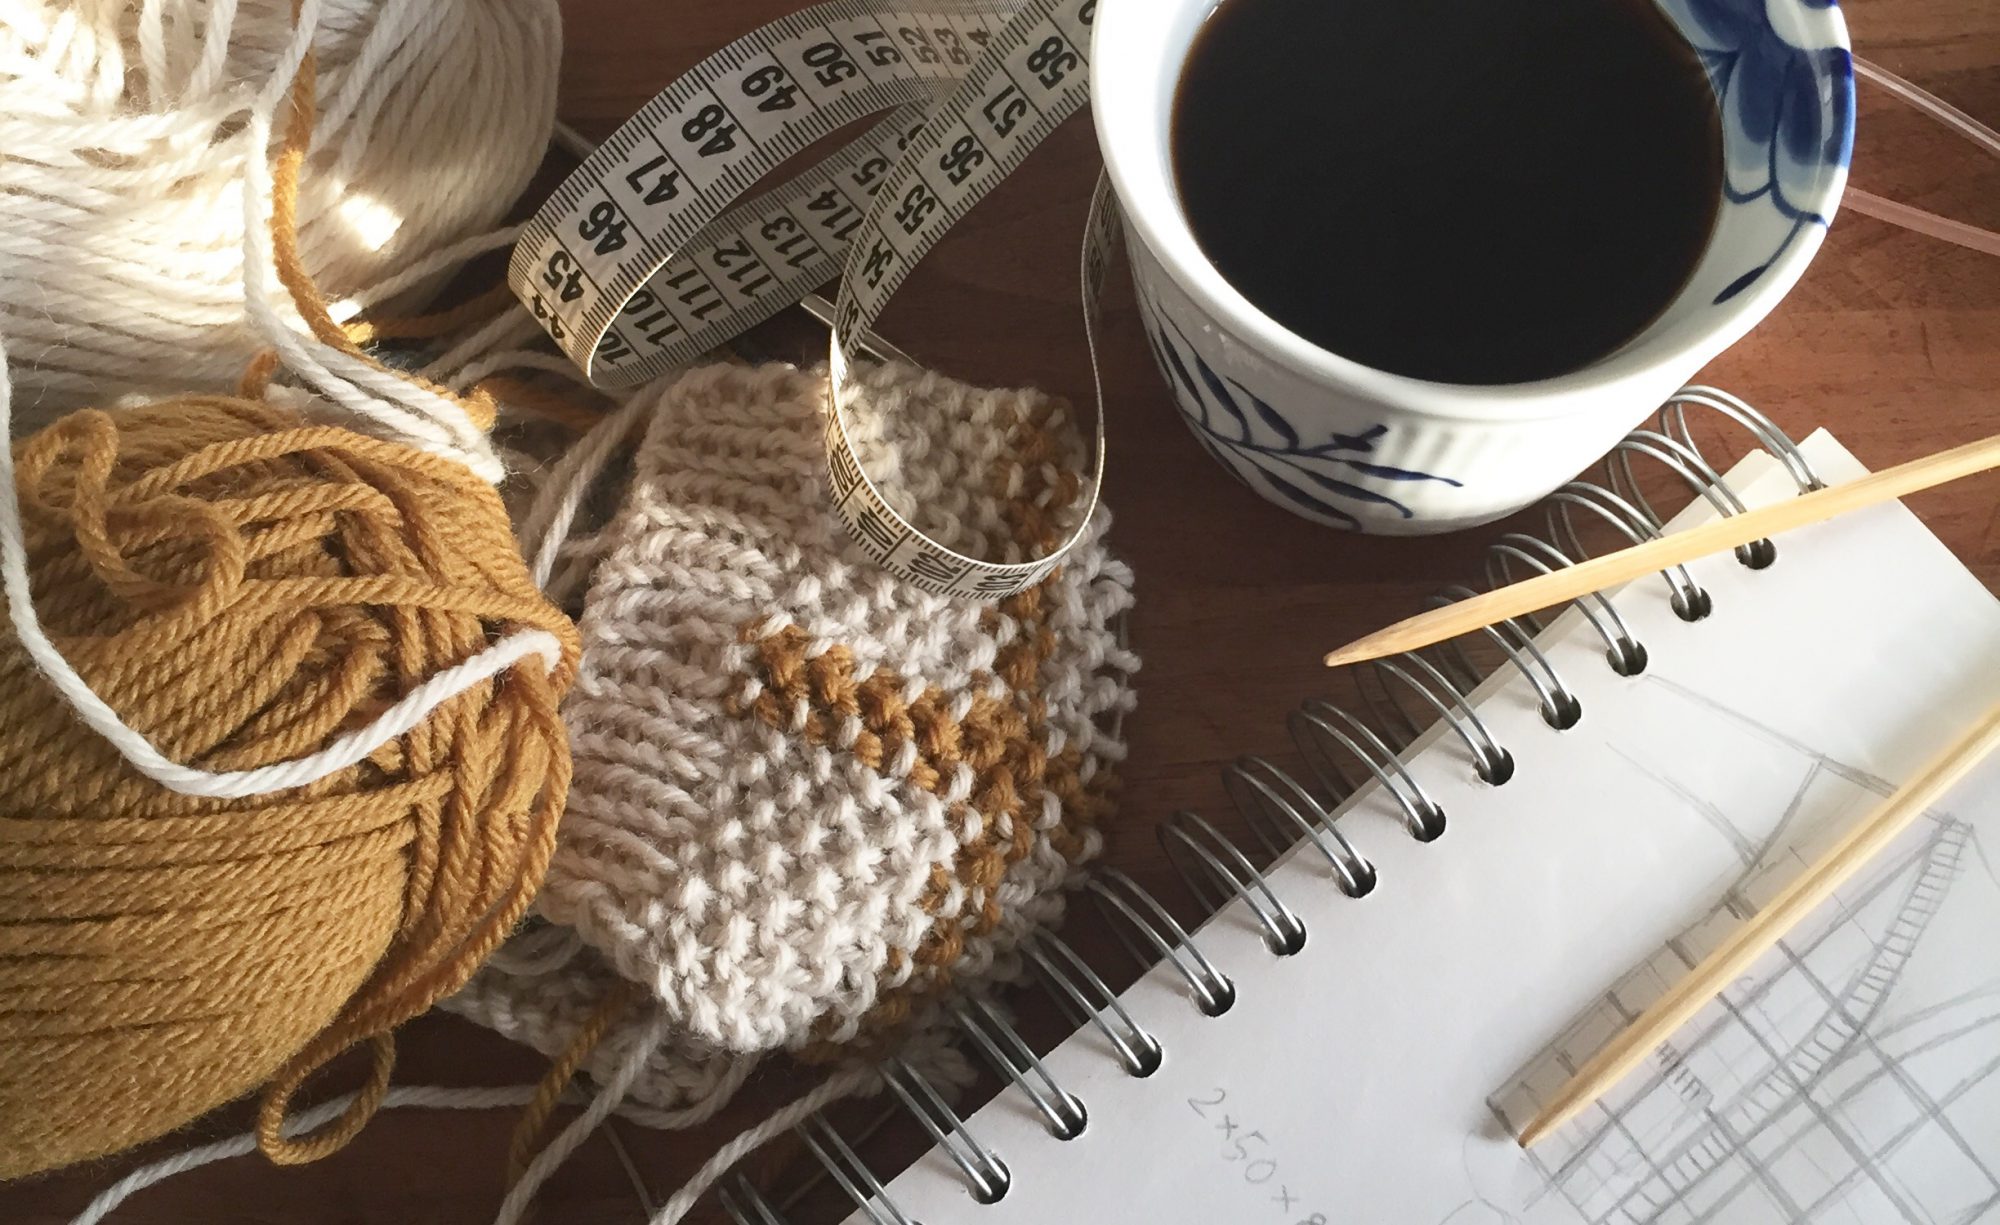
I just finished a long cardigan that has been in the making for a while. I am known for having many projects going on in parallel, and this knit has had to give way for my new passion for shoemaking. Nevertheless it is now off the needles, mounted, washed and blocked. I never knit from a pattern but make it up as I go along. Usually I draw a quick sketch and knit a lot of samples until I get the exact gauge and effect I want. I always wash or steam the final sample before counting the stitches and finally is able to make the calculations for my project.

For this cardigan I wanted a very large check with the effect of being a rough weave. This, I was able to achieve by knitting the whole sweater in moss stitch, and knitting the first and last stitch in the vertical stripes alternate light and mustard coloured. The yarn I used for this is Filcolana Peruvian Highland Wool colour 977-Marcipan and 136-Mustard bought at the local shop Garn10.

Long Cardigan
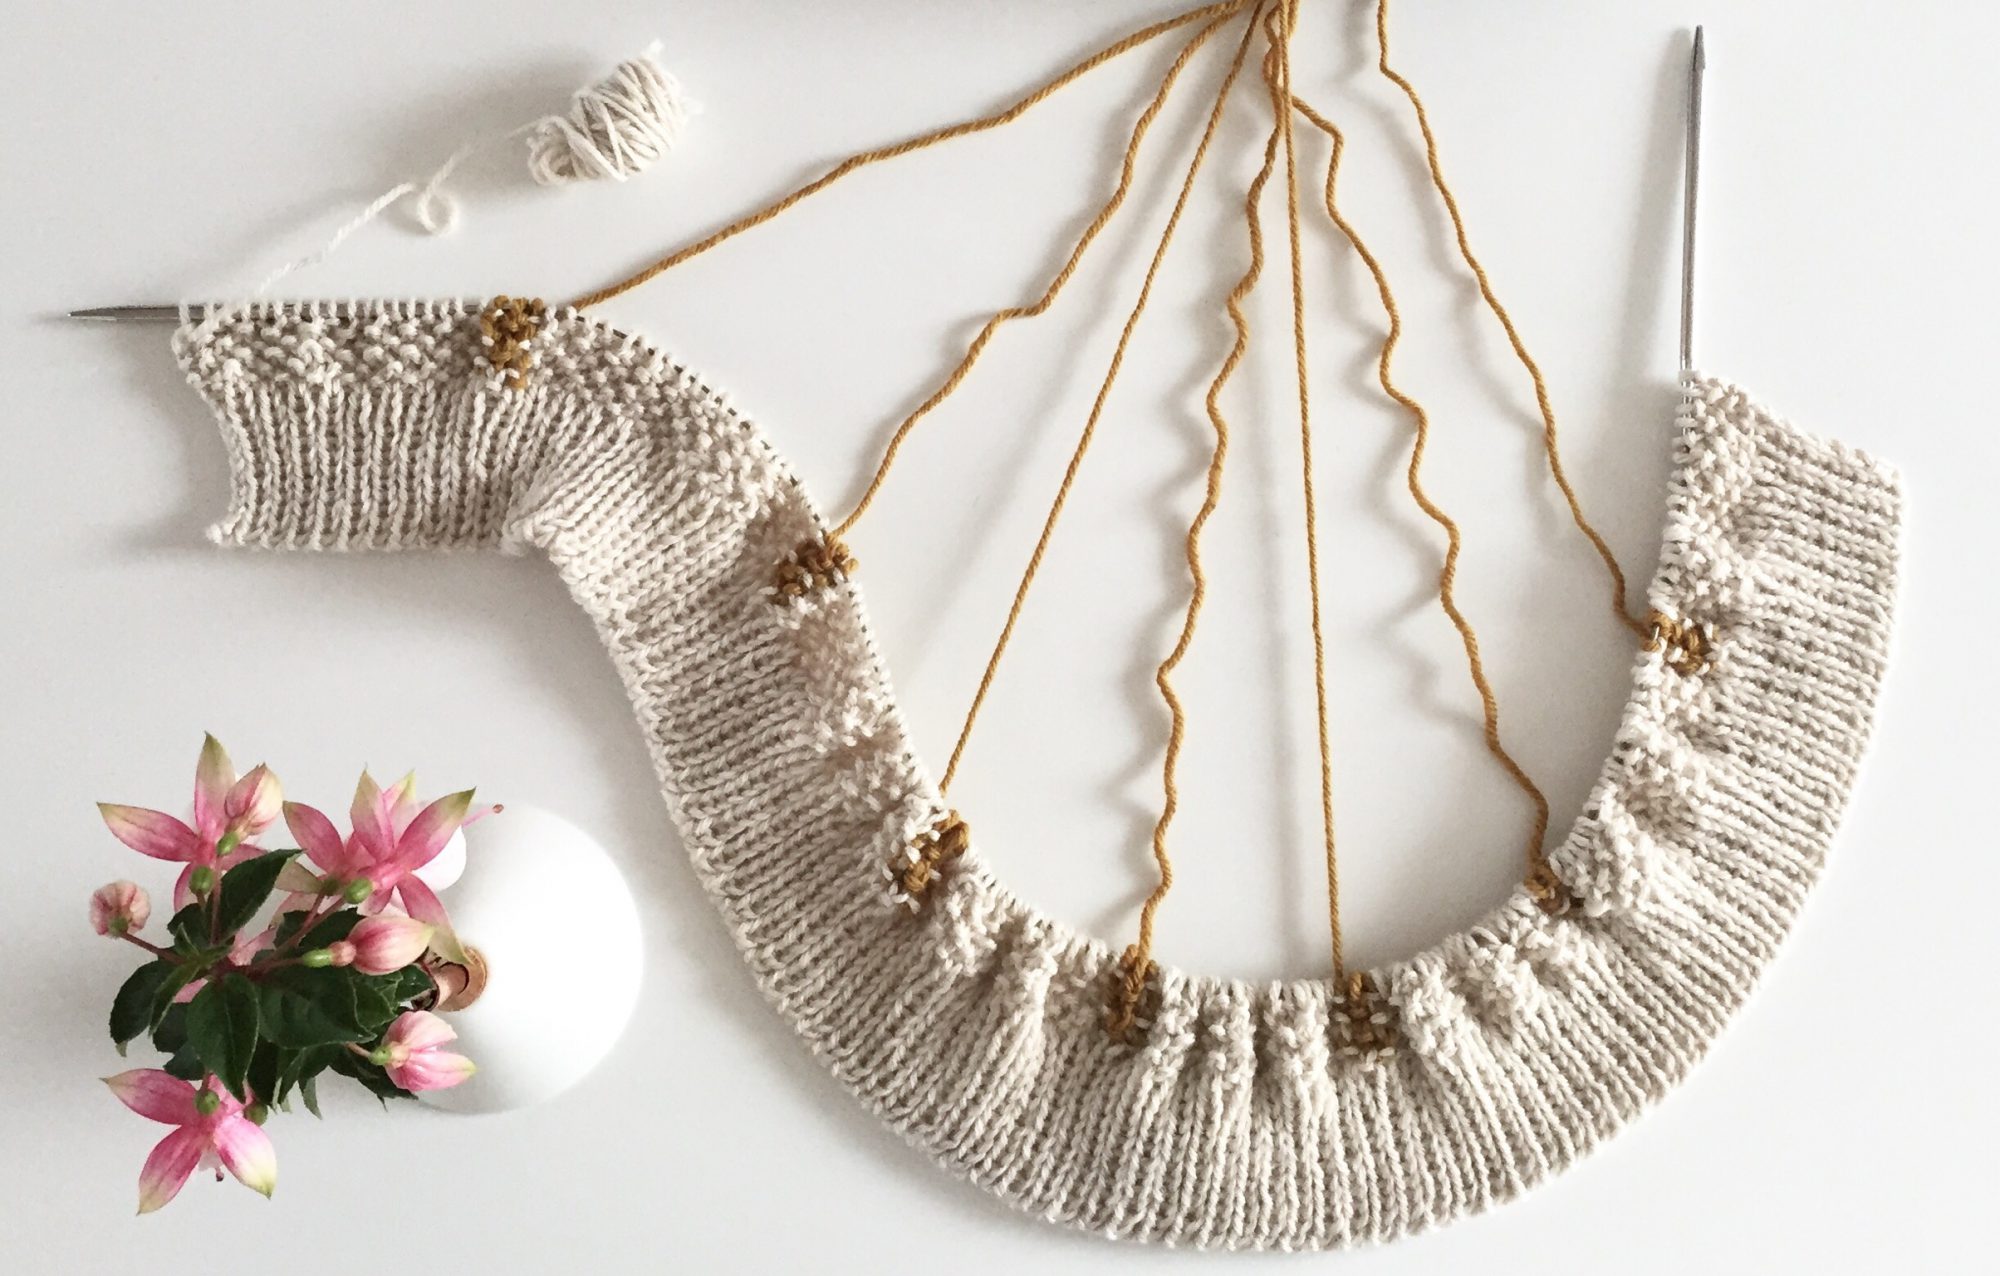
To avoid having to follow the mustard yarn through behind the large checks, I divided the yarn into 8 balls, equivalent to the 7 vertical stripes and one for the horisontals. It was a bit of a struggle keeping track of them all, but absolutely a beautiful solution.

Long Cardigan
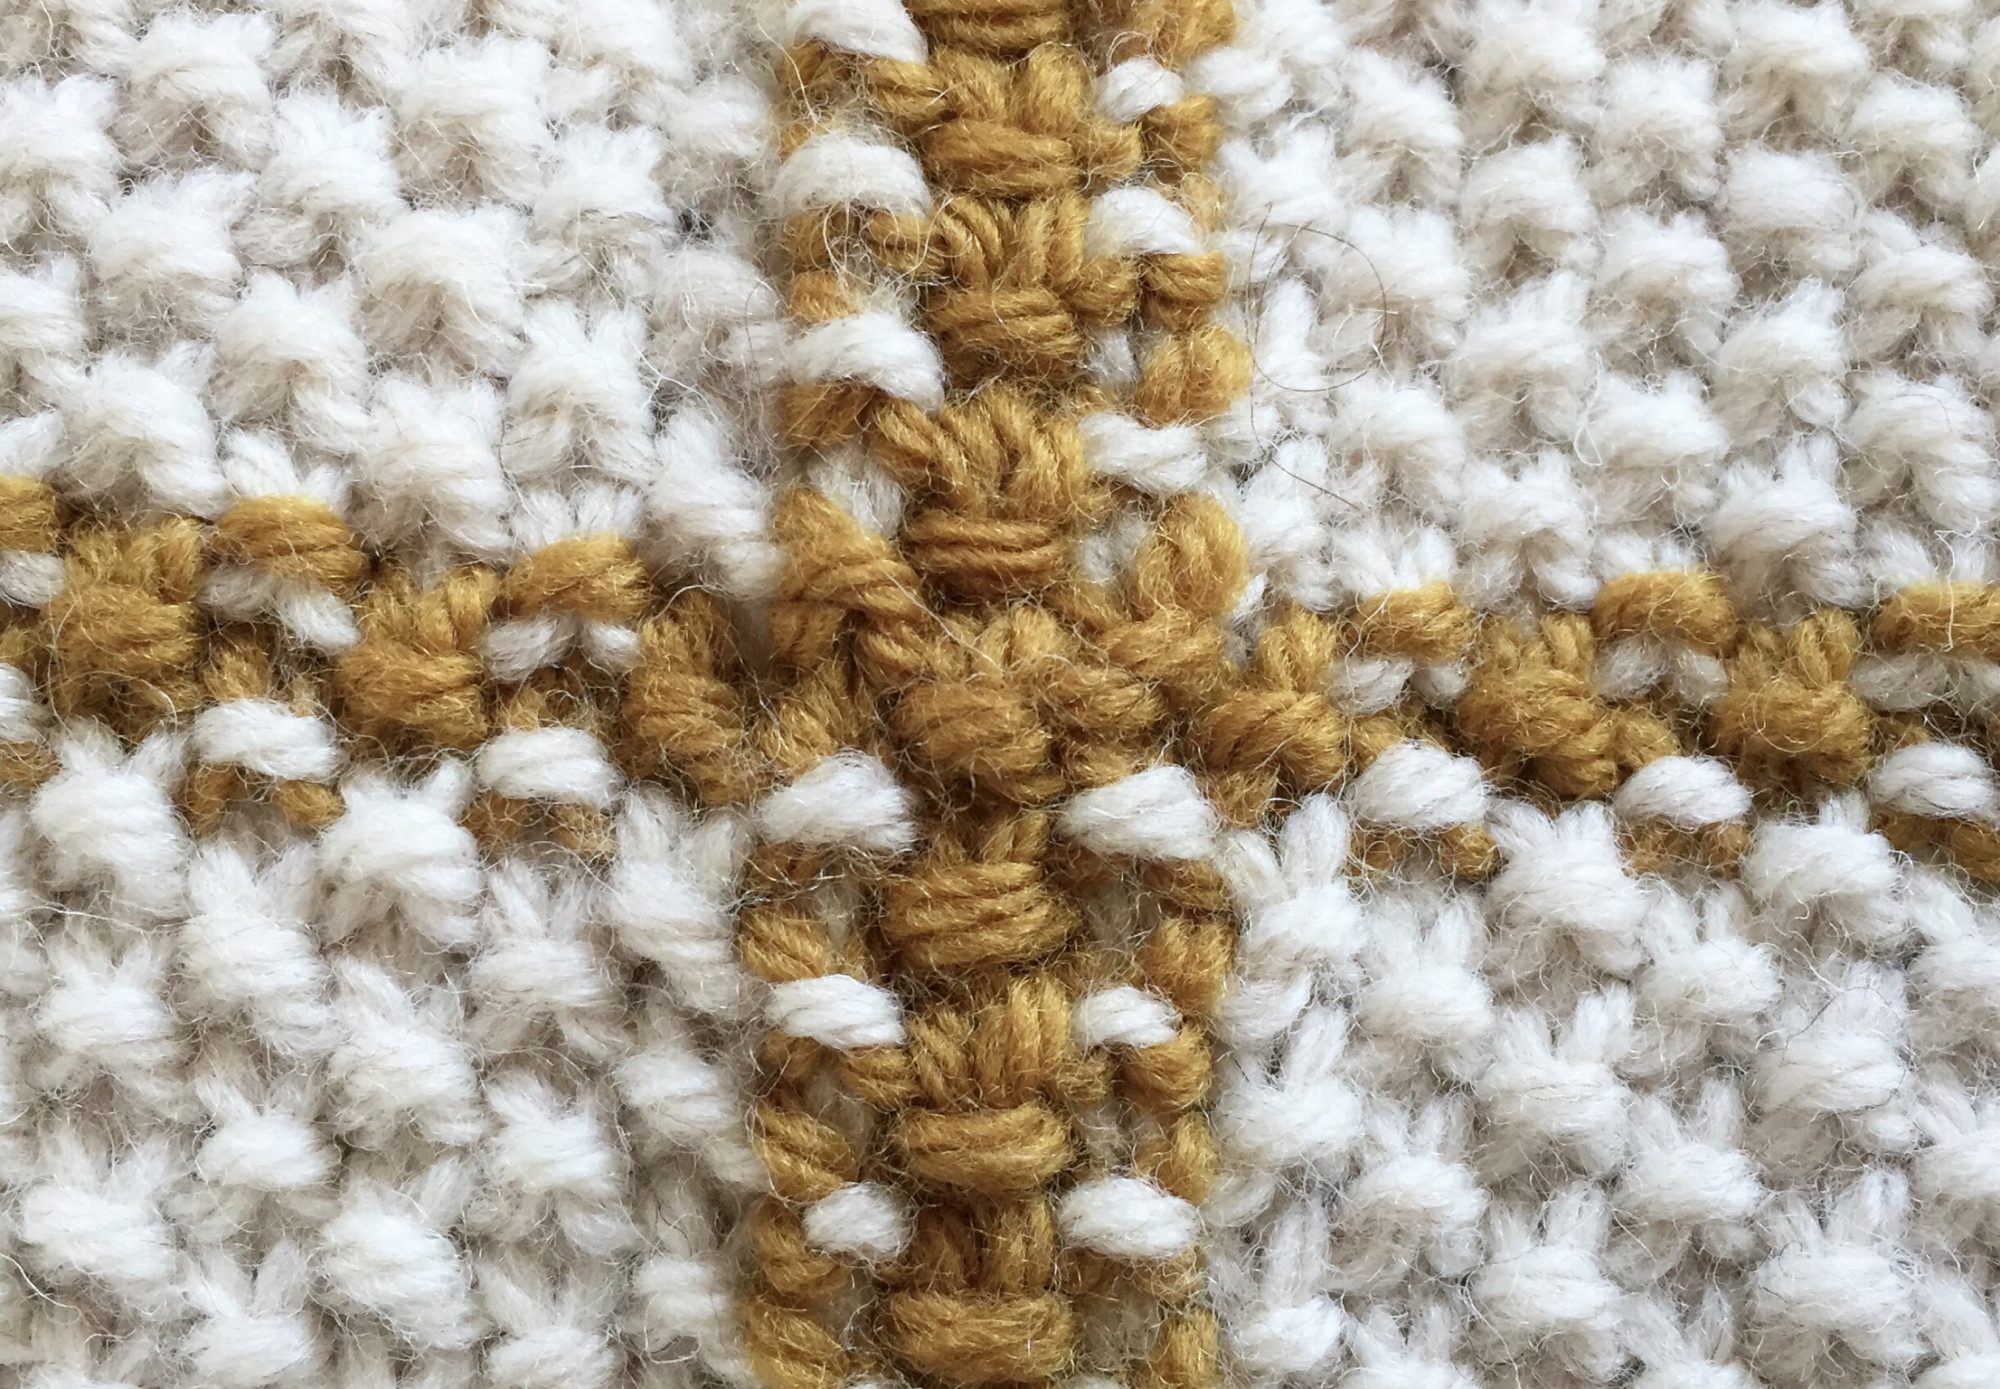
A close up of the check.

Long Cardigan
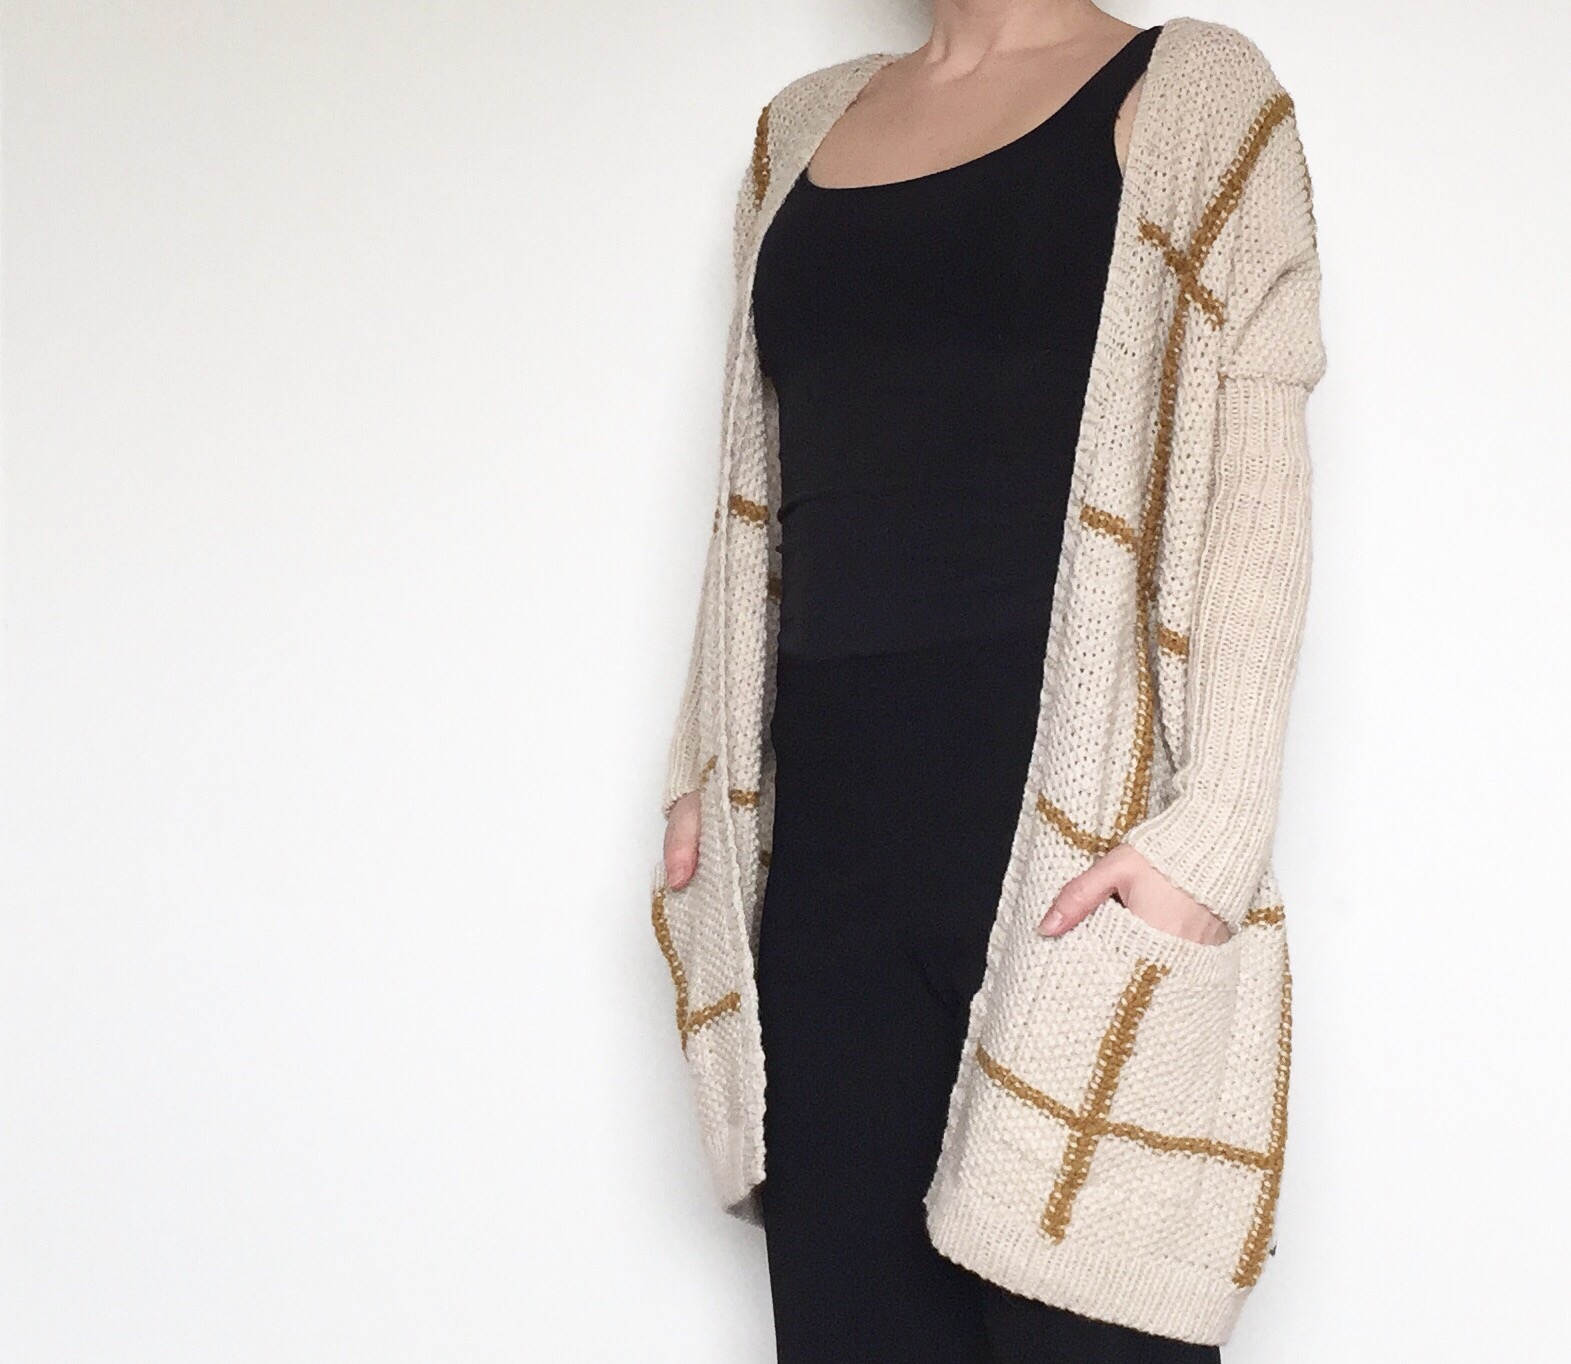
And the final cardigan. The slim sleeves makes a great contrast to the oversize body and the dropped sleeves. I think I am gonna move into this one for the next couple of months when the weather is very shifting and maybe just as an alternative jacket for the cool spring mornings. Finally a video of the Italian bind off that I have used for both sleeves, pockets and the long rib selvedge. This is my absolut favourite for 1X1 rib for its elasticity and sharp looking edge.

Lace Boots – Toe Cap

Lace Boots - Toe cap
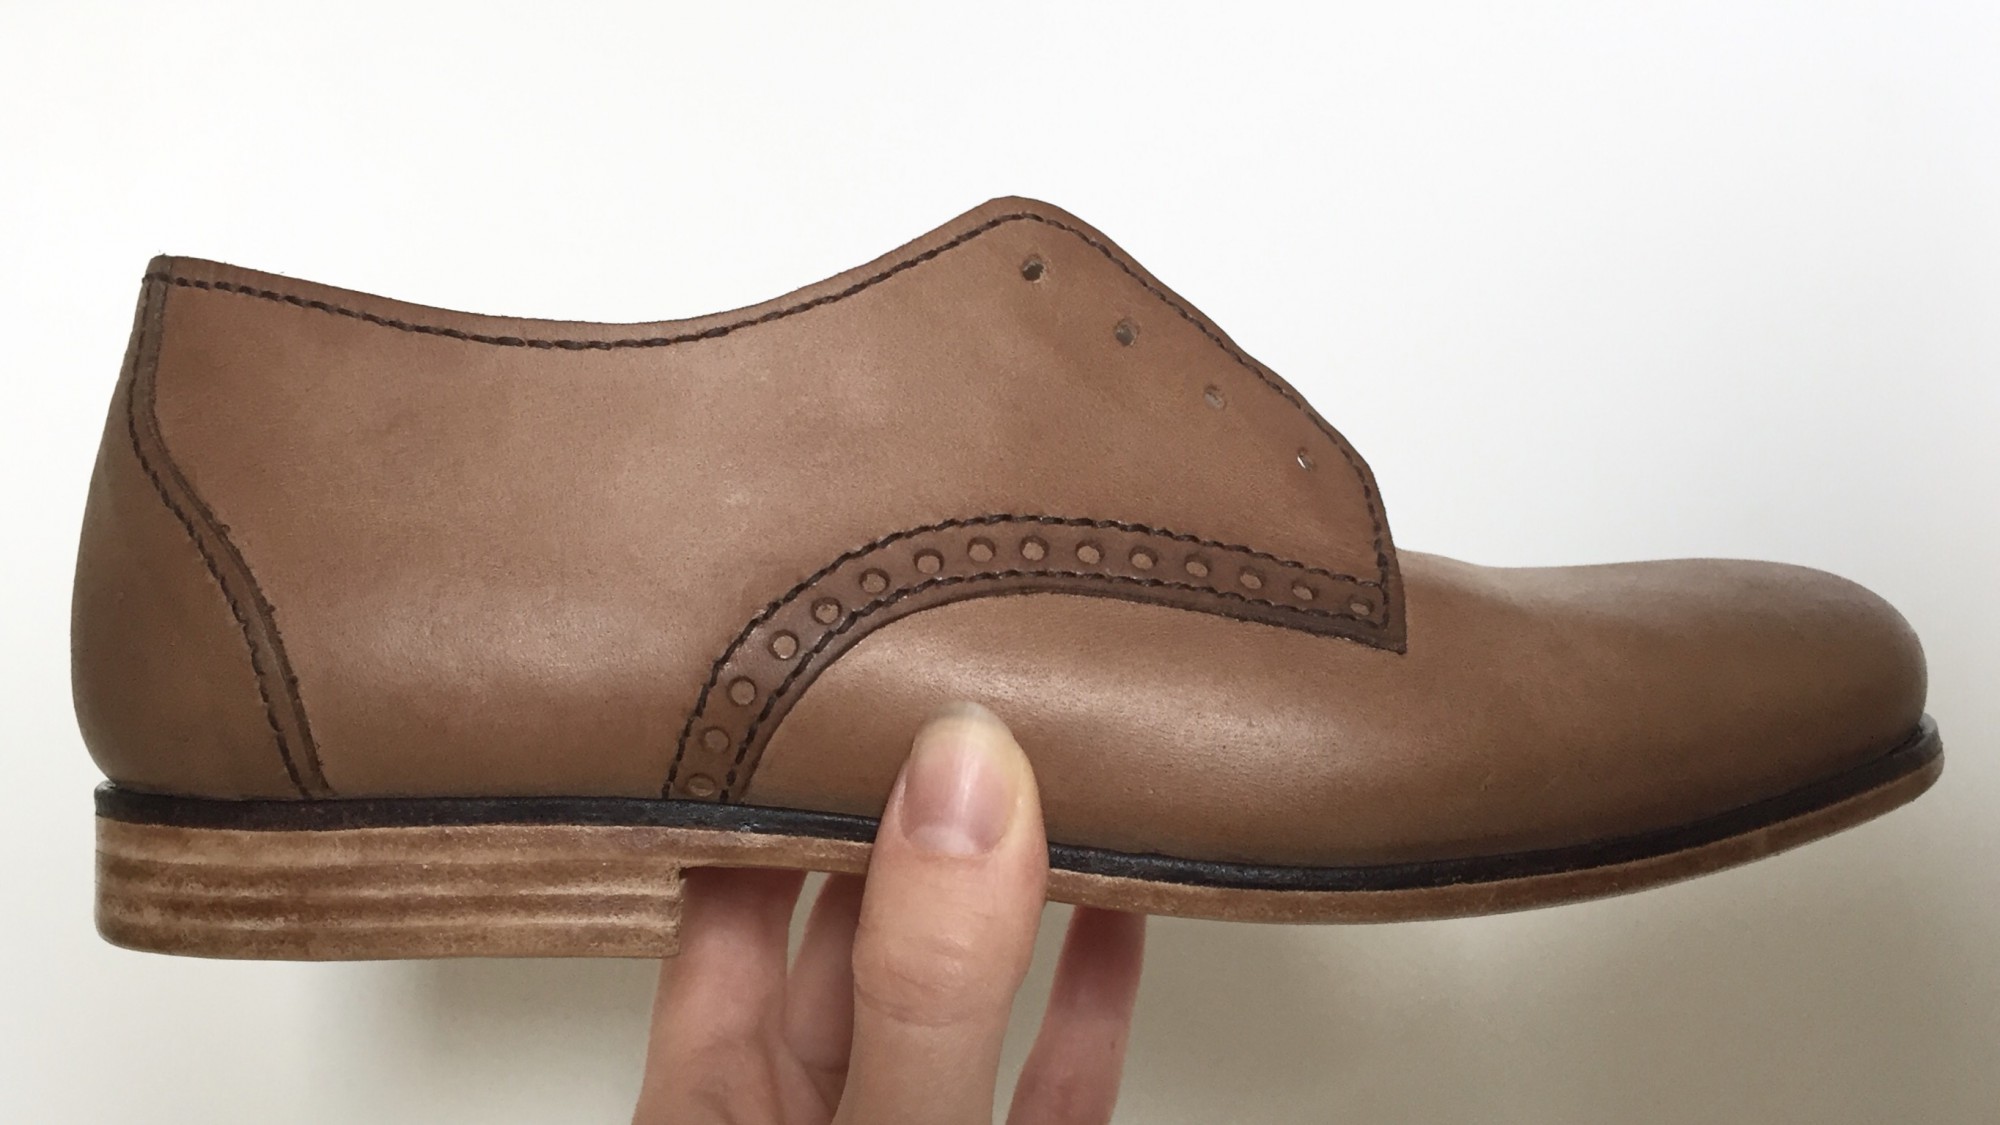
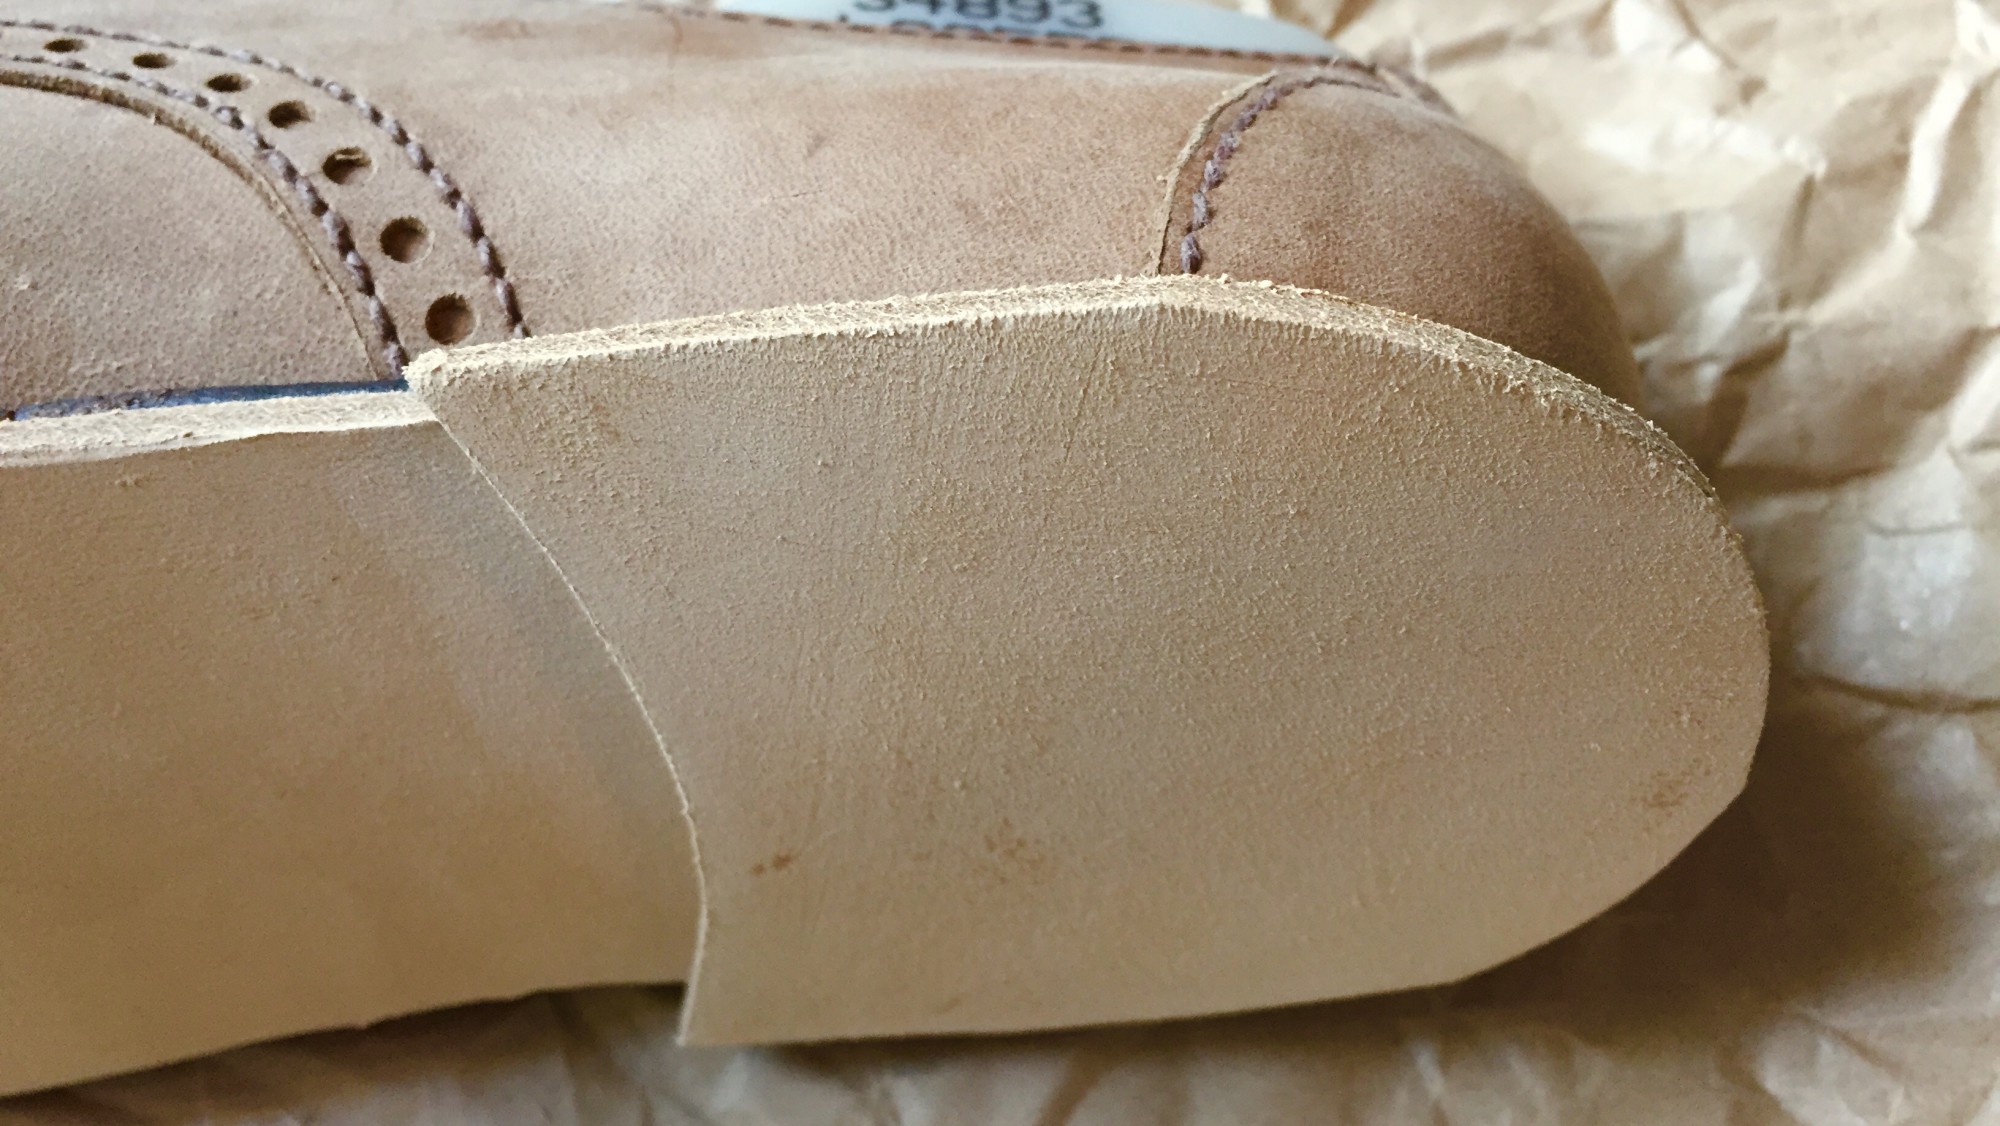
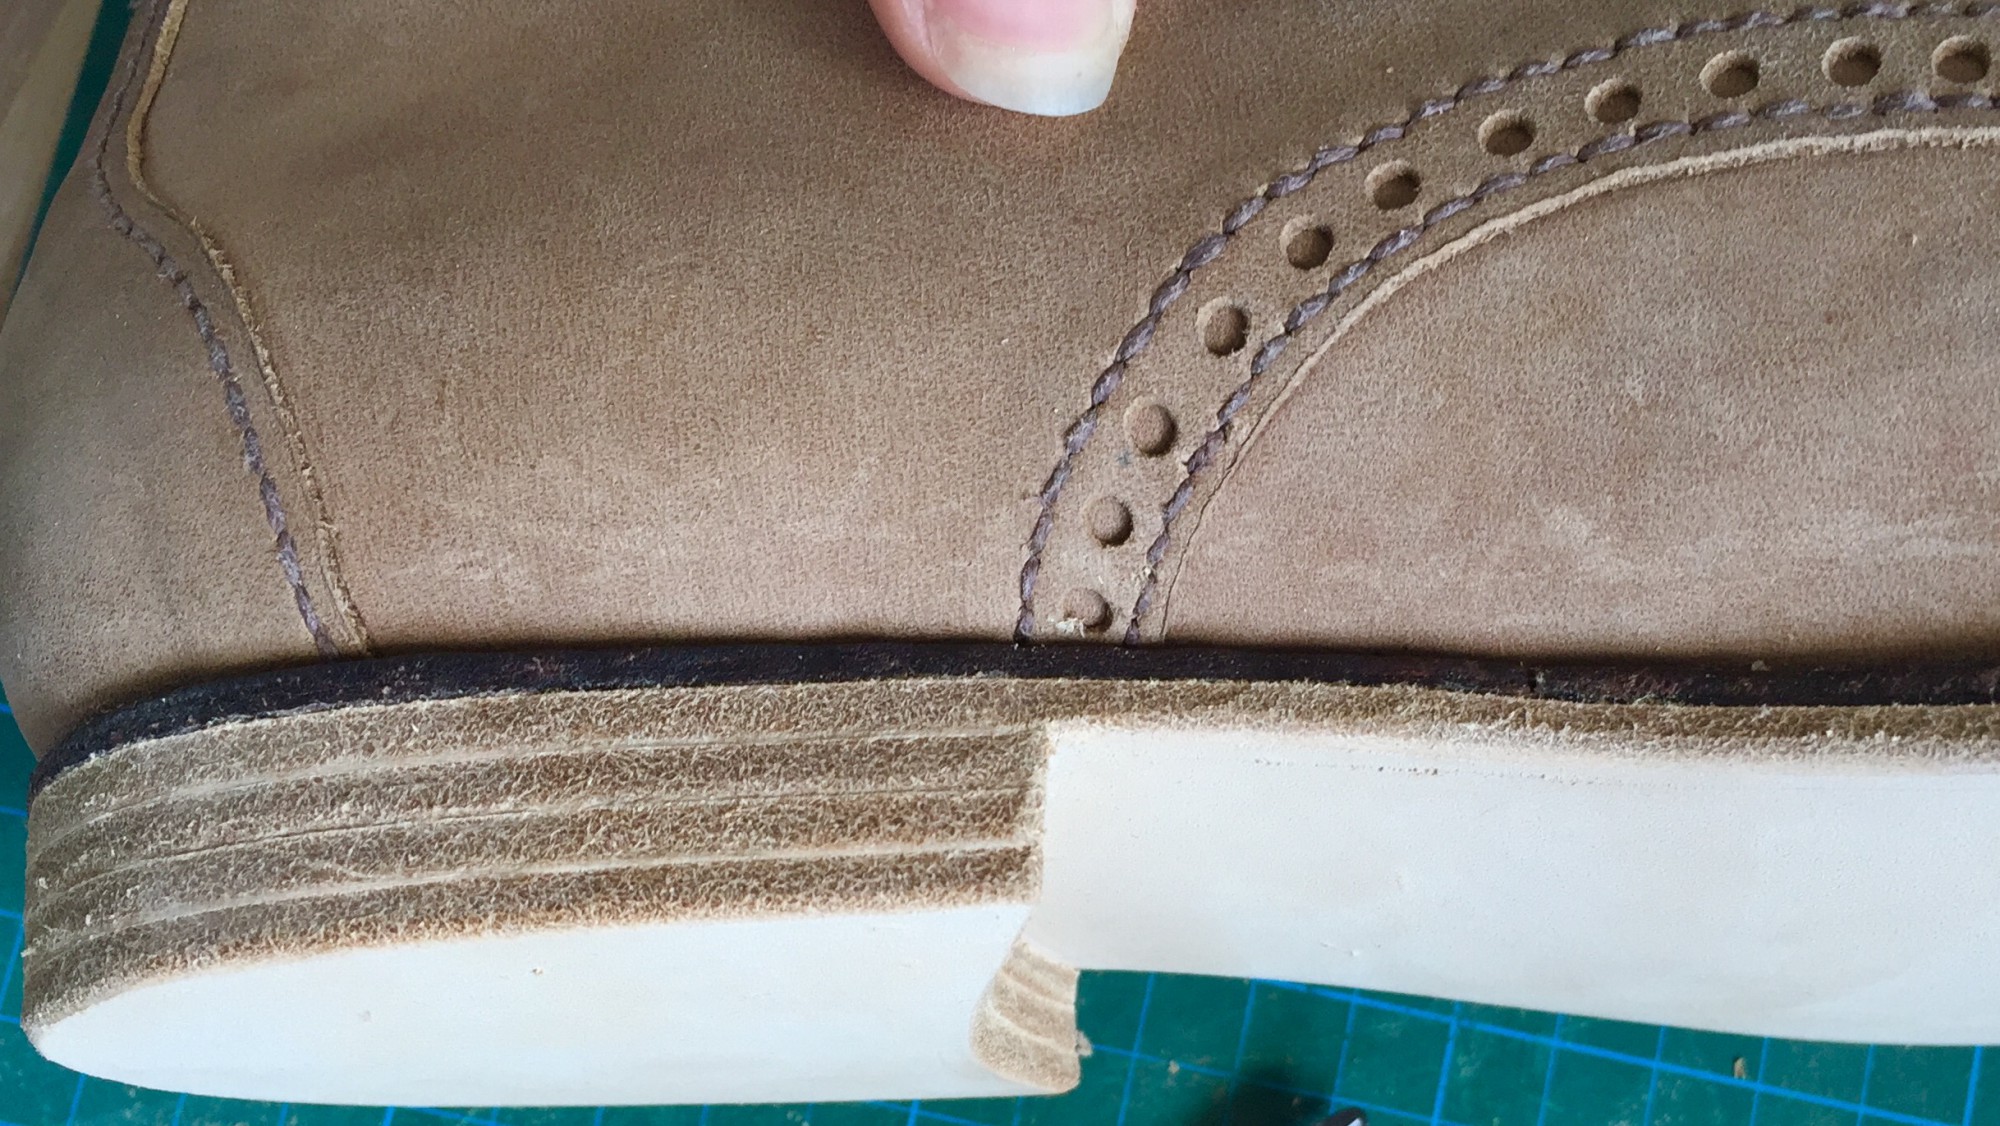
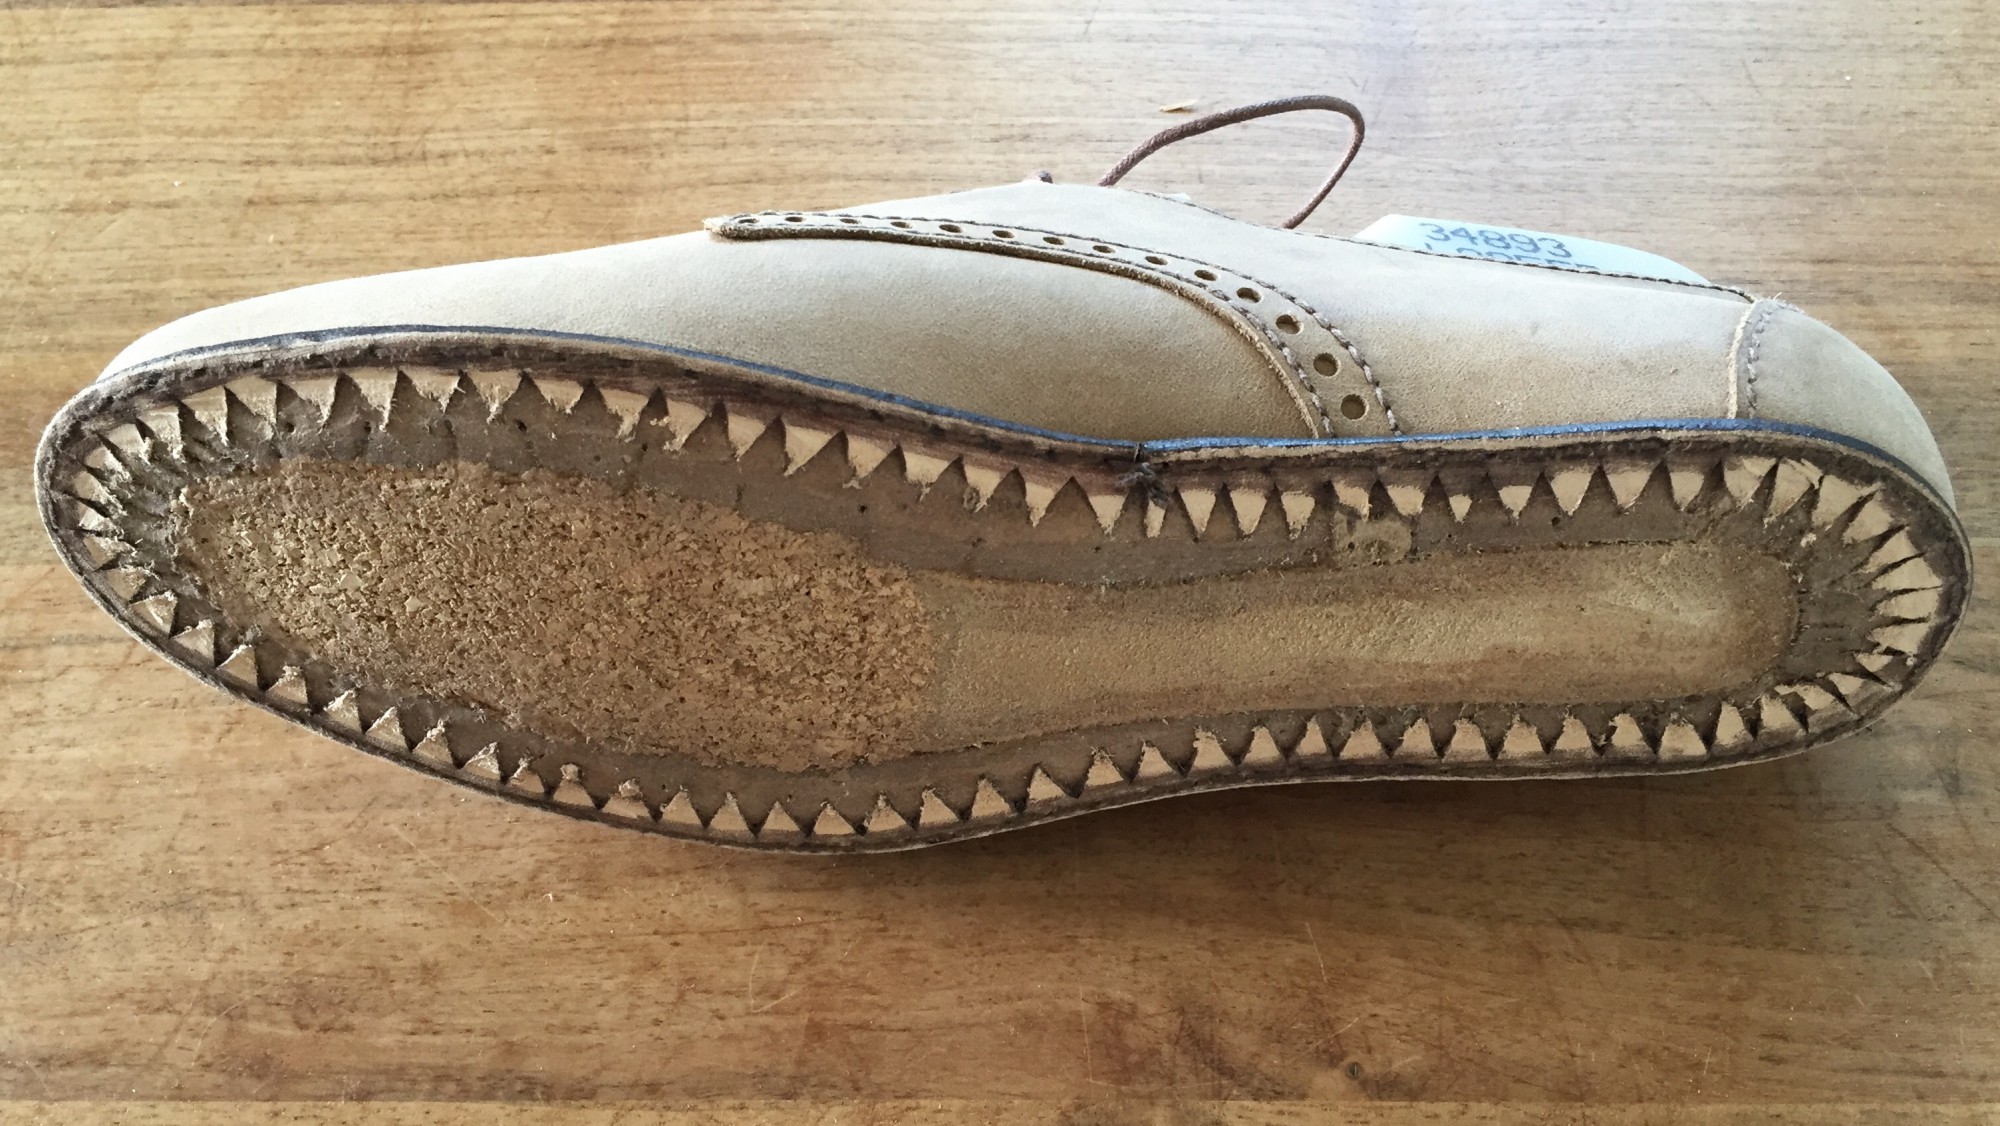
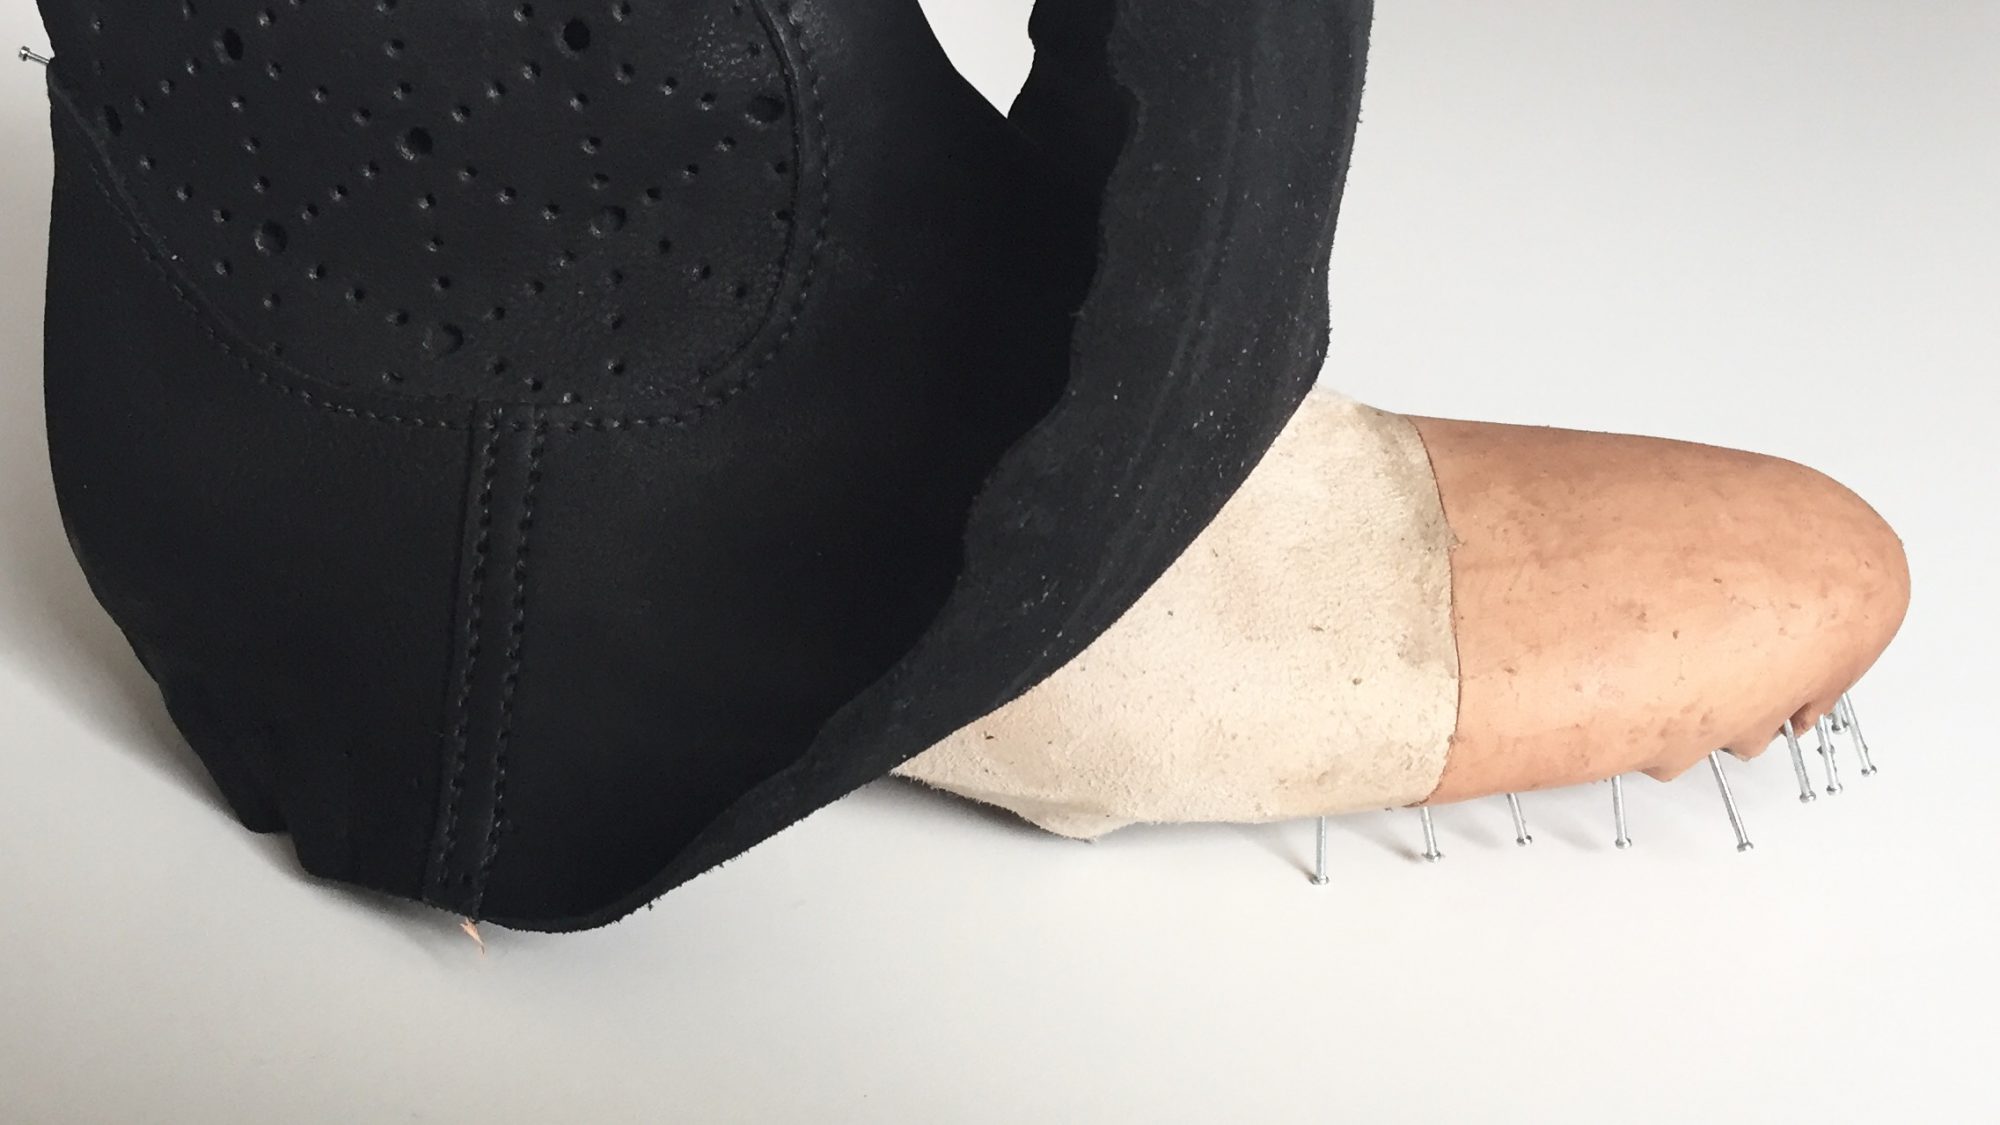
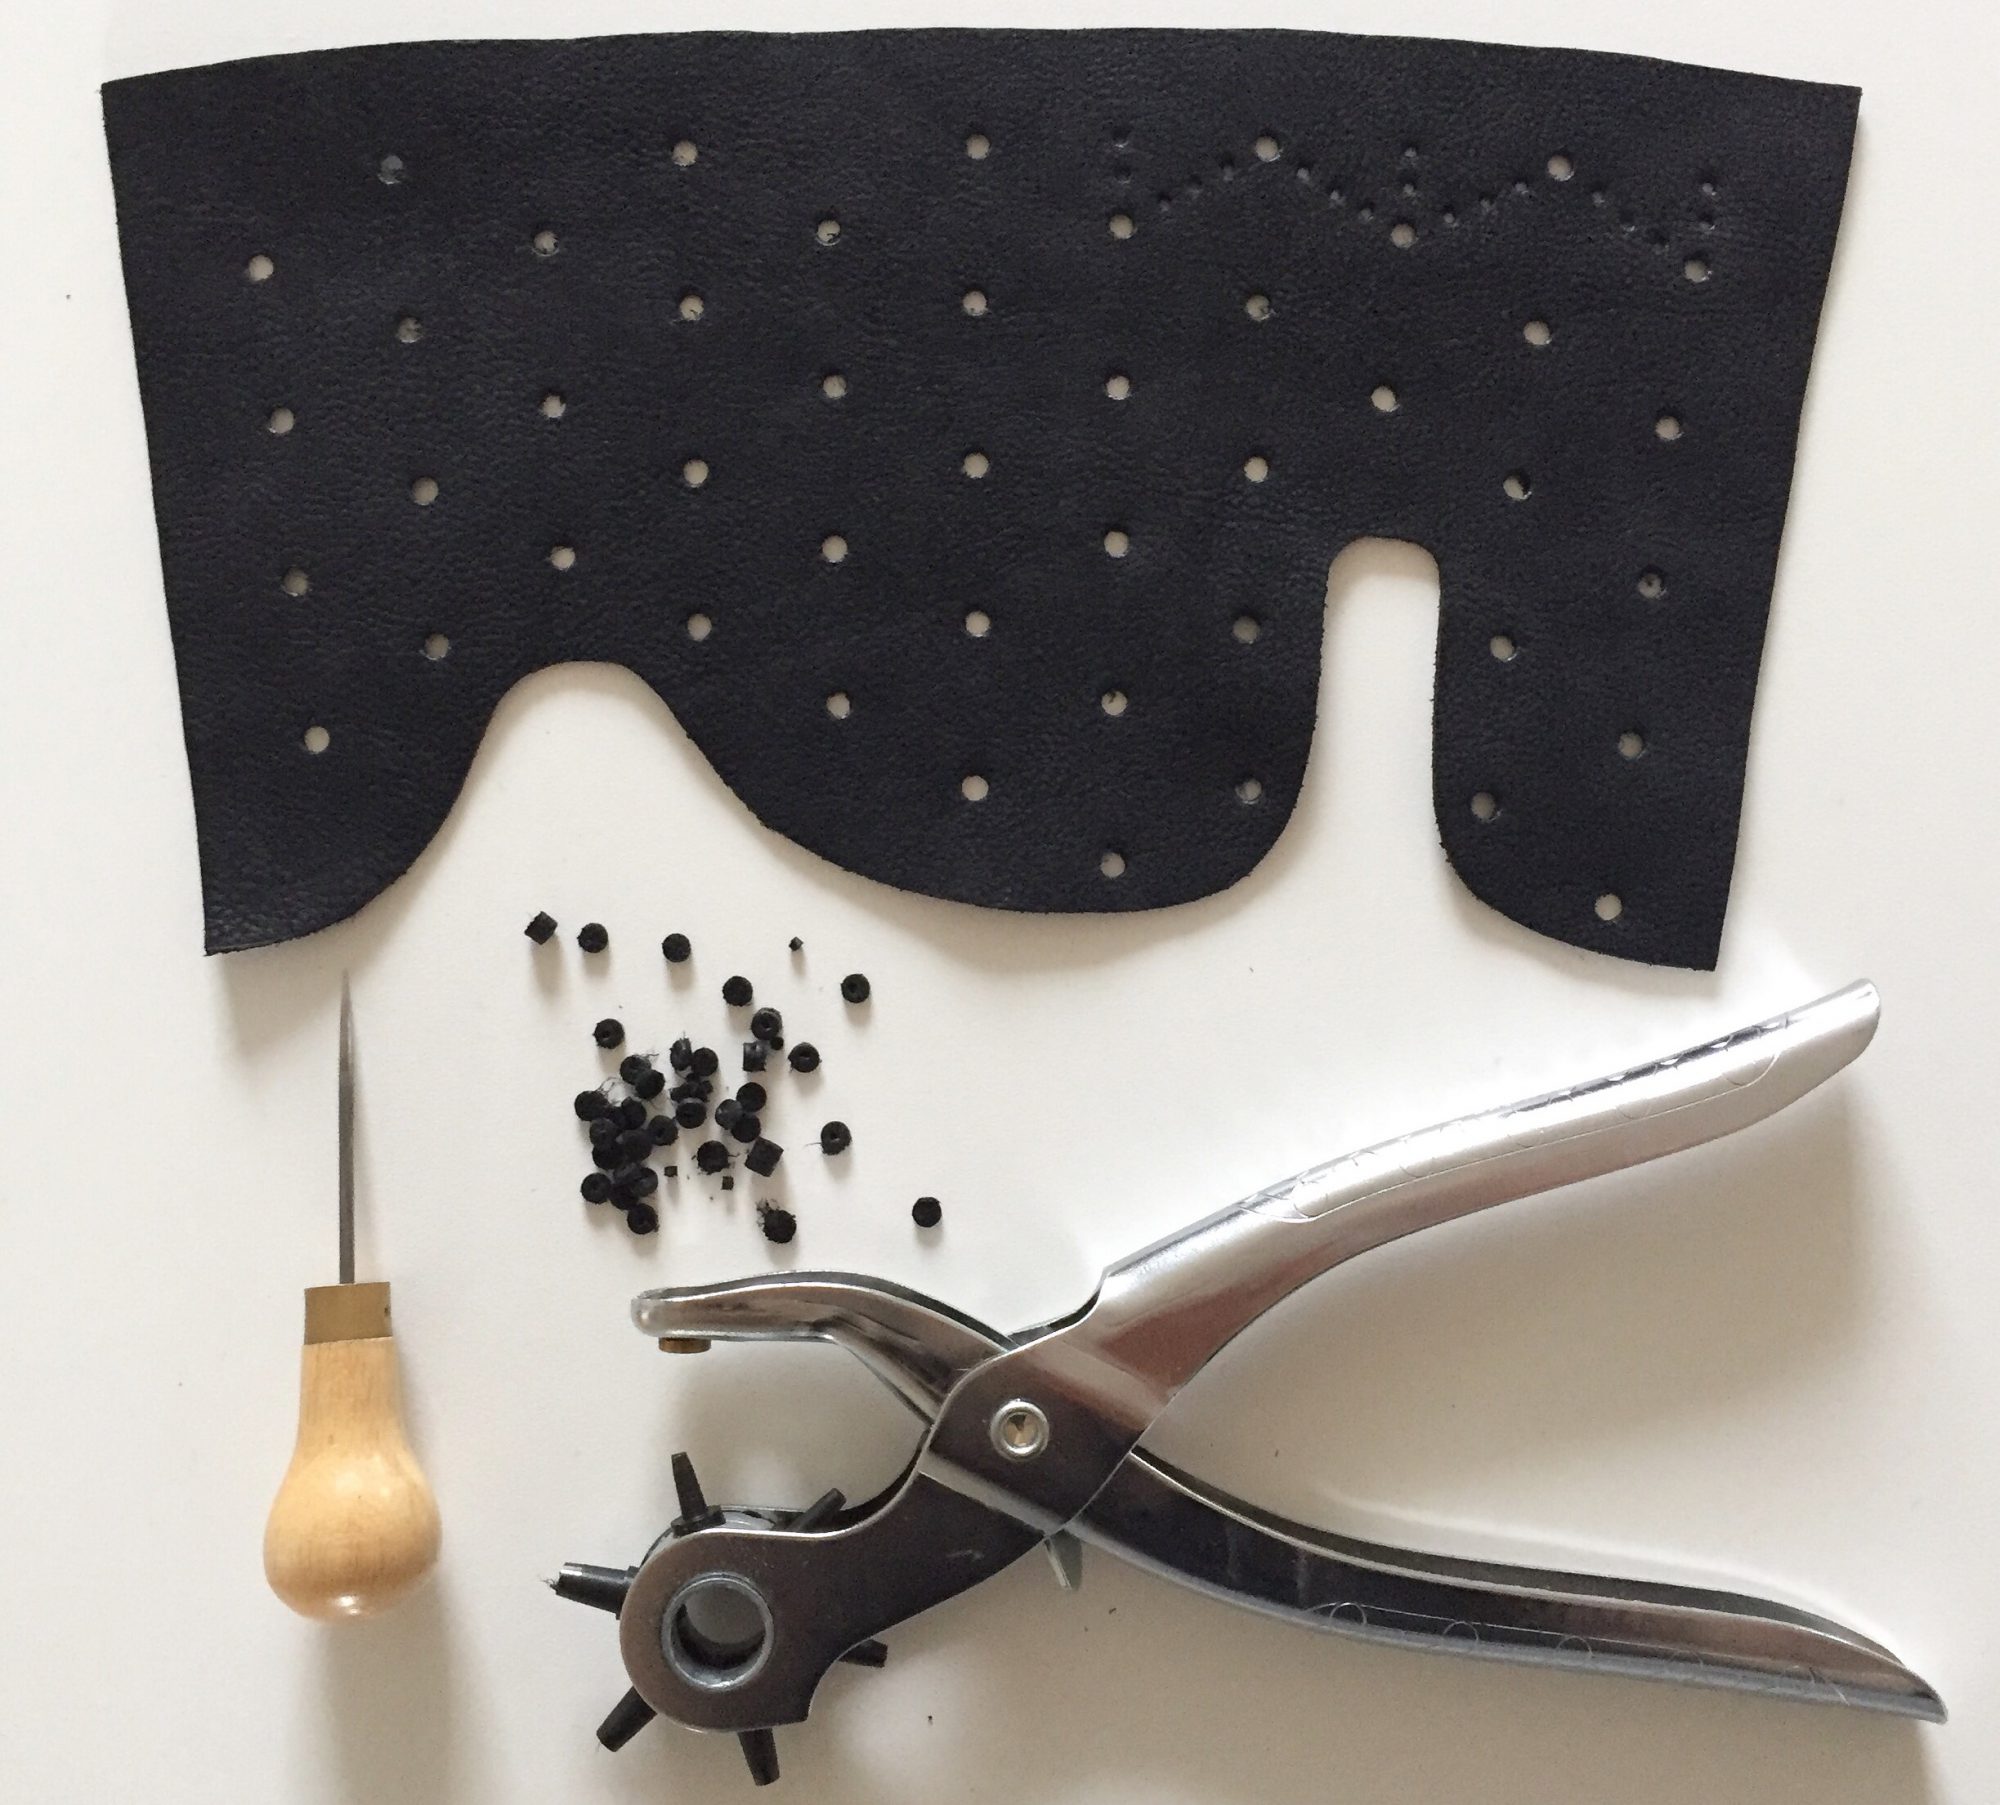
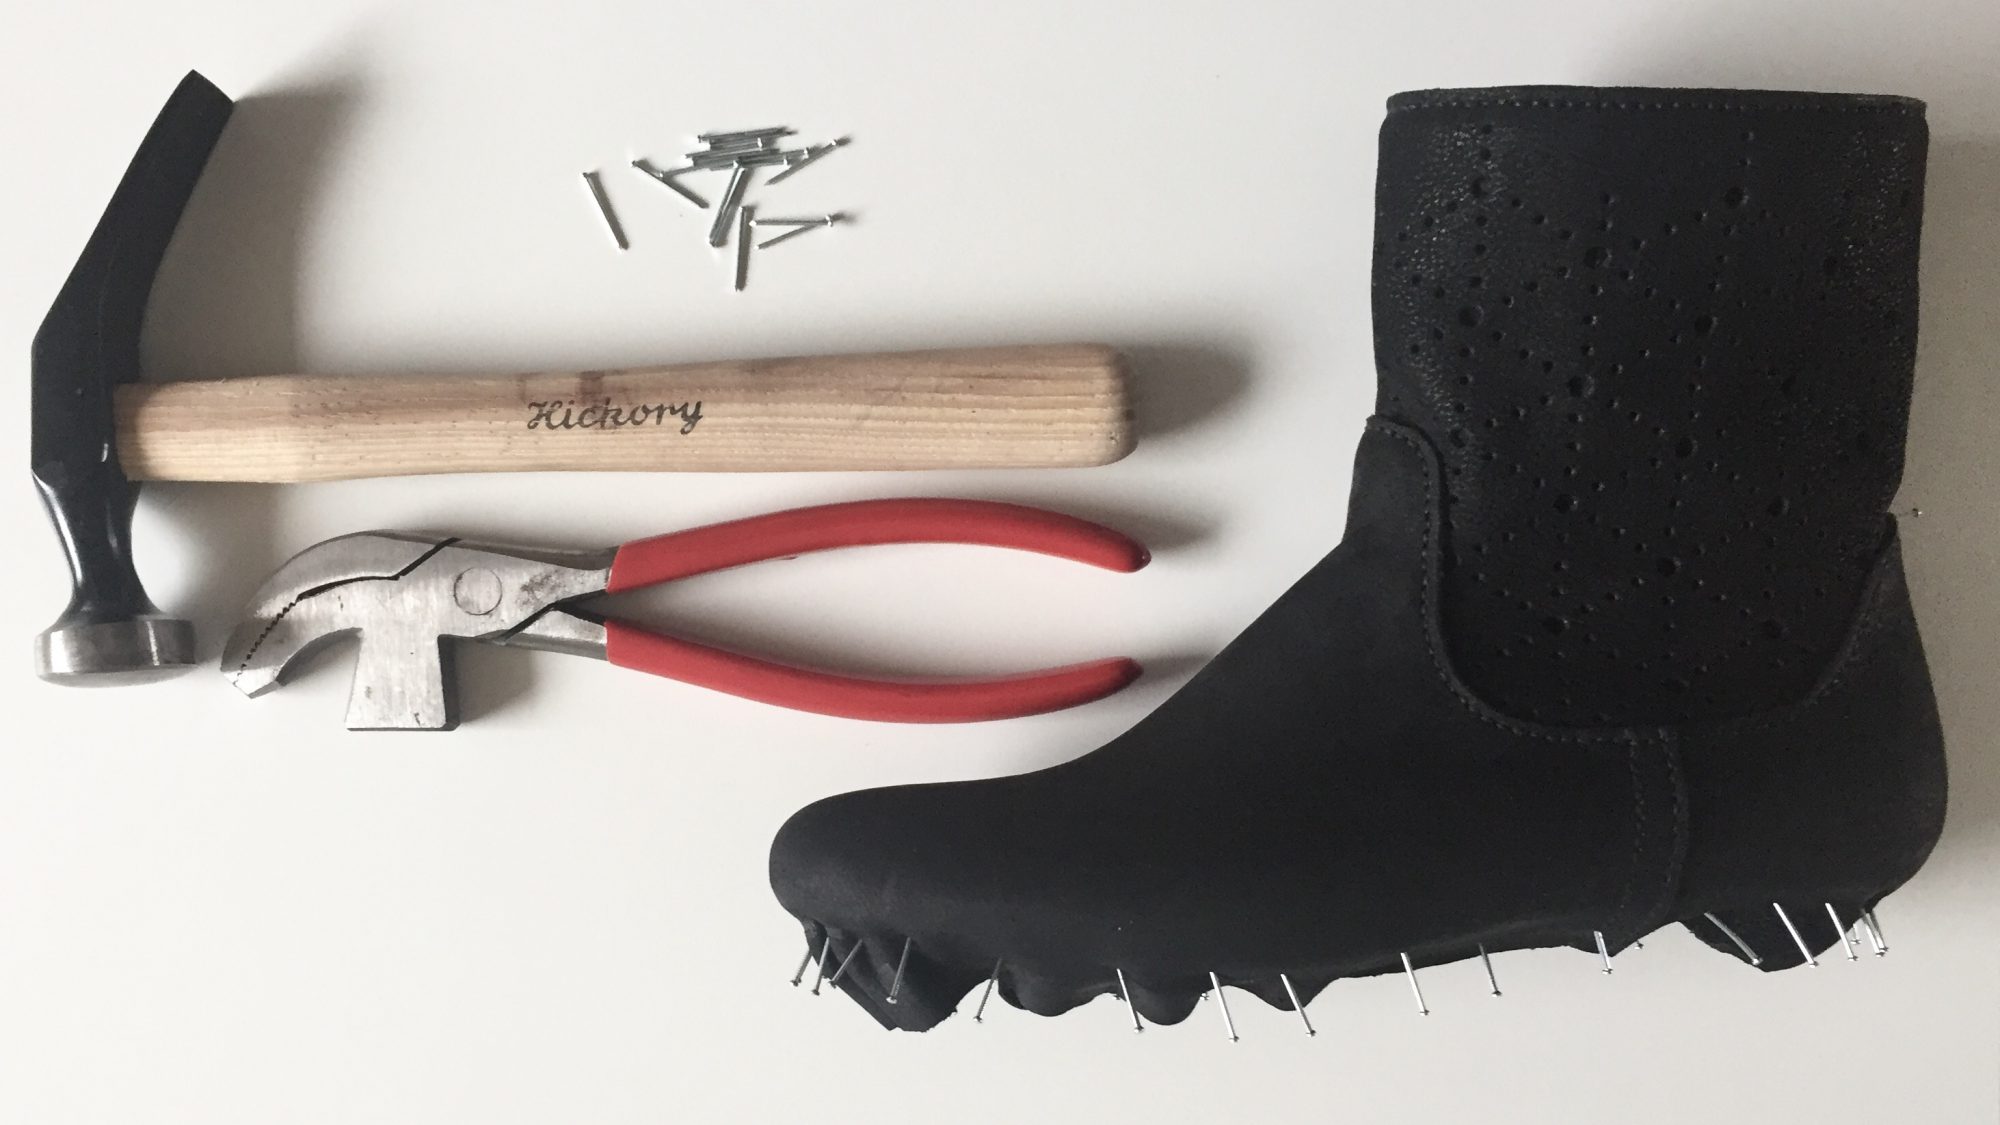
Now that the uppers are sewn and the insoles prepared, it is time for the first lasting. The upper is moistened to make the leather more flexible, and using the shoemakers pliers, it is pulled in shape over the instep, heel and toe. This will be the first and roughest of the lastings, so the nails are placed a little bit further apart than I intend to do on the final. The boots are then left to dry until next day.

Lace Boots - Toe capThe outer leather is carefully pulled back while the lining stays on the last. Placement marks for the toe caps are made on the lining. The toe cap is made of vegetable tanned leather, skived to nothing at the edges and sanded down with sand paper. It is soaked in homemade shoemakers paste and lasted on the toe. Finally it is compressed with a shoemakers hammer to obtain stability of the leather.

Lace Boots - Toe capHere is the lasted toe cap, now left to dry before the next process. The heel cap is done in the same way.

Lace Boots – Preparing insole

Lace Boots - Preparing insole
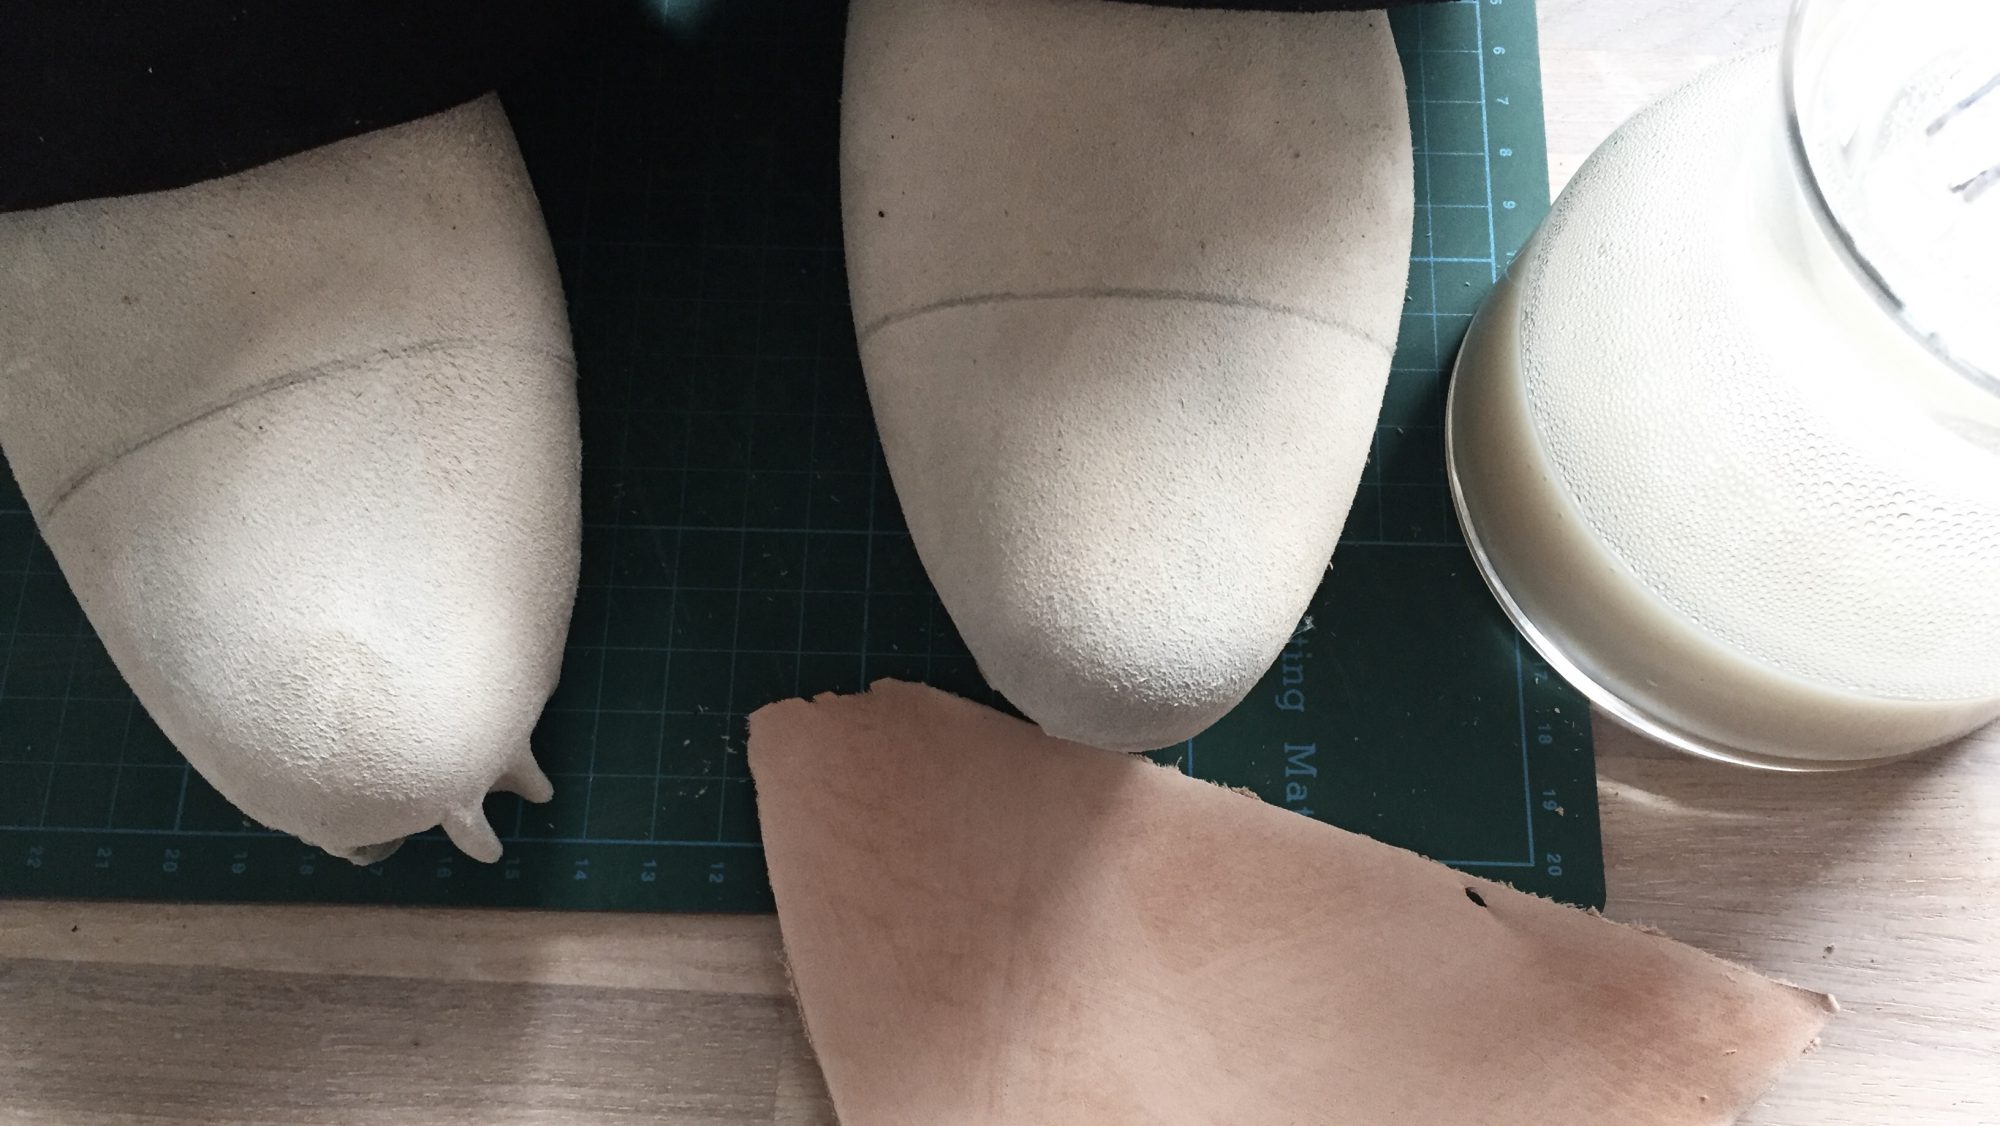
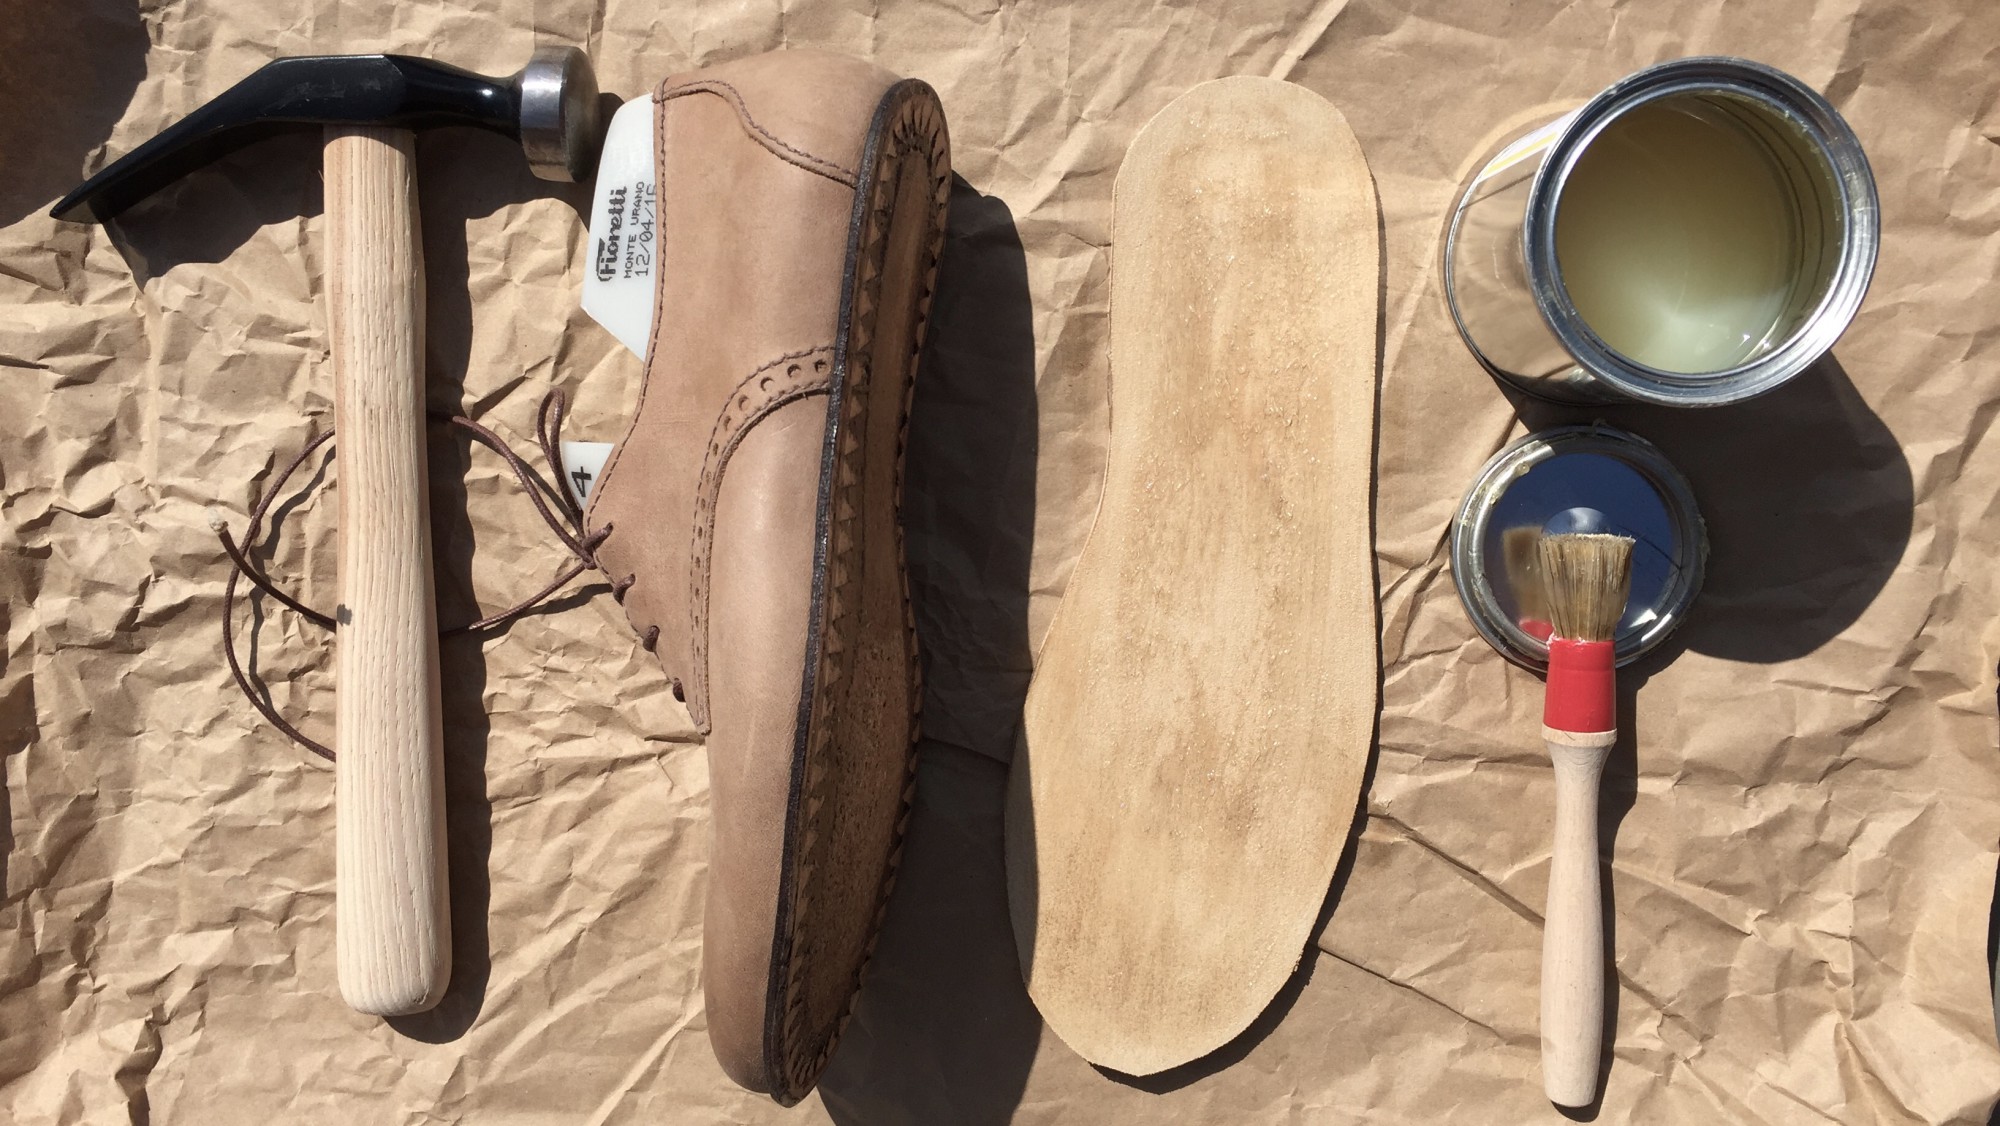
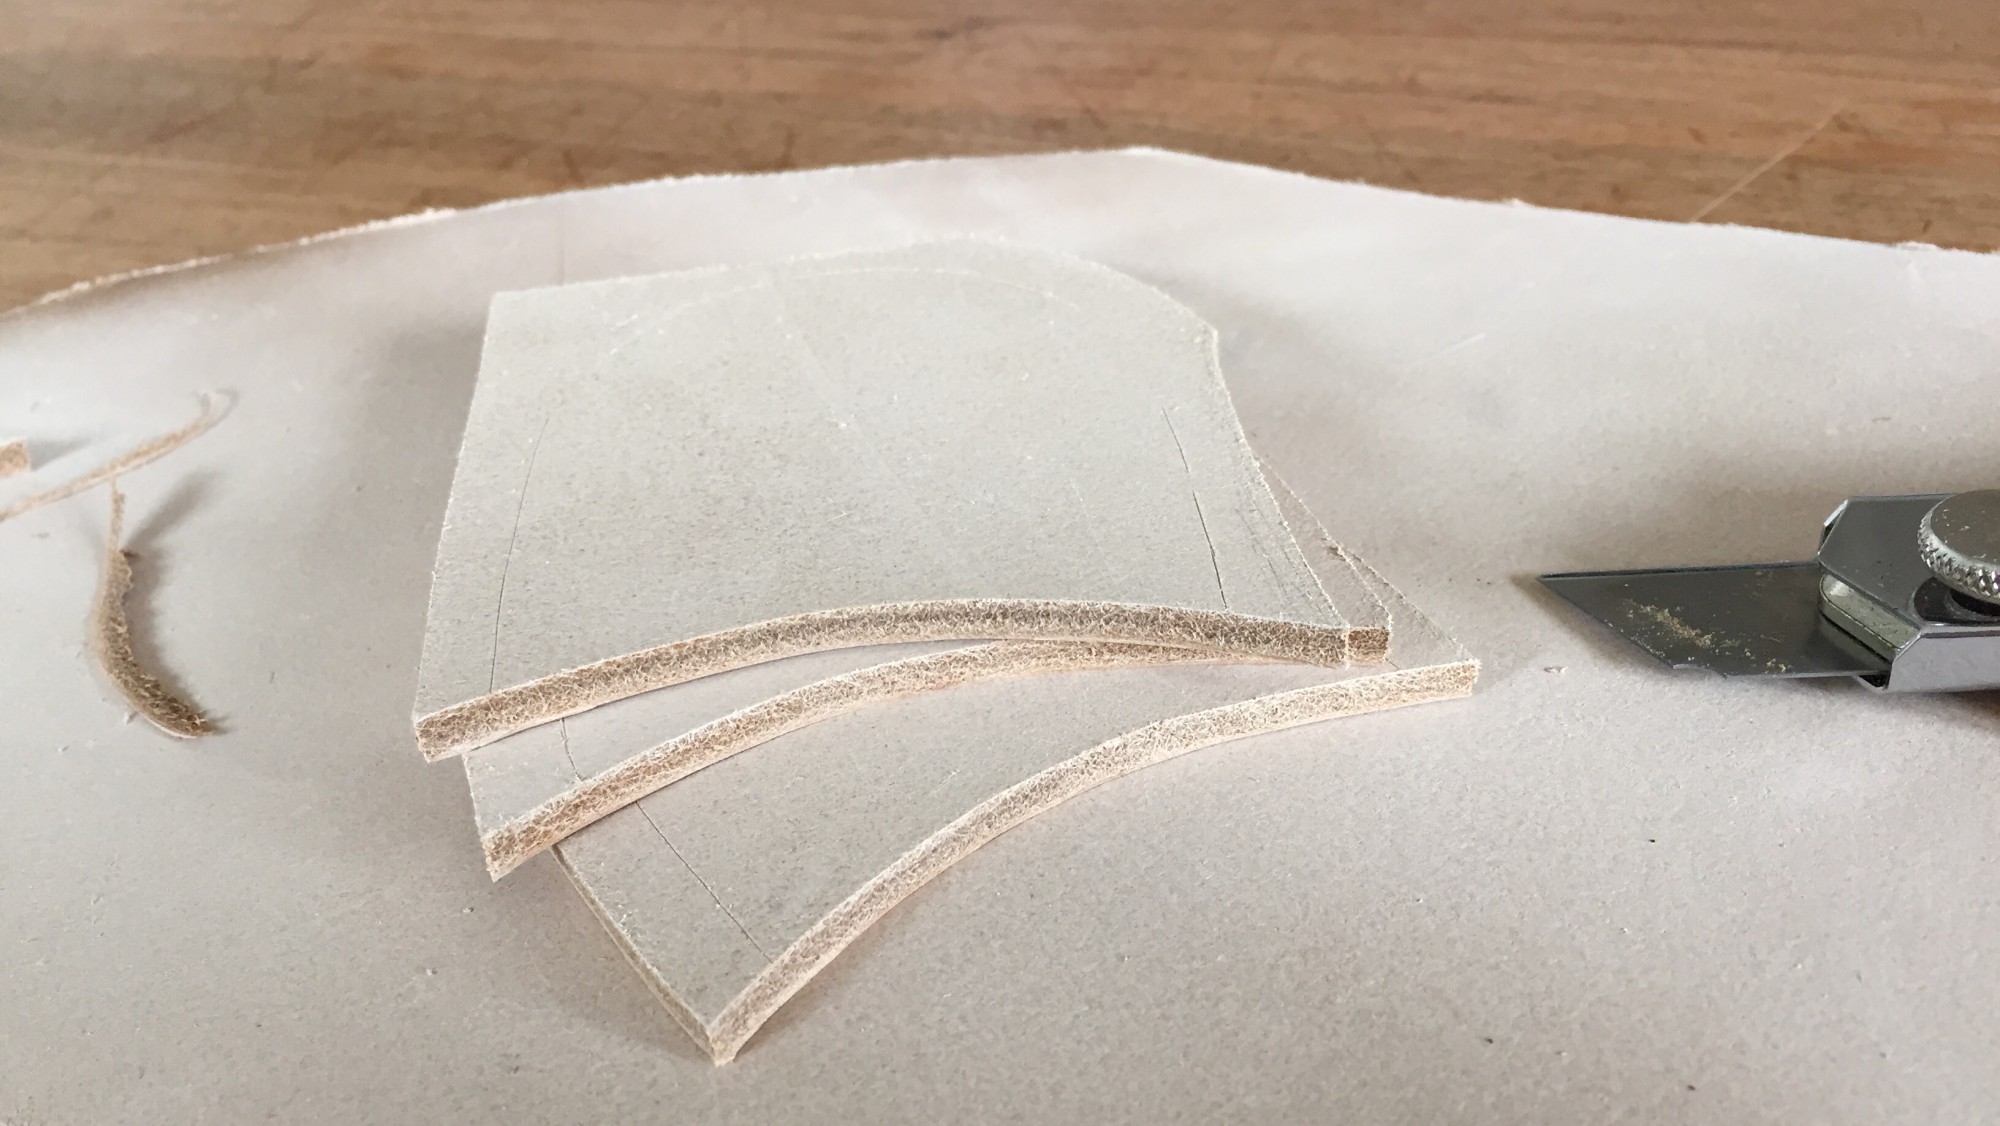
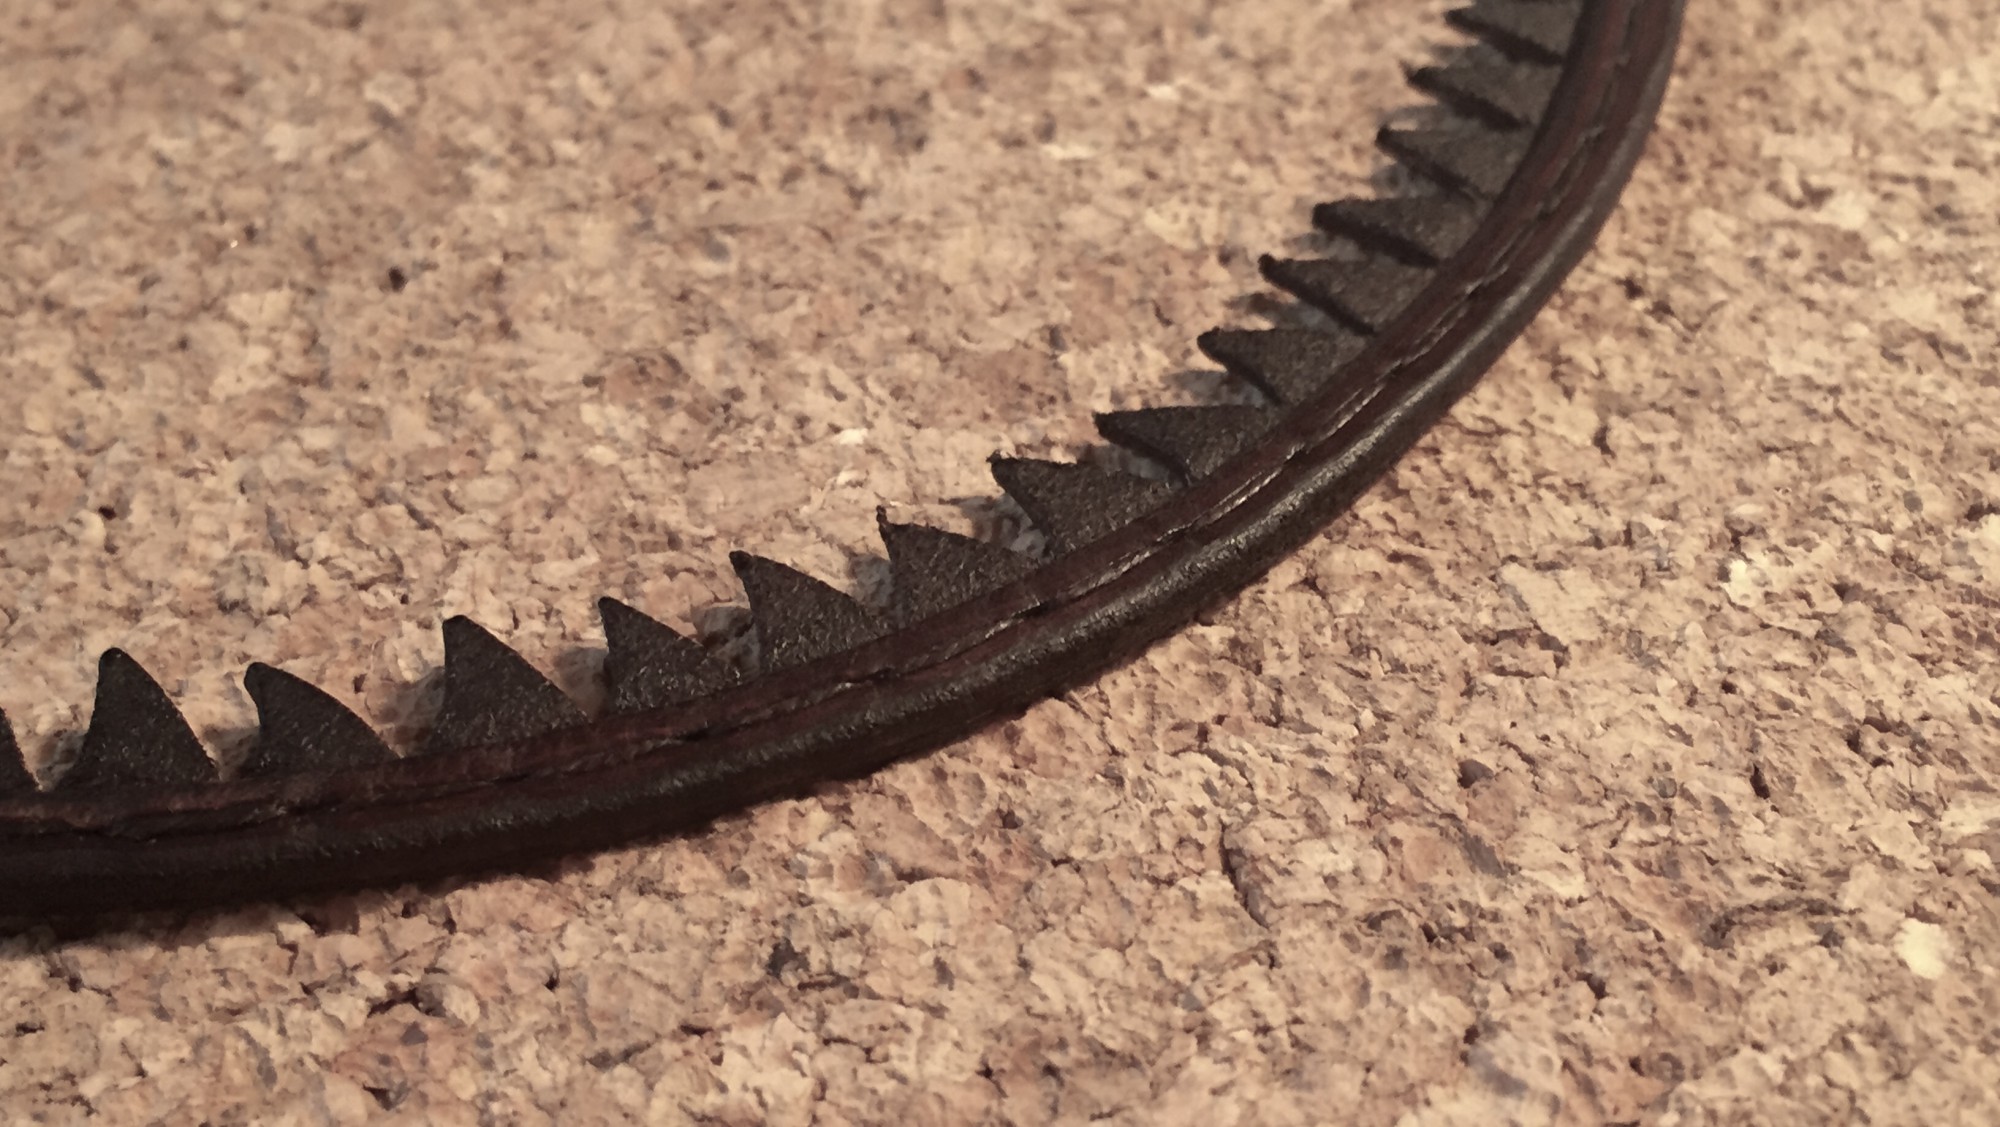
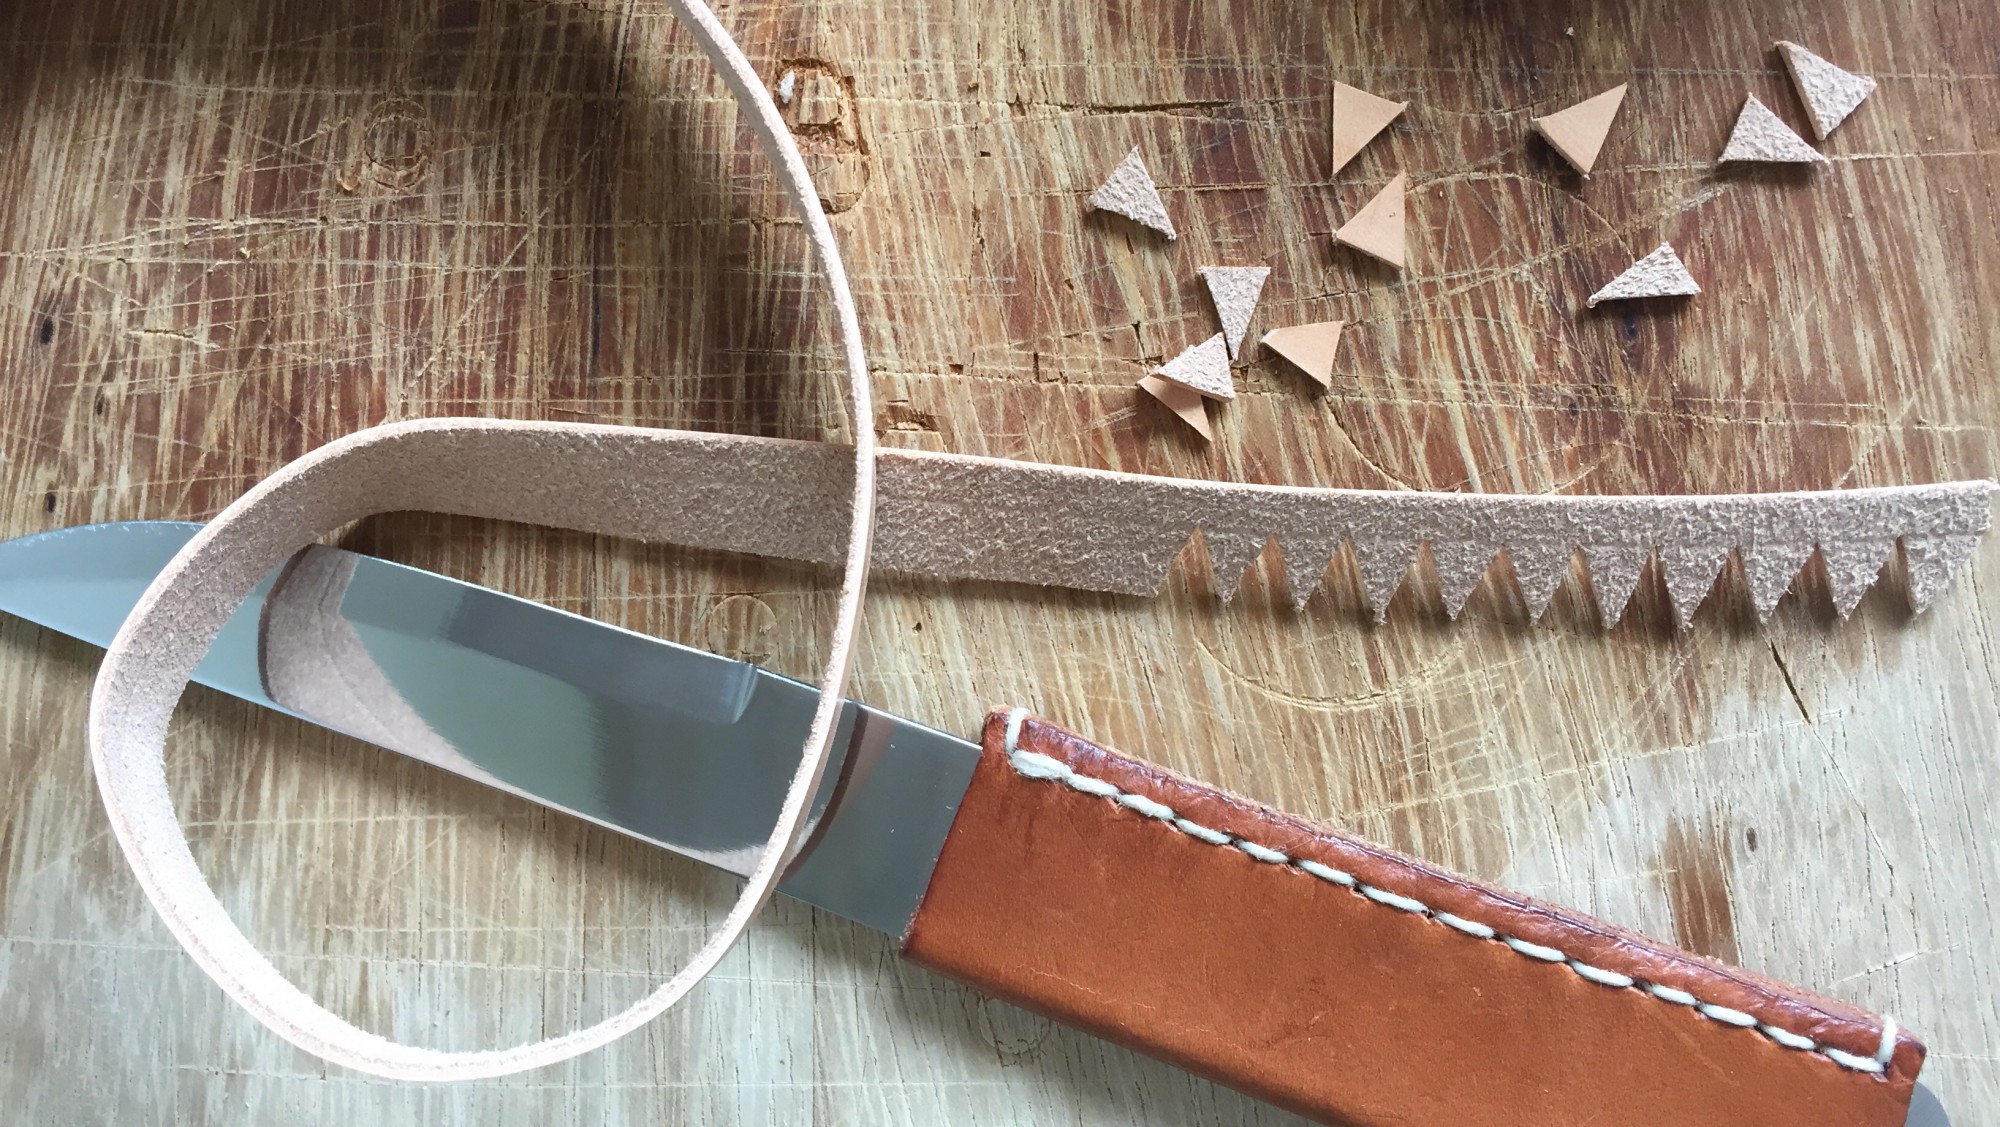
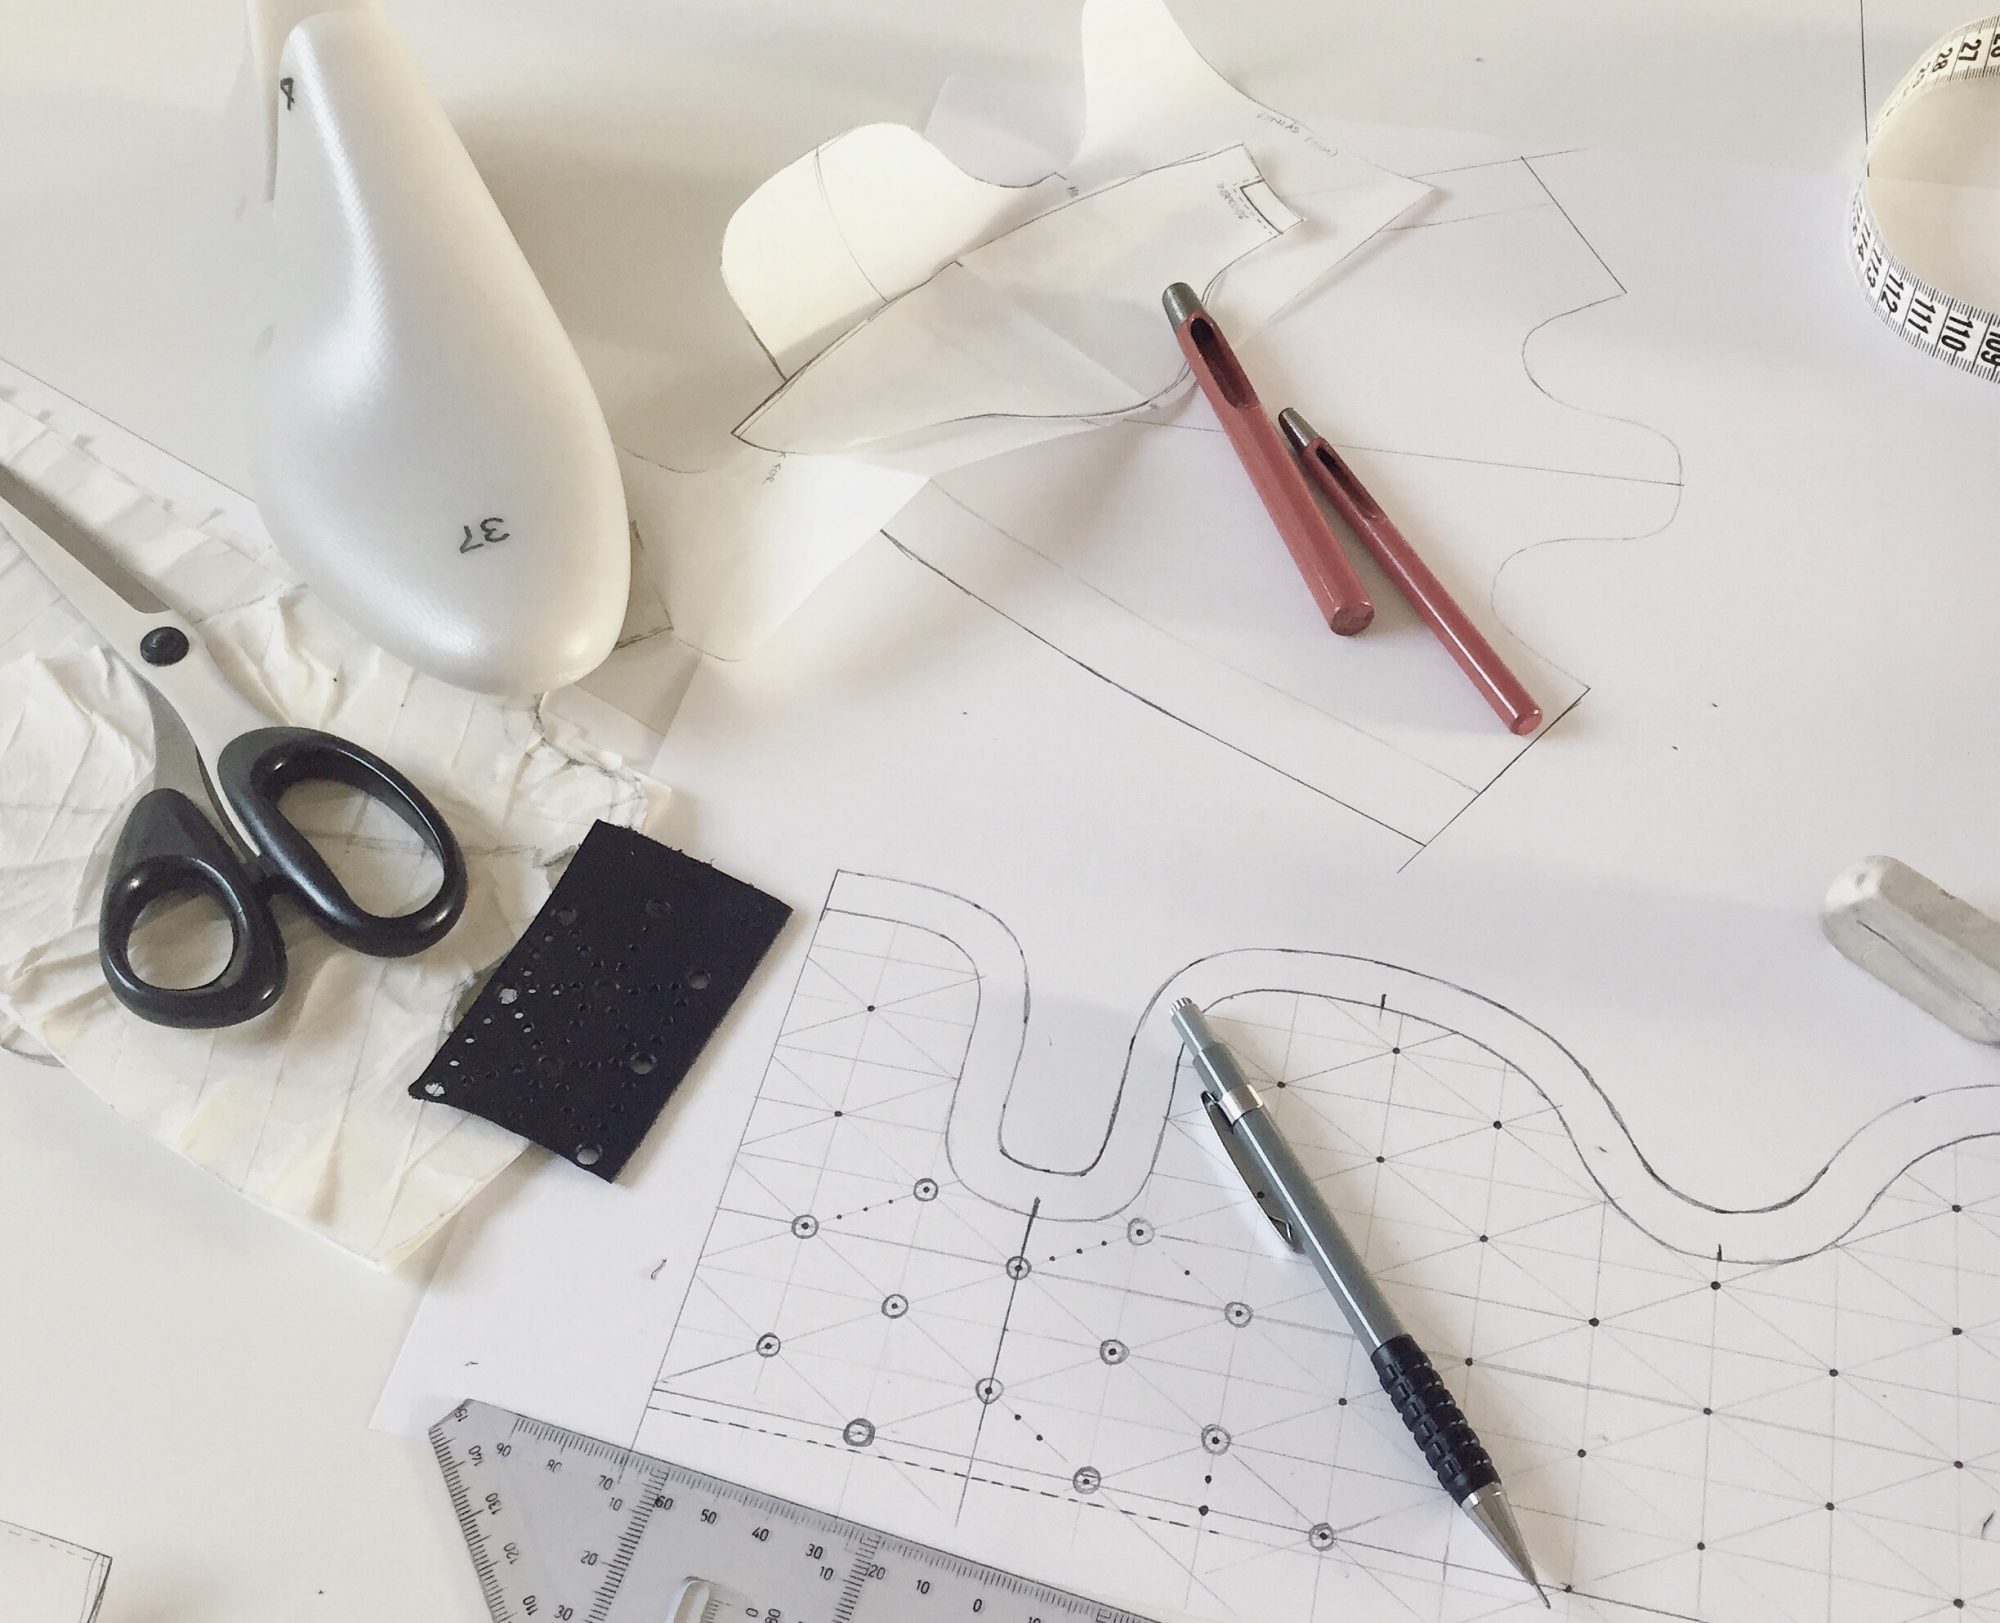
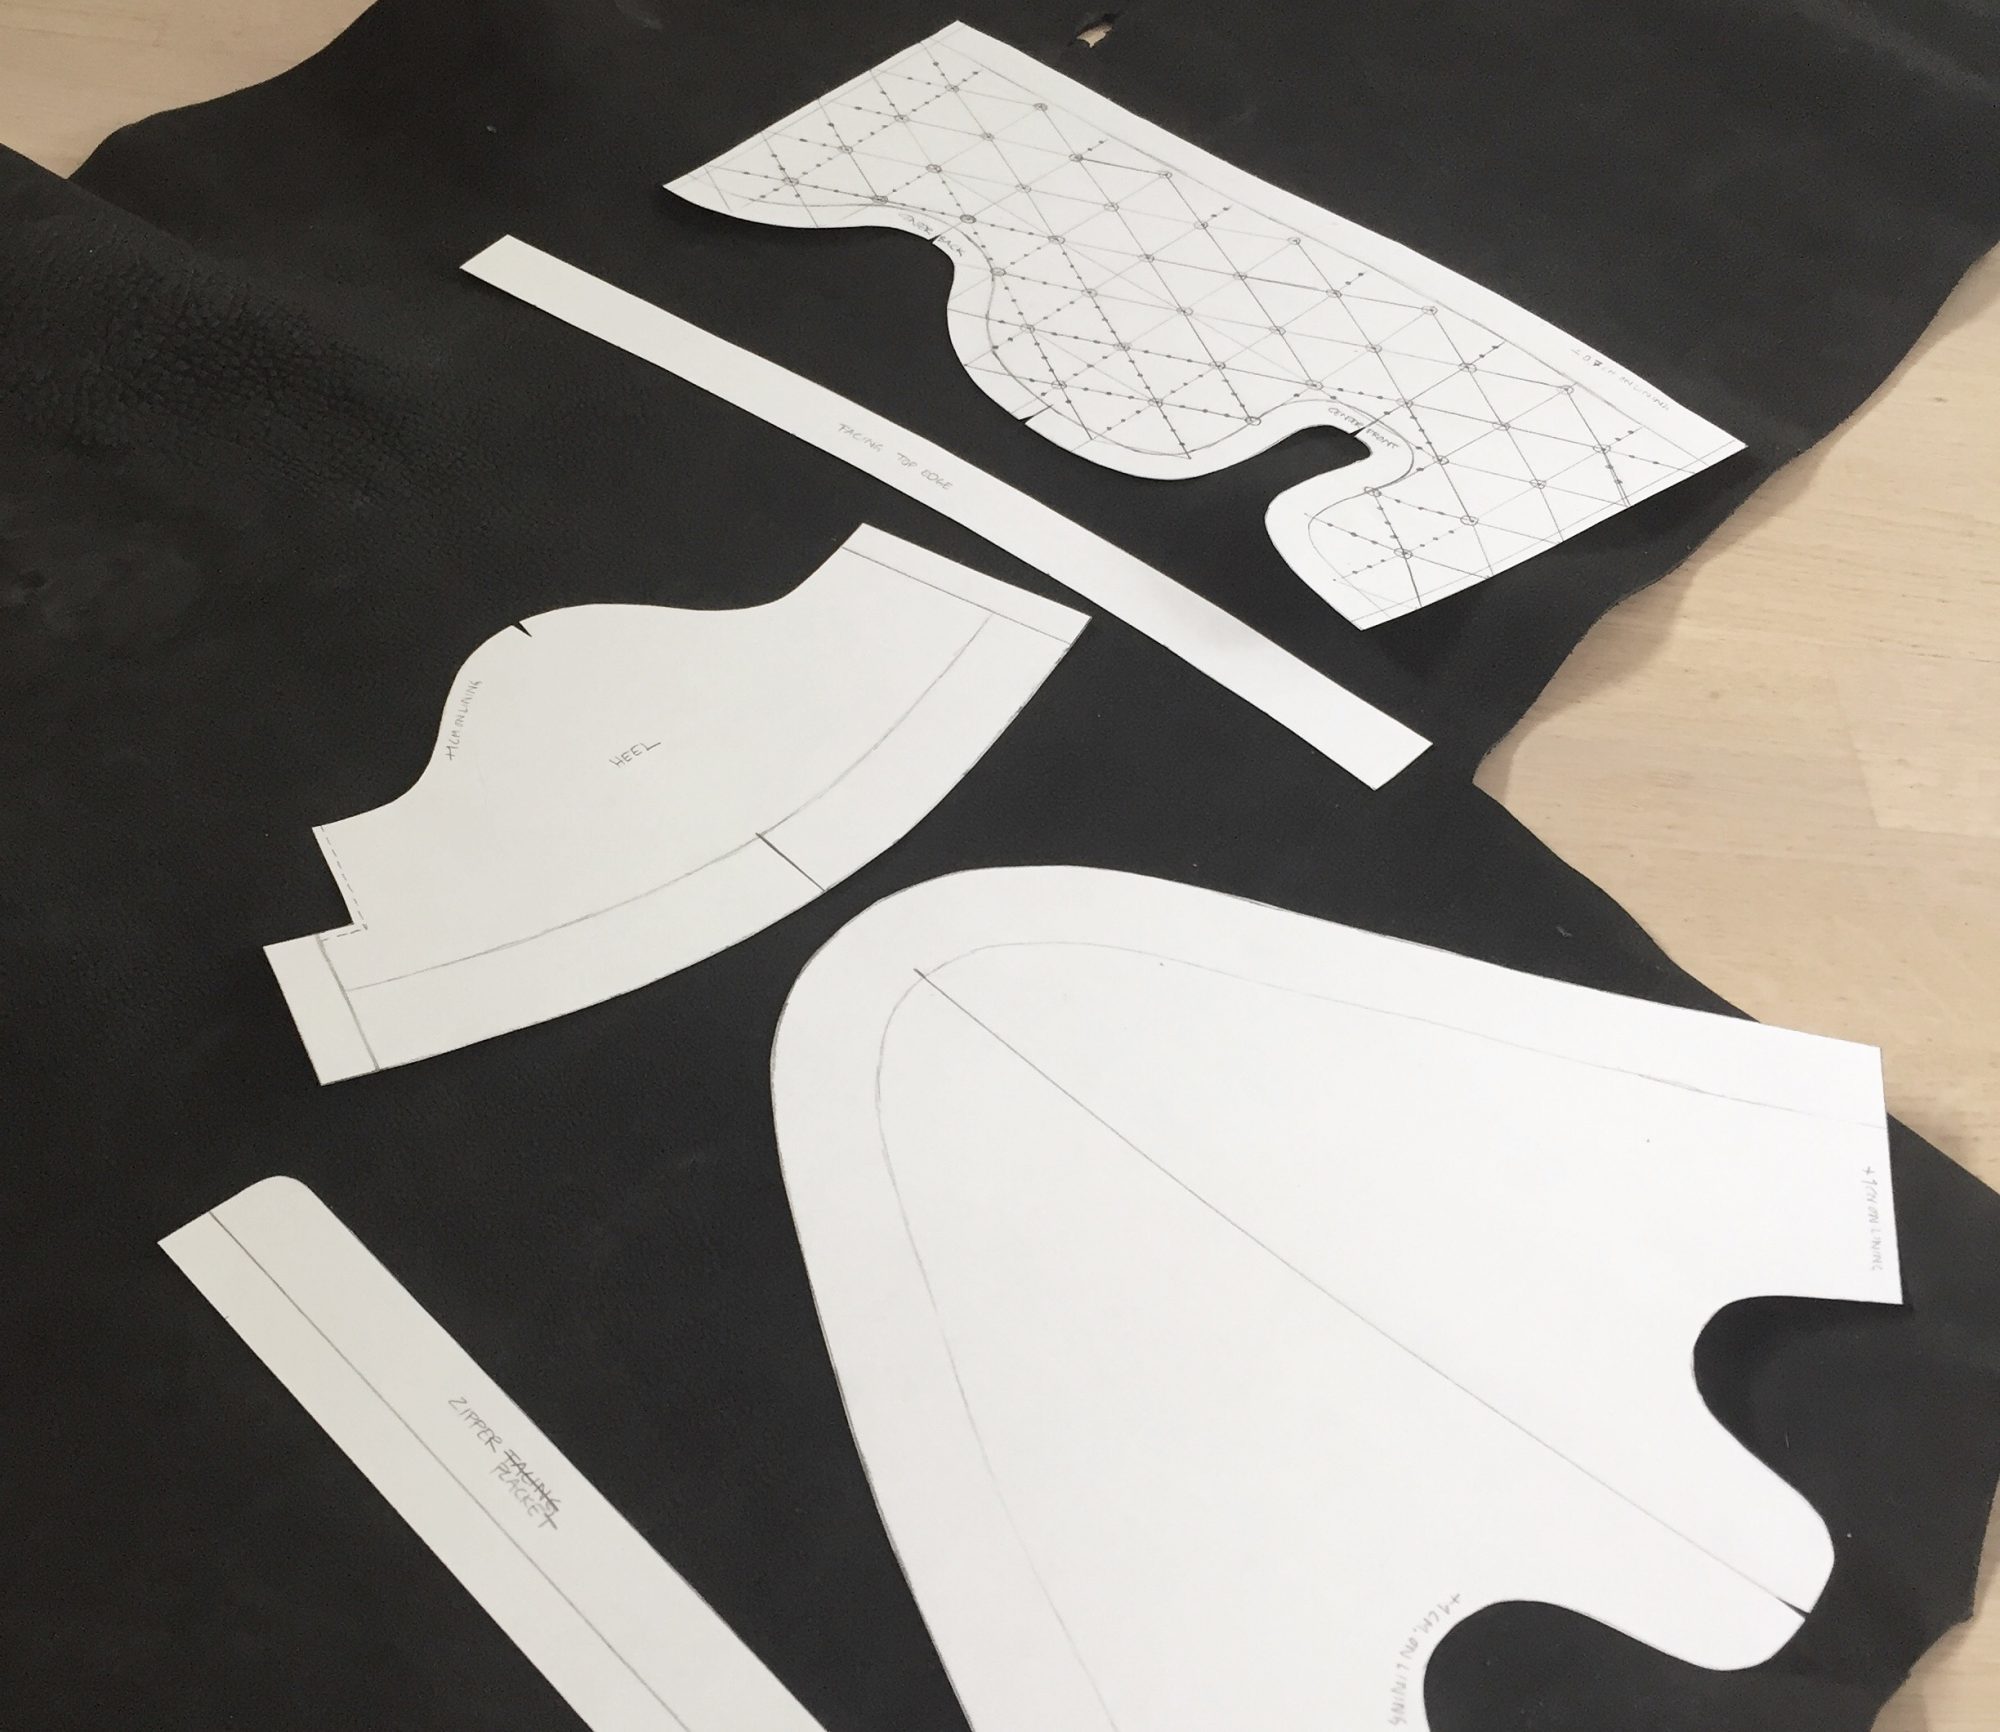
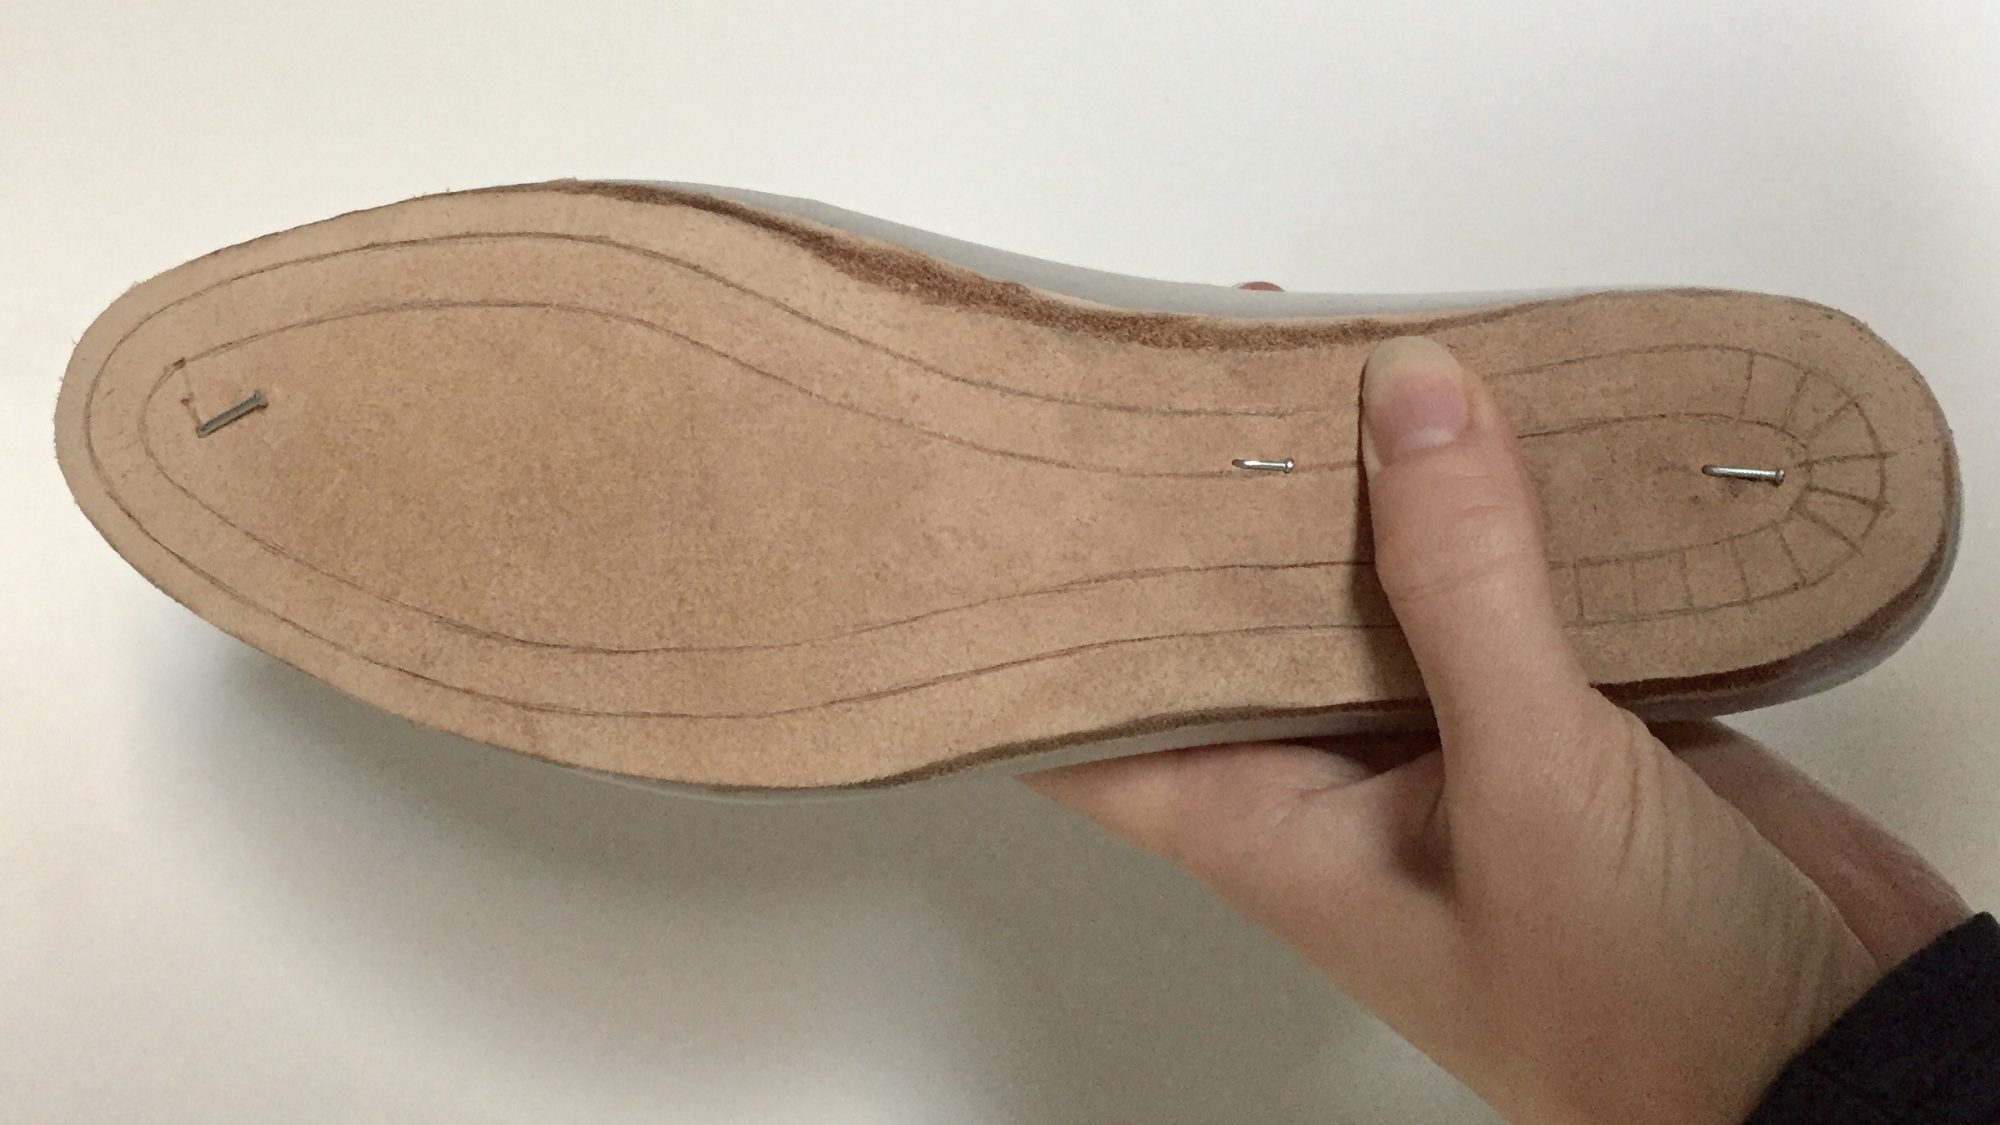
My first pair of shoes were made with a cemented rand tape and sole, which was a fairly big challenge, not having received any kind of introduction to shoemaking. This time I will obviously push my own limits once again, trying out the much more durable welted construction. A template is sketched onto the bottom of the insole. This is cut out as shown in the picture below, leaving an edge for sewing on the upper.

Lace Boots - Preparing insoleThen holes for sewing are made with a curved awl. It takes a very sharp awl, a lot of bees wax and hard work. Halfway through the first sole, I was so unlucky, (read: uncareful) the awl slipped into my own left hand! It gave me a few weeks break from shoemaking and I started thinking of new alternative ways for this task. I just bought a new tool, a Dremel 3000, which I am hoping will do the job of drilling the holes. Besides, it is a very clever tool for many other creative projects on which I promise to make a post or two in the future. First of all, I am hoping it will solve this job for me, maybe in combination with the curved awl…

Lace boots – Stitching upper

Lace boots - Stitching upperInden sammensyning limes delene sammen. Her ligger de og tørrer, holdt sammen med klemmer.


The pieces are glued together before stitching. Here it is left to dry, fixed with clamps.

Lace boots - Stitching upperLynlåsen, yderlæderet, underfald og foer syes sammen med én enkel søm.


The zipper, outer leather, facing and lining are stiched together in one single stitch.

Lace boots - Stitching upperTil sidst syes overkanten sammen med belægning og foer. Støvleoverdelen er nu klar til at blive læstet.


Finally the upper edge is stitched together with the facing and lining. The boot uppers are ready to be lasted.

Lace boots – Design

Lace boots - DesignSå har jeg kastet mig ud i et nyt skomagerprojekt. Denne gang et par korte støvler med lynlås. På skaftet vil jeg lave et blondelignende hulmønster. Herover ses en skitse fra min designproces.


I am off to a new shoemaking project. This time it is a pair of short zipper boots. On the shaft I will be making a lacelike brogue pattern. Above is a sketch from my design process.

Lace boots - DesignLæsten er tapet, mønsterdelene optegnet og skåret og her arbejder jeg med placering af hulmønsteret. For en mere detaljeret beskrivelse af udviklingen af et skomønster, kan du se dette tidligere indlæg.


The last has been taped, the pattern is drawn on and cut out. Here I am working on the placement of the hole pattern. For a more detailed description on the development of a shoe pattern, see this former post.

Lace boots - DesignMønsterdelene lægges på skindet og skæres ud. Jeg har valgt et lækkert, kraftigt men blødt sort koskind med masser af struktur og charmerende uregelmæssigheder.


The pieces are placed on the hide and cut out. For these boots I have chosen a nice, heavy yet soft black cow leather with lots of grain structure and charming irregularities.

Lace boots - DesignHulmønsteret udstanses… et noget langvarigt projekt, men jeg tror det bliver anstrengelserne værd.


Lace broguing… a somewhat time consuming task, but I believe it will be worth my while.

Poster frame DIY

Poster frame DIYJeg har netop afsluttet et DIY projekt som jeg har haft i tankerne længe. Et par af mine egne kunstprint har indtil nu været i glas og ramme, men jeg syntes det var lidt en skam at man ikke kunne få fornemmelsen af det lækre matte papir. Løsningen på dette blev disse plakatskinner, som jeg har lavet af egetræ.


I recently finished a DIY project that has been on my mind for a while. A pair of my own art prints have been displayed behind glass up until now. However, I thought it was a shame not to be able to get a feeling of the luxurious matte paper. The solution was these poster frames, made of oak wood.

Poster frame DIY
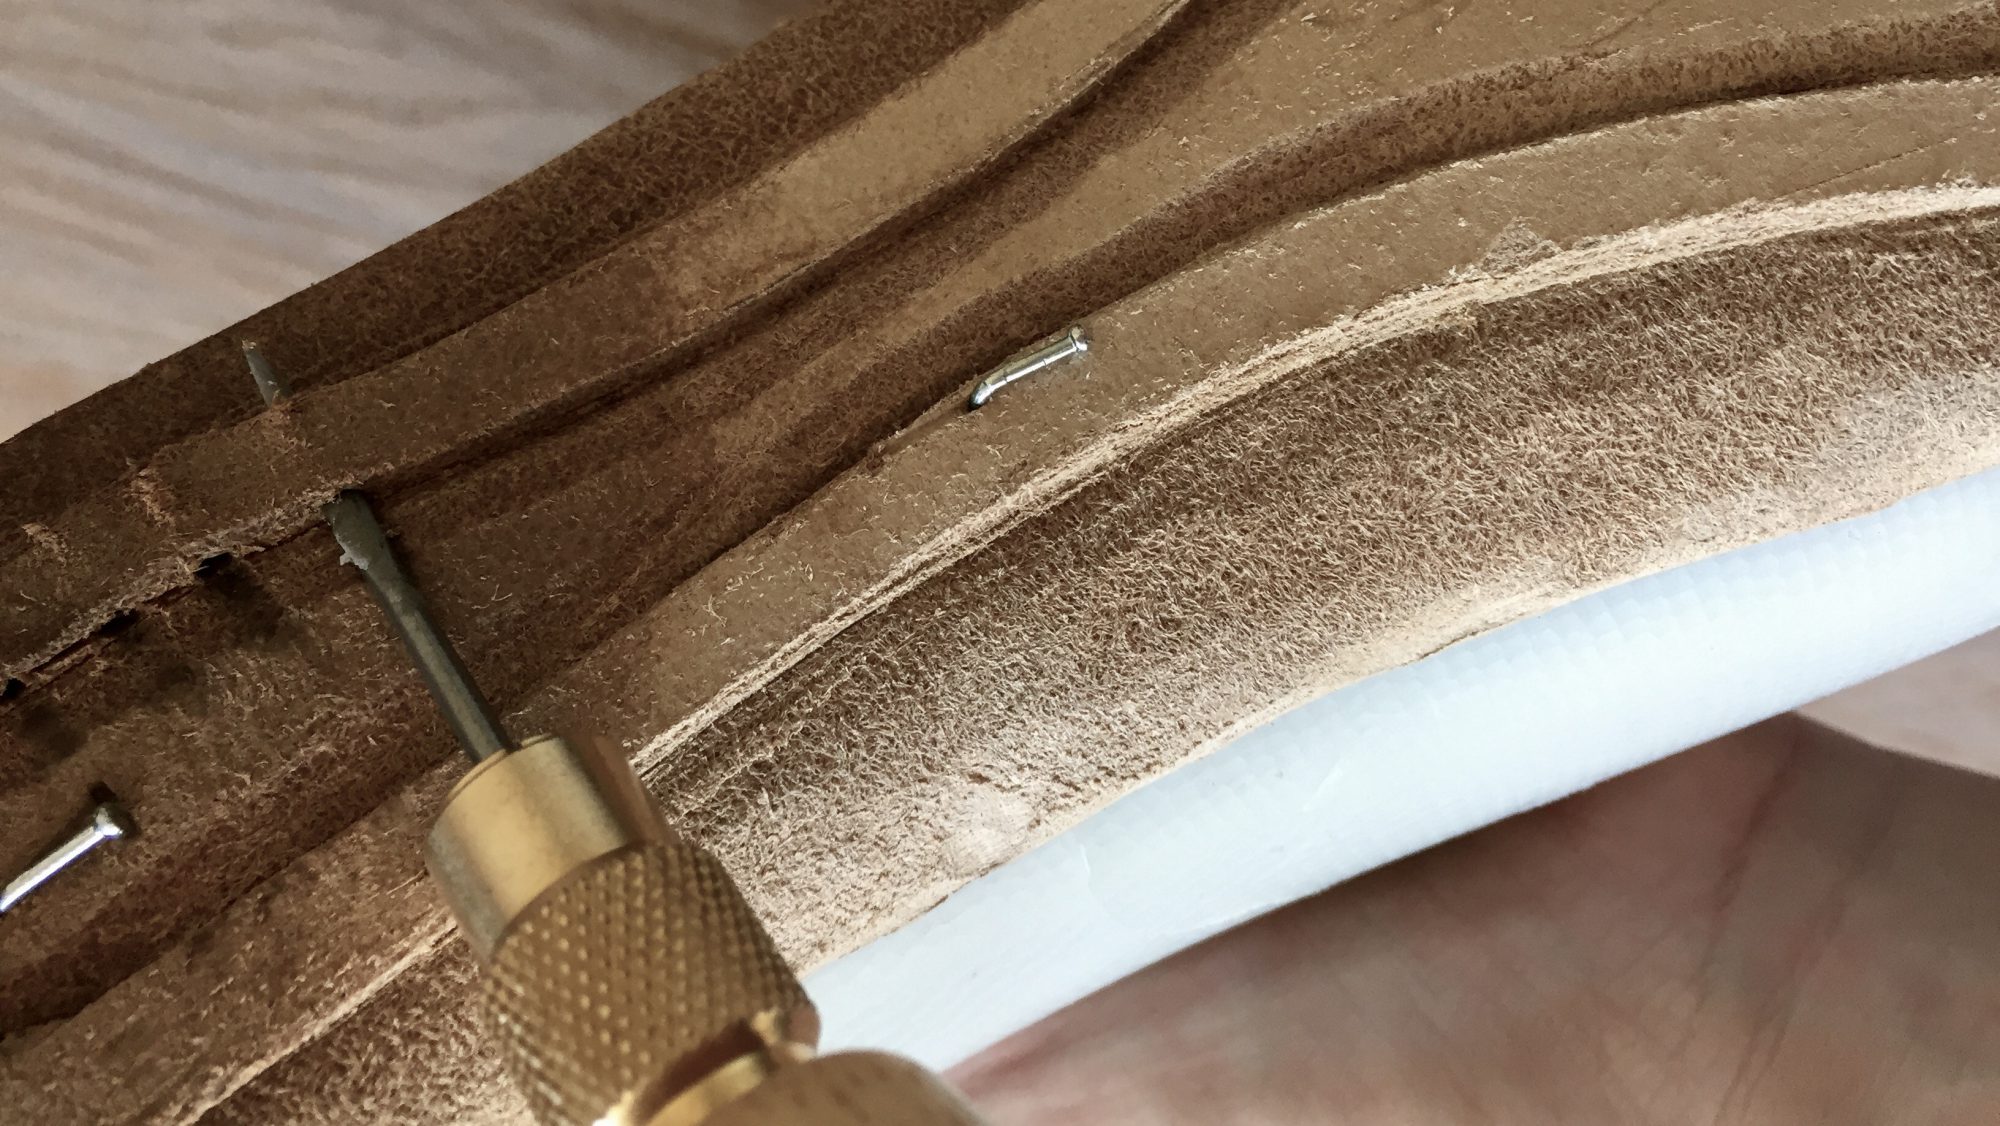
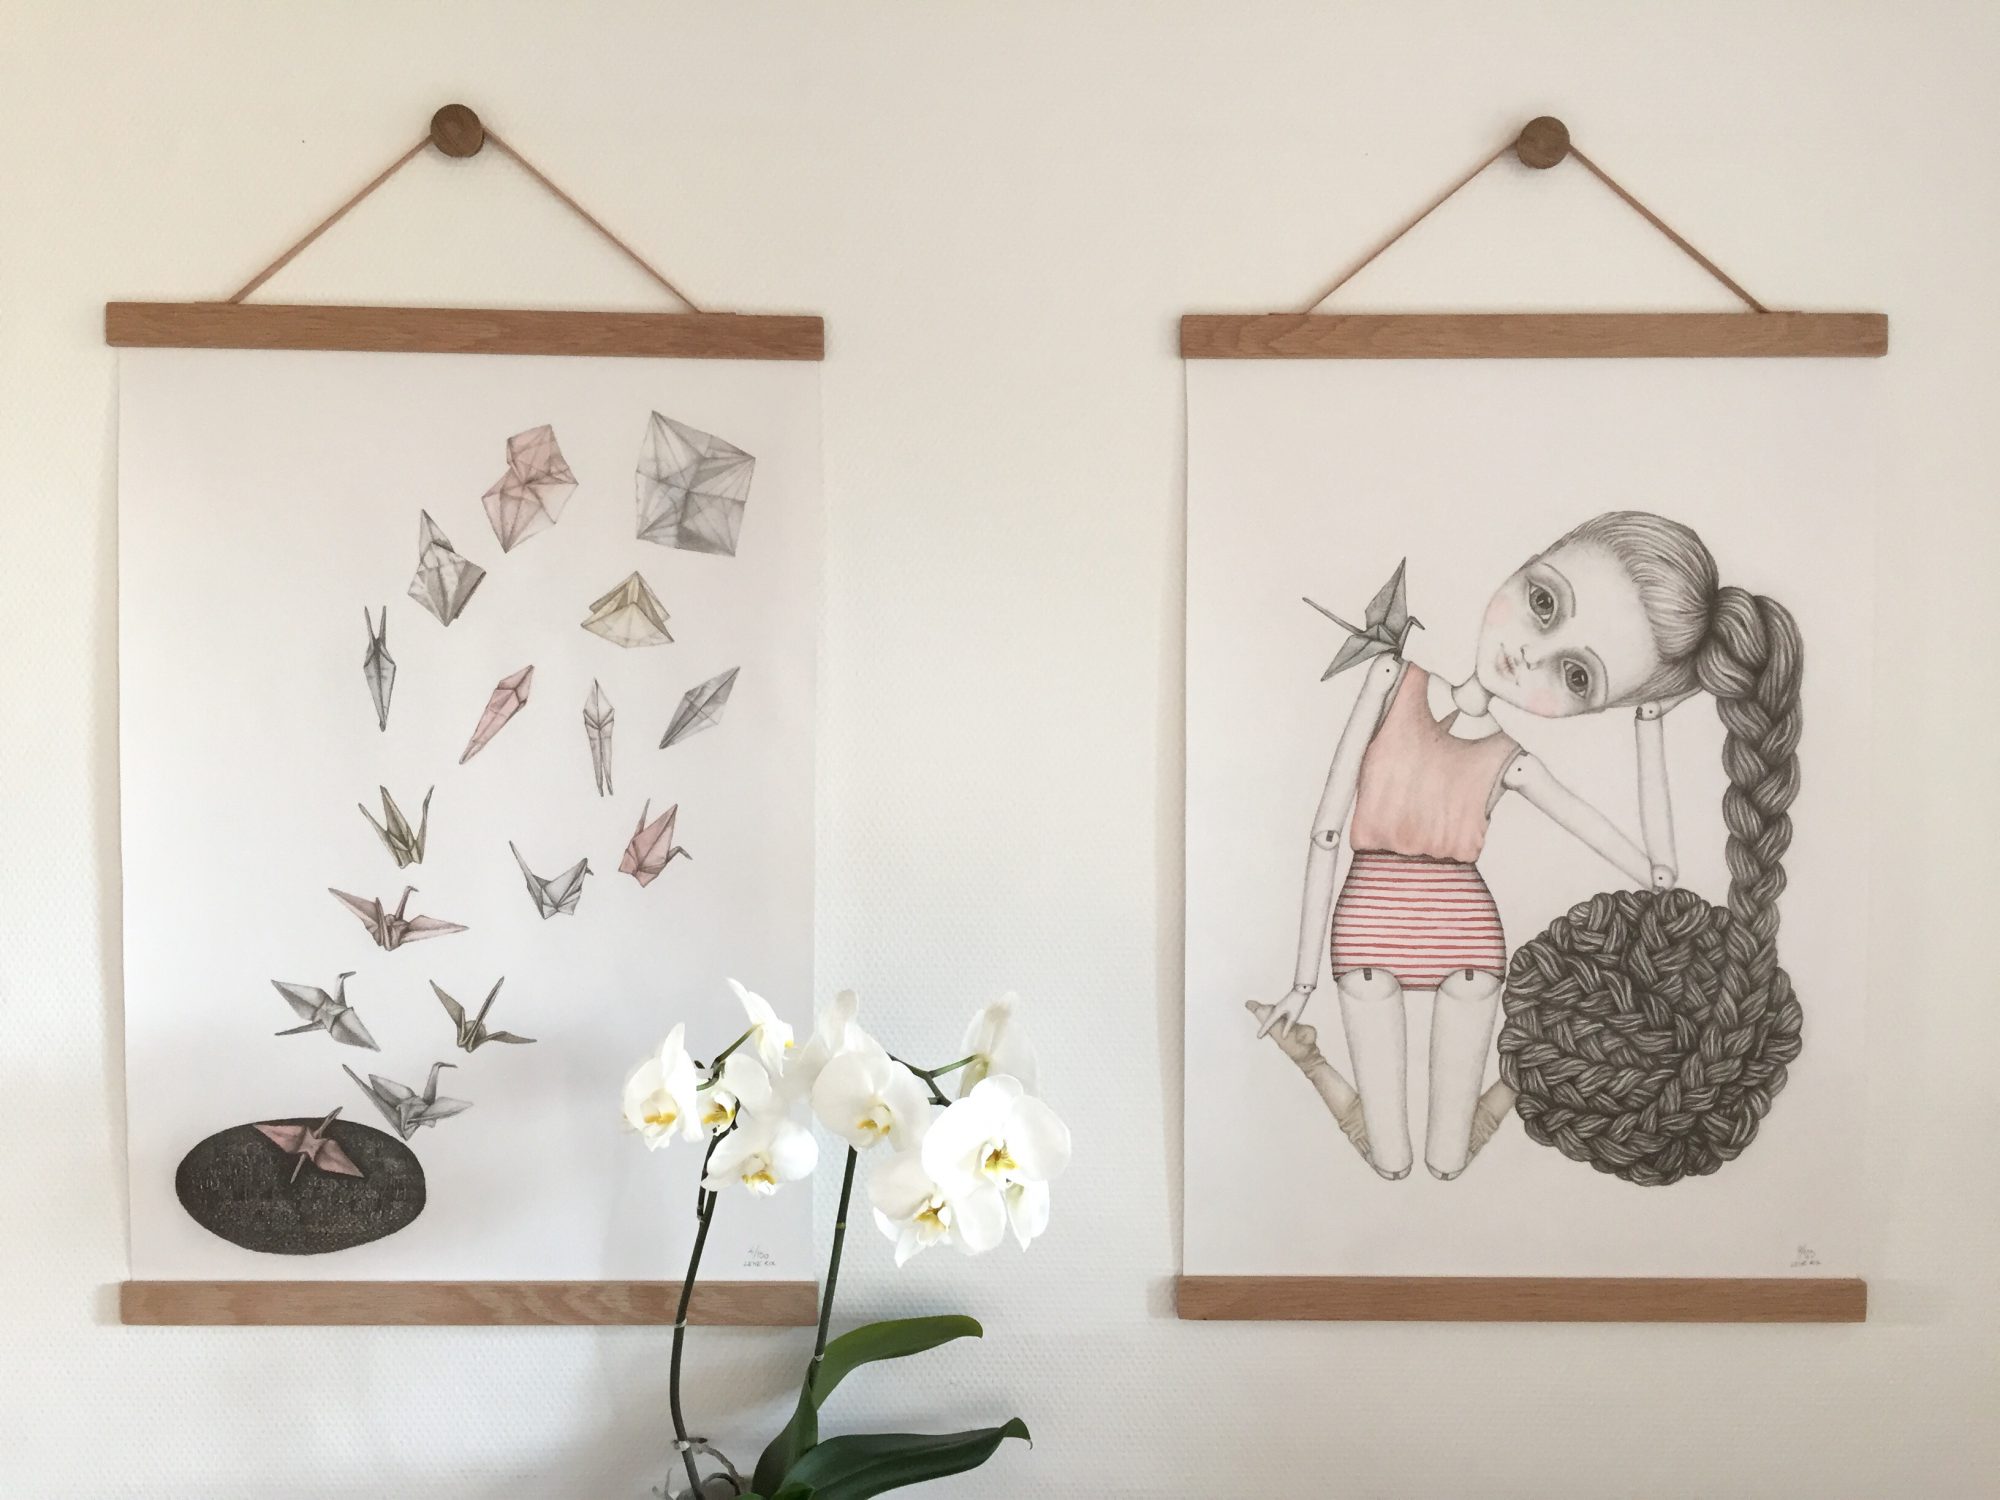
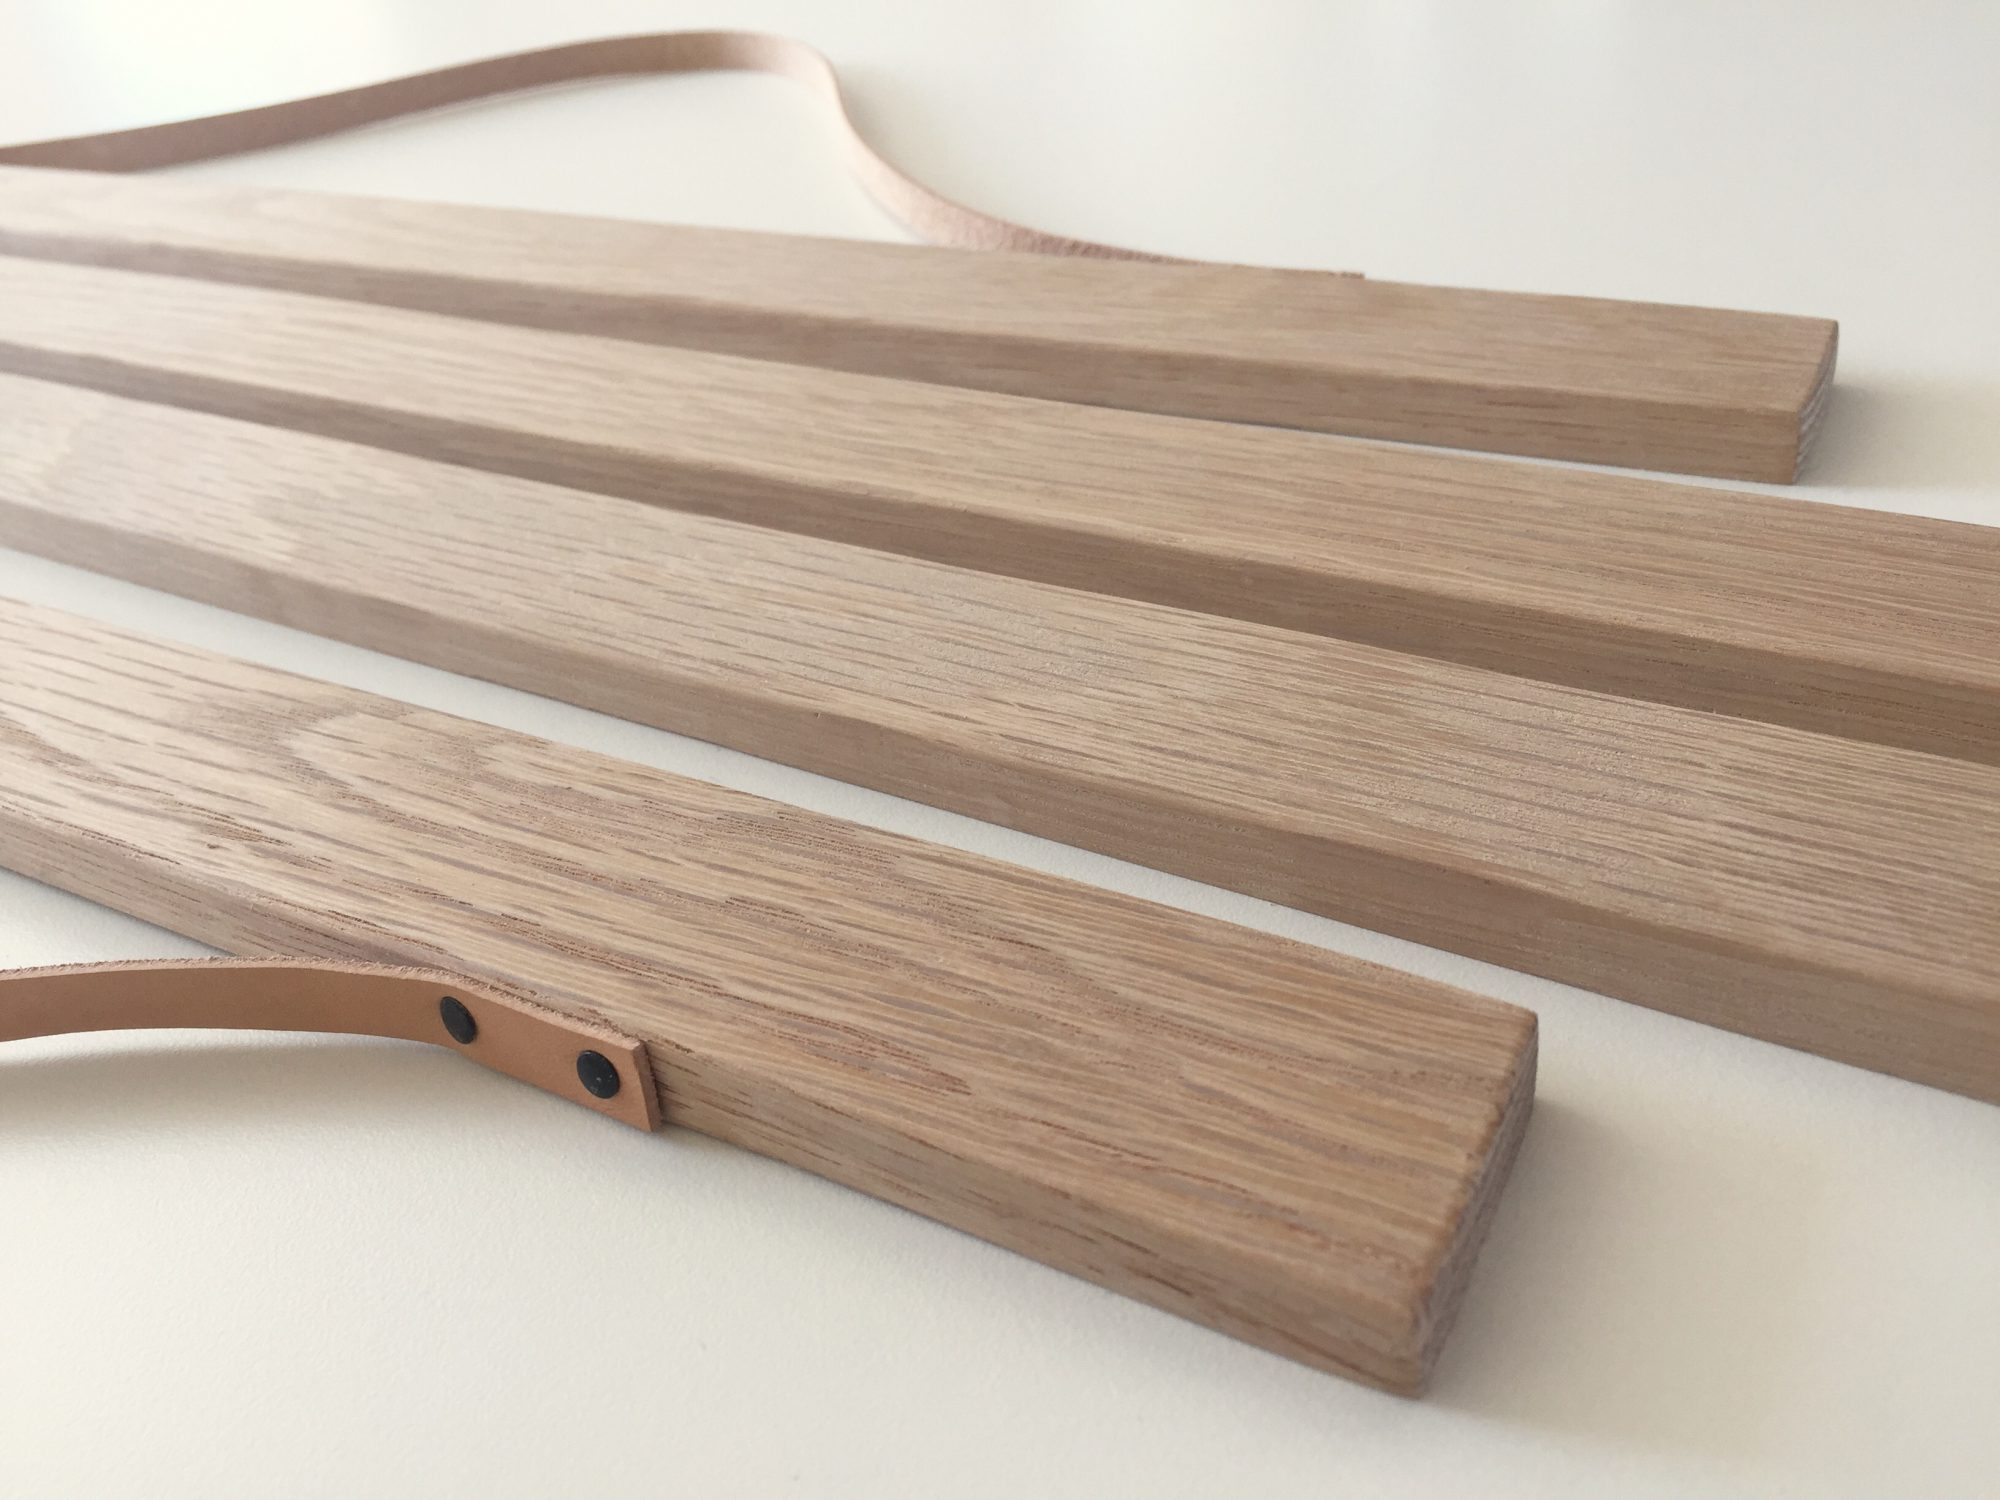
Listerne er savet i illustrationernes bredde plus en centimeter og derefter slebet grundigt med sandpapir. Til ophænget har jeg skåret strimler af kernelæder, som er fæstnet med to søm i hver ende. Endelig har jeg monteret to egetræsknopper på væggen til at hænge dem på. Jeg er meget tilfreds med resultatet og det lette udtryk.


The wood strips are sawn to a length of one centimeter longer than the illustrations, then sandet thoroughly. I have cut leather strips for hanging, fixed with two nails at each end. Finally I put two oak wood knobs on the wall to hang them from. I am very happy with the very light look.

Shoemaking 5.1 – Finishing oxford shoes

WaxingJeg gjorde det sgu! Nu er der kun de sidste detaljer tilbage før jeg har bestået den kreative prøve, jeg har sat mig selv på. Det har været en kæmpe udfordring, men dermed også tilsvarende en stor personlig sejr for mig, at det er lykkedes mig at lave et par helt gennemført håndlavede sko alene baseret på egen research på nettet. Jeg har uden tvivl brugt længere tid på, at undersøge teknikkerne end faktisk at lave skoene. Jeg er ovenud tilfreds med resultatet. Efter at have taget læsterne ud, har jeg lavet en indersål af et tyndt lag kork, dækket med foerlæder. Og for den sidste finish har skoene fået en grundig omgang skocreme. Med lidt brun narvsværte har jeg fremhævet hulmønsterdetaljen og sømmene.


I did it! Only a few finishing touches left to do before I have passed the creative test I have put on myself. It has been a great challenge, thus an equally great personal victory for me to have managed to make my own genuinely handmade shoes, based on research on the internet alone. No doubt, I have spent more hours researching than actually working on the shoes. I am very satisfied with the result. After removing the lasts, I made an insole of cork covered with lining leather. For the fininshing touches, the shoes have been given a clear polish and the seams and brogue details are enhanced with a small amount of brown leather dye.

imageDe færdige sko!


The finished shoes!

Shoe poseOg til sidst lige et billede fra en stolt første dag i nye hjemmelavede sko. Til min store glæde har de vist sig at være fantastisk behagelige at gå i. Det bliver helt sikkert ikke det sidste par sko fra disse spæde skomagerhænder.


And finally a picture from a proud first day wearing new homemade shoes. I was very happy to find that they are very comfortable to wear. These shoes will definitely not be the last from these rookie shoemaker hands.

Shoemaking 5.0 – Cemented sole

Cemented soleDet er nu blevet tid til at lave sålerne på mine oxford sko. Et stykke sålelæder skæres til, så det er lidt større end skoens bund. Inden sålen limes på med kontaktlim, slibes begge sider med sandpapir.


It is time for making the soles of my oxford shoes. A piece of sole leather is cut a little bigger than the bottom of the shoe. Before the soles is glued on with contact cement, both sides are sanded down.

Fitting soleSålen skæres til langs randbåndet.


The sole is cut along the rand tape.

SoleSålens nederste kant afrundes med en kantskærer.


The bottom edge of the sole is rounded off with an edge bevelling tool.

Cutting heel piecesTre hælstykker skæres til hver sko.


Three heel pieces are cut for each shoe.

First heel layerHældelene limes på én af gangen og skæres til i kanten.


The heel parts are glued on one at a time, and cut to fit.

Layered heelFærdig med opbygningen af hælens lag.


Finished building the heel.

Finishing heelTil sidst fugtes hælen med vand og glattes med et træværktøj. Nu mangler jeg bare den sidste finish inden jeg kan vise de færdige sko frem til verden.


Finally the heel is moisted with water and smoothed with a wooden tool. Now there are only a few finishing touches before I can show the world my finished shoes.

Shoemaking 4.2 – Rand

Sewn & dyed randRandbåndet er nu syet med vokset tråd og indfarvet med mørkebrun narvsværte. Kanterne er derefter afrundet ved at gnide dem med træskaftet på et læderværktøj.


The rand tape is sewn with waxed thread and dyed dark Brown. The edges are rounded off by rubbing it with a wooden shaft on a leather tool.

Cemented randBåndet limes på langs kanten, begyndende ved indersiden af svangen. Det skæres til så længden passer, men først optrævles en trådende der bruges til hæftning.


The tape is glued on along the feather edge, beginning at the inside. The length is cut to fit, leaving a thread end for closing.

Skived randDer hæftes ved at sy et sting henover samlingen. Alle spidserne skærfes og kanten files for at limen til sålen hæfter bedre.


A stitch across the gathering closes it off. All the pointed ends are skived and the edge is rasped to make the glue stick better when the sole is attached.


Shoemaking 4.1 – Rand tape

Cutting randTil dette første par “rigtige” sko jeg laver, har jeg valgt en limet sålkonstruktion. Den mere avancerede randsyede version vil jeg helt sikkert prøve kræfter med senere, men man skal jo starte et sted. Til dette kan man købe færdiglavet randbånd i metermål, men jeg har lavet dem selv, primært fordi jeg ikke kunne finde det andre steder end i amerikanske eller australske webshops, og havde ikke tålmodighed til at vente på det. Der skæres hakker langs den ene kan på en strimmel af tyndt læder. Dette gør, at båndet er fleksibelt nok til at kunne limes langs buen på tå og hæl.


For this first “real” pair of shoes I am making, I have chosen a cemented construction. I am sure I will be trying my luck with the more advanced goodyear welted version later on, but one has to begin somewhere. It is possible to buy premade rand tape by the inch, but I made my own, primarily because I could only find them in Australian and American webshops, and didn’t have the patience to wait for it to arrive. The edge of a thin leatherstrap is cut to make it flexible enough to be glued along the curve of the heel and toe.

Grooving randDer skæres en rille i en smallere læderstrimmel.


A groove is cut in a narrower leather strap.

Marking randDer markeres til syhuller.


Marking for stitch holes.

Rand toolsDe to færdige strimler limes sammen.


The two finished straps are glued together.

Punching randSømhuller laves med en syl. I næste indlæg vil jeg vise hvordan randen monteres efter at være blevet syet og indfarvet.


Stitch holes are made with an awl. Next time I will show how to fix the rand after sewing and dyeing.